メモ
GitHub Codespaces は、octocorp.ghe.com など、GHE.com のサブドメインでは利用できません。
はじめに
このガイドでは、テンプレート リポジトリから codespace を作成し、codespace 内で使用できるいくつかの重要な機能について調べます。 ブラウザー バージョンの Visual Studio Code で作業します。これは、最初は GitHub Codespaces の既定のエディターです。 このクイックスタートを試した後、他のエディターで Codespaces を使用し、既定のエディターを変更できます。 リンクは、このガイドの最後に示します。
このクイックスタートでは、codespace を作成し、転送されるポートに接続して実行中のアプリケーションを表示し、新しいリポジトリに codespace を発行し、拡張機能でセットアップをカスタマイズする方法について学習します。
GitHub Codespaces の厳密なしくみについて詳しくは、コンパニオン ガイド「GitHub Codespaces の詳細」をご覧ください。
codespace を作成する
-
github/haikus-for-codespaces テンプレート リポジトリに移動します。
-
[このテンプレートを使用する] をクリックし、 [codespace で開く] を選びます。
![[このテンプレートを使用] ボタンと、ドロップダウン メニューが展開されて [codespace で開く] が表示されている状態のスクリーンショット。](/assets/cb-76823/images/help/repository/use-this-template-button.png)
![[このテンプレートを使用] ボタンと、ドロップダウン メニューが展開されて [codespace で開く] が表示されている状態のスクリーンショット。](/assets/cb-76823/mw-1440/images/help/repository/use-this-template-button.webp)
アプリケーションの実行
codespace が作成されると、そこにテンプレート リポジトリが自動的にクローンされます。 これで、アプリケーションを実行し、ブラウザーで起動できます。
-
ターミナルが使用可能になったら、コマンド
npm run devを入力します。 この例では Node.js プロジェクトを使用します。また、このコマンドはpackage.jsonファイルで、サンプル リポジトリで定義されている Web アプリケーションを起動する "dev" というラベルの付いたスクリプトを実行します。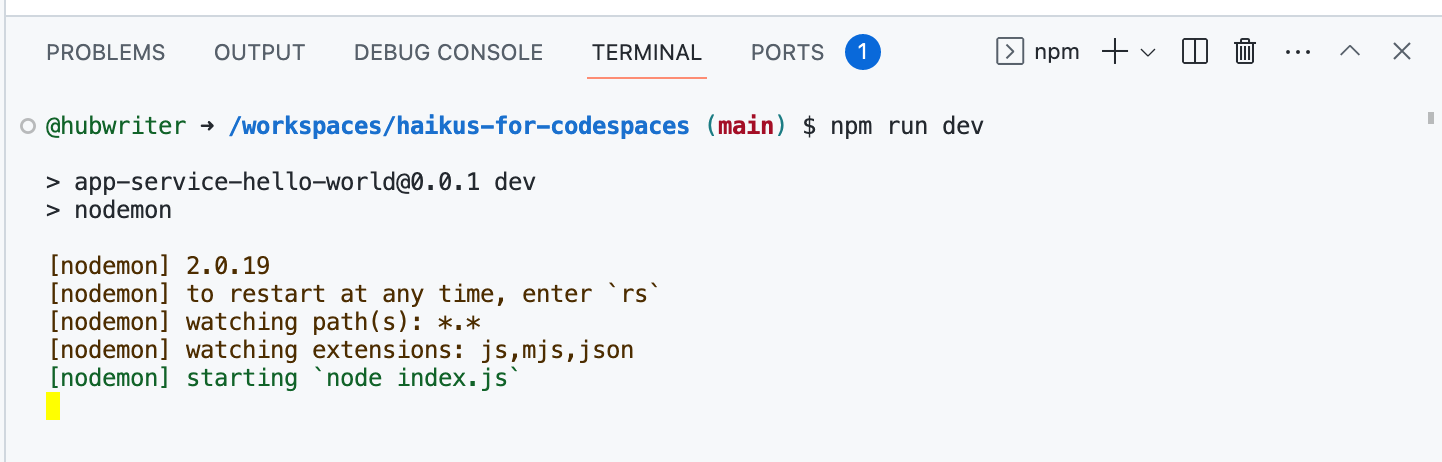
別のアプリケーションの種類を使用している場合は、そのプロジェクトの対応する開始コマンドを入力します。
-
アプリケーションが起動すると、アプリケーションが実行しているポートが codespace によって認識され、ポートが転送されたことを伝えるポップアップ メッセージが表示されます。
![ポップアップ メッセージのスクリーンショット: "ポート 3000 で実行されているアプリケーションを使用できます。" この下には、[ブラウザーで開く] というラベルが付いた緑色のボタンがあります。](/assets/cb-17218/images/help/codespaces/quickstart-port-toast.png)
-
[ブラウザーで開く] をクリックして、実行中のアプリケーションを新しいタブで表示します。

![ポップアップ メッセージのスクリーンショット: "ポート 3000 で実行されているアプリケーションを使用できます。" この下には、[ブラウザーで開く] というラベルが付いた緑色のボタンがあります。](/assets/cb-17218/mw-1440/images/help/codespaces/quickstart-port-toast.webp)
アプリケーションを編集して変更を表示する
-
codespace に戻り、エクスプローラーで
haikus.jsonファイルをクリックして開きます。 -
最初の俳句の
textフィールドを編集して、独自の俳句でアプリケーションをカスタマイズします。 -
ブラウザーで実行中のアプリケーションのタブに戻り、表示を更新して変更を確認します。
ブラウザーのタブを閉じた場合は、VS Code の [ポート] タブをクリックし、実行しているポートの [ローカル アドレス] の値をポイントして、 [ブラウザーで開く] アイコンをクリックします。
![[ポート] タブのスクリーンショット。 [ポート] タブと、ブラウザーで転送されたポートを開く地球アイコンが、オレンジ色の枠線で強調されています。](/assets/cb-25086/images/help/codespaces/quickstart-forward-port.png)
![[ポート] タブのスクリーンショット。 [ポート] タブと、ブラウザーで転送されたポートを開く地球アイコンが、オレンジ色の枠線で強調されています。](/assets/cb-25086/mw-1440/images/help/codespaces/quickstart-forward-port.webp)
変更のコミットとプッシュ
いくつかの変更を加えたので、統合ターミナルまたはソース ビューを使って作業をリポジトリに公開できます。
-
アクティビティ バーで、 [ソース管理] ビューをクリックします。
![[ソース管理] ボタンがオレンジ色の枠線で強調されている VS Code アクティビティ バーのスクリーンショット。](/assets/cb-33788/images/help/codespaces/source-control-activity-bar-button.png)
-
変更をステージングするには、
haikus.jsonファイルの横の [] をクリックします。複数のファイルを変更してすべてをステージングする場合は、 [変更] の横のものをクリックします。![[ソース管理] サイド バーのスクリーンショット。[変更] の右側にあるステージング ボタン (プラス記号) が濃いオレンジ色の枠線で強調表示されています。](/assets/cb-33843/images/help/codespaces/codespaces-commit-stage.png)
-
ステージングされた変更をコミットするには、行った変更を説明するコミット メッセージを入力し、 [コミット] をクリックします。
![[ソース管理] サイド バーのスクリーンショット。 "Change haiku text and styles" というコミット メッセージと [Commit] ボタンがオレンジ色の枠線で囲まれています。](/assets/cb-38443/images/help/codespaces/vscode-commit-button.png)
-
[ブランチを公開する] をクリックします。
![[ブランチを公開する] ボタンが表示されている [ソース管理] サイド バーのスクリーンショット。](/assets/cb-15968/images/help/codespaces/vscode-publish-branch-button.png)
-
[リポジトリ名] ドロップダウンに新しいリポジトリの名前を入力してから、 [GitHub プライベート リポジトリに発行] または [GitHub パブリック リポジトリに発行] を選びます。

新しいリポジトリの所有者は、codespace を作成した GitHub アカウントになります。
-
エディターの右下隅に表示されるポップアップで [GitHub で開く] をクリックし、GitHub の新しいリポジトリを表示します。 新しいリポジトリで
haikus.jsonファイルを表示し、codespace で加えた変更がリポジトリに正常にプッシュされたことを確認します。![[GitHub で開く] ボタンが示されている、正常に発行されたリポジトリの確認メッセージのスクリーンショット。](/assets/cb-33916/images/help/codespaces/open-on-github.png)
![[ソース管理] ボタンがオレンジ色の枠線で強調されている VS Code アクティビティ バーのスクリーンショット。](/assets/cb-33788/mw-1440/images/help/codespaces/source-control-activity-bar-button.webp)
![[ソース管理] サイド バーのスクリーンショット。[変更] の右側にあるステージング ボタン (プラス記号) が濃いオレンジ色の枠線で強調表示されています。](/assets/cb-33843/mw-1440/images/help/codespaces/codespaces-commit-stage.webp)
![[ソース管理] サイド バーのスクリーンショット。 "Change haiku text and styles" というコミット メッセージと [Commit] ボタンがオレンジ色の枠線で囲まれています。](/assets/cb-38443/mw-1440/images/help/codespaces/vscode-commit-button.webp)
![[ブランチを公開する] ボタンが表示されている [ソース管理] サイド バーのスクリーンショット。](/assets/cb-15968/mw-1440/images/help/codespaces/vscode-publish-branch-button.webp)

![[GitHub で開く] ボタンが示されている、正常に発行されたリポジトリの確認メッセージのスクリーンショット。](/assets/cb-33916/mw-1440/images/help/codespaces/open-on-github.webp)
拡張機能を使用した個人用設定
ブラウザーまたは Visual Studio Code デスクトップ アプリケーションを使用して codespace に接続すると、エディターから Visual Studio Code Marketplace に直接アクセスできます。 この例では、テーマを変更する VS Code 拡張機能をインストールしますが、ご自分のワークフローにとって便利なあらゆる拡張機能をインストールすることができます。
-
アクティビティ バーの拡張機能アイコンをクリックします。
![アクティビティ バーのスクリーンショット。 [拡張機能] アイコンがオレンジ色の枠線で強調されています。](/assets/cb-2620/images/help/codespaces/extensions-activity-bar-icon.png)
-
検索バーに「
fairyfloss」と入力し、 [インストール] をクリックします。![[Extensions: Marketplace] のスクリーンショット。 検索ボックスには "fairyfloss" と表示されています。 結果には、"fairyfloss" 拡張機能と [Install] ボタンが表示されます。](/assets/cb-25167/images/help/codespaces/add-extension.png)
-
一覧で
fairyflossテーマをクリックして選択します。!["fairyfloss" テーマが選ばれている、[配色テーマの選択] ドロップダウンのスクリーンショット。](/assets/cb-57096/images/help/codespaces/fairyfloss.png)
![[Extensions: Marketplace] のスクリーンショット。 検索ボックスには "fairyfloss" と表示されています。 結果には、"fairyfloss" 拡張機能と [Install] ボタンが表示されます。](/assets/cb-25167/mw-1440/images/help/codespaces/add-extension.webp)
!["fairyfloss" テーマが選ばれている、[配色テーマの選択] ドロップダウンのスクリーンショット。](/assets/cb-57096/mw-1440/images/help/codespaces/fairyfloss.webp)
Settings Sync について
Settings Sync を有効にして、VS Code のデバイスやインスタンス間で拡張機能やその他の設定を同期できます。 同期された設定は、クラウドにキャッシュされます。 codespace で Settings Sync をオンにすると、codespace で設定に行った更新はすべてクラウドにプッシュされ、他の場所からクラウドにプッシュした更新は codespace にプルされます。詳しくは、「アカウントの GitHub Codespaces をパーソナライズする」をご覧ください。
次のステップ
codespace で最初のアプリケーションを正常に作成、パーソナライズ、および実行しましたが、その他にもできることはまだまだたくさんあります。 GitHub Codespaces で次の手順を行うのに役立つリソースをいくつか以下に示します。
- GitHub Codespaces の詳細: このクイックスタートでは、GitHub Codespaces のいくつかの機能をご覧いただけます。 詳細情報では、これらの領域について技術的な観点から説明します。
- 開発コンテナー構成のリポジトリへの追加: これらのガイドでは、特定の言語で GitHub Codespaces を使うようにリポジトリを設定する方法が説明されています。
- 開発コンテナーの概要: このガイドでは、プロジェクト向けの Codespaces のカスタム構成の作成について詳しく説明されています。