Introducción
Este tutorial te enseña lo esencial de GitHub, como los repositorios, ramas, confirmaciones y solicitudes de cambio. Crearás tu propio repositorio de Hola mundo y aprenderás el flujo de trabajo de las solicitudes de cambio de GitHub, una forma popular de crear y revisar código.
En esta guía de inicio rápido:
- Crea y usa un repositorio.
- Inicia y administra una rama nueva.
- Harás cambios a un archivo y los subirás a GitHub como confirmaciones.
- Abre y fusiona una solicitud de cambios.
Requisitos previos
-
Debes tener una cuenta de GitHub. Para más información, consulta Creación de una cuenta en GitHub.
-
No necesitas saber cómo codificar, utilizar la línea de comandos o instalar Git (el software de control de versiones en el que está integrado GitHub).
Paso 1: Creación de un repositorio
Lo primero será crear un repositorio. Puedes considerar un repositorio como una carpeta que contiene elementos relacionados, como archivos, imágenes, vídeos o incluso otras carpetas. Normalmente, un repositorio agrupa los elementos que pertenecen al mismo "proyecto" o aquello en lo que trabajes.
A menudo, los repositorios incluyen un archivo LÉAME con información sobre el proyecto. Los archivos LÉAME están escritos en Markdown, un lenguaje fácil de leer y escribir para aplicar formato al texto sin formato. En el siguiente tutorial, Configuración del perfil obtendrás más información sobre Markdown.
GitHub permite agregar un archivo LÉAME al mismo tiempo que crea el nuevo repositorio. GitHub también ofrece otras opciones comunes, tales como un archivo de licencia, pero no tienes que seleccionar ninguna de ellas ahora mismo.
El repositorio hello-world puede ser un lugar donde almacene ideas, recursos o incluso comparta y debata cosas con otros usuarios.
-
En la esquina superior derecha de cualquier página, selecciona y luego haz clic en Nuevo repositorio.

-
En el cuadro "Nombre del repositorio", escriba
hello-world. -
En el cuadro "Descripción", escriba una breve descripción. Por ejemplo, escribe "Este repositorio es para practicar el flujo de GitHub".
-
Seleccione si el repositorio será Público o Privado.
-
Seleccione Agregar un archivo LÉAME.
-
Haga clic en Create repository (Crear repositorio).

Paso 2: Creación de una rama
La ramificación te permite tener versiones diferentes de un repositorio en una ocasión.
De manera predeterminada, el repositorio tiene una rama llamada main que se considera la rama definitiva. Puede crear ramas adicionales fuera de main en el repositorio.
La ramificación es útil cuando quieres agregar características nuevas a un proyecto sin cambiar la fuente de código principal. El trabajo que se hace en las diferentes ramas no se mostrará en la rama principal sino hasta que la fusiones, lo cual veremos más adelante en esta guía. Puede utilizar ramas para experimentar y realizar ediciones antes de confirmarlas en main.
Al crear una rama a partir de la rama main, se realiza una copia, o instantánea, de main como estaba en ese momento en el tiempo. Si alguien más ha realizado cambios en la rama main mientras trabajaba en el rama, podría extraer esas actualizaciones.
En este diagrama se muestra:
- La rama
main - Una nueva rama denominada
feature - El recorrido que
featurelleva a cabo fases para "Confirmar cambios", "Enviar solicitud de incorporación de cambios" y "Analizar los cambios propuestos" antes de combinarlos enmain

Cómo crear una rama
-
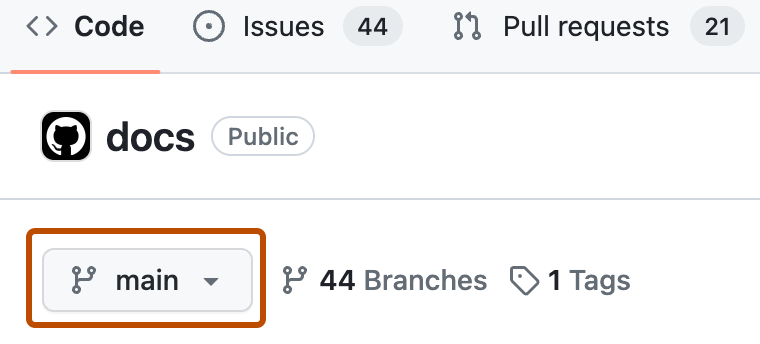
Haga clic en la pestaña Código del repositorio
hello-world. -
Encima de la lista de archivos, haga clic en el menú desplegable que indica main.
-
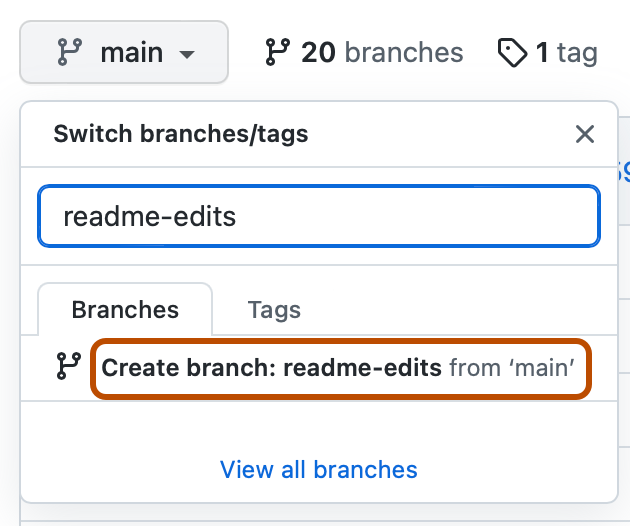
Escriba un nombre de rama,
readme-edits, en el cuadro de texto. -
Haga clic en Crear rama: readme-edits desde main.


Ahora tiene dos ramas, main y readme-edits. Ahora mismo, se ven idénticas. A continuación, agregarás cambios a la rama readme-edits nueva.
Paso 3: Realización y confirmación de cambios
Cuando has creado una rama en el paso anterior, GitHub te ha llevado a la página de código de la nueva rama readme-edits, que es una copia de main.
Puedes hacer y guardar cambios a los archivos de tu repositorio. En GitHub, los cambios guardados se llaman confirmaciones. Cada confirmación tiene un mensaje de confirmación asociado, el cual es una descripción que explica por qué se realizó algún cambio en particular. Los mensajes de confirmación capturan la historia de tus cambios para que otros contribuyentes puedan entender lo que hiciste y por qué.
- En la rama
readme-editsque has creado, haz clic en el archivoREADME.md. - Para editar el archivo, haz clic en .
- En el editor, escribe un poco sobre ti mismo.
- Haz clic en Confirmar cambios….
- En el cuadro "Confirmar cambios", escribe un mensaje de confirmación que describa los cambios.
- Haga clic en Confirmar cambios.
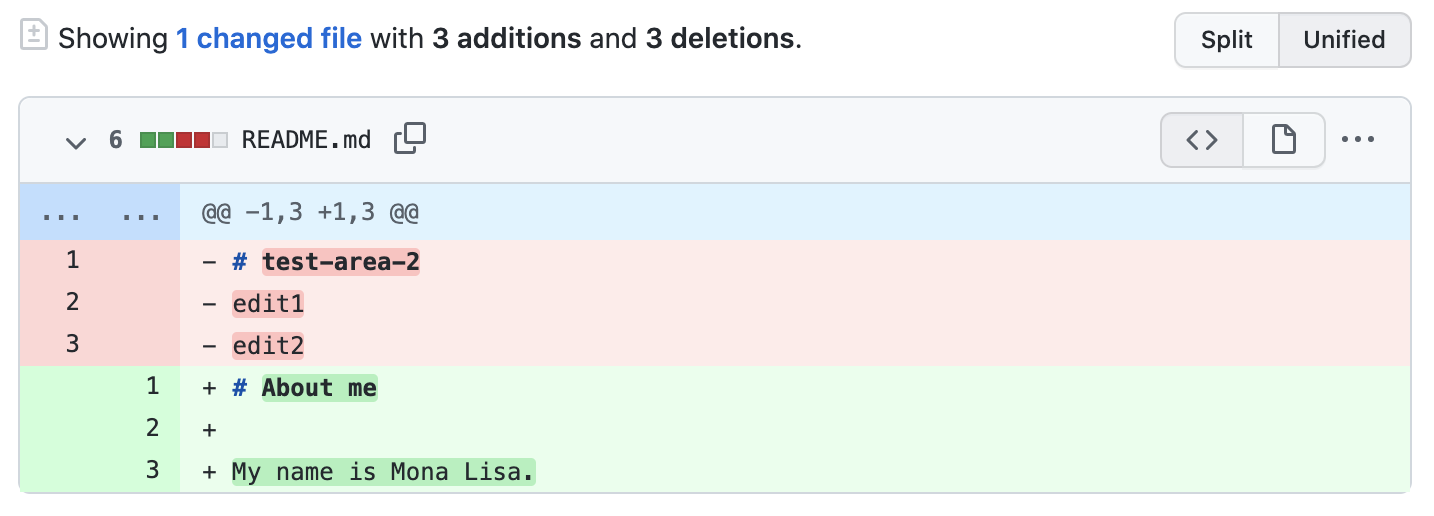
Estos cambios solo se realizarán en el archivo LÉAME de la rama readme-edits, por lo que ahora contiene contenido diferente al de main.
Paso 4: Apertura de una solicitud de cambios
Ahora que tiene cambios en una rama derivada de main, puede abrir una solicitud de incorporación de cambios.
Las solicitudes de cambios son el núcleo de la colaboración en GitHub. Cuando abres una solicitud de cambios, estás proponiendo tus cambios y solicitando que alguien revise e integre tu contribución y la fusione en su rama. Las solicitudes de cambio muestran diffs o diferencias del contenido de ambas ramas. Los cambios, adiciones y sustracciones se muestran en varios colores.
Tan pronto hagas una confirmación, puedes abrir una solicitud de cambios y comenzar un debate, incluso antes de que se termine el código.
En este paso, abrirár una solicitud de cambios en tu propio repositorio y, después, la combinarás personalmente. Es una forma genial de practicar el flujo de GitHub antes de trabajar en proyectos más grandes.
-
Haga clic en la pestaña Solicitudes de incorporación de cambios del repositorio
hello-world. -
Haz clic en Nueva solicitud de incorporación de cambios.
-
En el cuadro Comparaciones de ejemplo, seleccione la rama que ha creado,
readme-edits, para compararla conmain(la original). -
Mira tus cambios en los diffs en la página de Comparar, asegúrate que son lo que quieres enviar.
-
Haga clic en Create pull request (Crear solicitud de incorporación de cambios).
-
Dale un título a tu solicitud de cambios y escribe una descripción breve de estos. Puedes incluir emojis y arrastrar y soltar imágenes y gifs.
-
Haga clic en Crear solicitud de incorporación de cambios.

Revisión de una solicitud de incorporación de cambios
Cuando empieces a colaborar con otros usuarios, es la hora a la que les pedirías su revisión. Esto permite a los colaboradores comentar o proponer cambios en la solicitud de cambios antes de combinar los cambios en la rama main.
En este tutorial no se tratará la revisión de las solicitudes de cambios, pero si te interesa obtener más información, consulta Acerca de las revisiones de solicitudes de extracción. Como alternativa, prueba el curso "Revisión de solicitudes de cambios" de GitHub Skills.
Paso 5: Fusión de la solicitud de cambios
En este paso final, combinará la rama readme-edits en la rama main. Después de combinar la solicitud de incorporación de cambios, los cambios en la rama readme-edits se incorporarán a main.
En ocasiones, una solicitud de cambios podría introducir cambios en el código que entren en conflicto con el código existente en main. Si existe cualquier conflicto, GitHub te alertará sobre el código conflictivo y no dejará que se combine hasta que se resuelvan los conflictos. Puedes hacer una confirmación que resuelva los conflictos o que utilice comentarios en la solicitud de cambios para debatir estos conflictos con tus miembros de equipo.
En este recorrido, no deberías de tener conflictos, así que estás listo para fusionar tu rama en la principal.
- En la parte inferior de la solicitud de incorporación de cambios, haz clic en Combinar solicitud de incorporación de cambios para combinar los cambios en
main. - Haga clic en Confirmar combinación. Recibirás un mensaje indicando que la solicitud se fusionó con éxito y luego se cerró.
- Haga clic en Eliminar rama. Ahora que la solicitud de incorporación de cambios se ha combinado y los cambios están en
main, puede eliminar la ramareadme-editsde forma segura. Si quieres hacer más cambios a tu proyecto, siempre puedes crear una rama nueva y repetir este proceso. - Haz clic de nuevo en la pestaña Código del repositorio
hello-worldpara ver los cambios publicados enmain.
Conclusión
Al haber completado este tutorial, has aprendido a crear un proyecto y hacer una solicitud de cambios en GitHub.
Como parte de eso, has aprendido a:
- Crea un repositorio.
- Inicia y administra una rama nueva.
- Cambia un archivo y confirma esos cambios en GitHub.
- Abre y fusiona una solicitud de cambios.
Pasos siguientes
- Echa un vistazo a tu perfil de GitHub y verás tu trabajo reflejado en tu gráfica de contribuciones.
- Si quieres volver a practicar las aptitudes que has aprendido en este tutorial, prueba el curso "Introducción a GitHub" de GitHub Skills.
- En el siguiente tutorial, Configuración del perfil, aprenderás a personalizar tu perfil y también aprenderás algo de sintaxis básica de Markdown para escribir en GitHub.