Introduction
This guide demonstrates how to use Projects to plan and track work. In this guide, you will create a new project and add a custom field to track priorities for your tasks. You'll learn how to create saved views that help you communicate priorities and progress with your collaborators. You'll also set up built-in workflows to manage the items in your project.
Prerequisites
You can either create an organization project or a user project. To create an organization project, you need a GitHub organization. For more information about creating an organization, see Creating a new organization from scratch.
In this guide, you will add existing issues from repositories owned by your organization (for organization projects) or by you (for user projects) to your new project. For more information about creating issues, see Creating an issue.
Creating a project
First, create an organization project or a user project.
Creating an organization project
-
In the upper-right corner of GitHub, select your profile photo, then click Your organizations.
-
Click the name of your organization.
-
Under your organization name, click Projects.

-
Click New project.
-
Select which type of project or template you want to use.
- To create a blank project, under "Start from scratch", click Table, Roadmap, or Board.
- To create a project from a template, click the template you want to use. You can select from the built-in templates curated by GitHub, the templates created by your organization, and the recommended templates that have been chosen by your organization.
-
Optionally, if you selected a template, review the fields, views, workflows, and insights that will be created.
-
In the text box under "Project name", type a name for your new project.
-
Click Create project.

Creating a user project
-
In the top right corner of GitHub, click your profile photo, then click Your profile.

-
On your profile, click Projects.
-
Click New project.
-
Select which type of project or template you want to use.
- To create a blank project, under "Start from scratch", click Table, Roadmap, or Board.
- To create a project from a template, click the built-in template that you want to use.
-
Optionally, if you selected a template, review the fields, views, workflows, and insights that will be created.
-
In the text box under "Project name", type a name for your new project.
-
Click Create project.
Setting your project description and README
You can set your project's description and README to share the purpose of your project, provide instructions on how to use the project, and include any relevant links.
-
Navigate to your project.
-
In the top-right, click to open the menu.

-
In the menu, click Settings to access the project settings.
-
To add a short description to your project, under "Add a description", type your description in the text box and click Save.
-
To update your project's README, under "README", type your content in the text box.
- You can format your README using Markdown. For more information, see Basic writing and formatting syntax.
- To toggle between the text box and a preview of your changes, click or .
-
To save changes to your README, click Save.

You can view and make quick changes to your project description and README by navigating to your project and clicking in the top right.
Adding issues to your project
Next, add a few issues to your project.
-
Place your cursor in the bottom row of the project, next to the .

-
Paste the URL of the issue or pull request.
-
To add the issue or pull request, press Return.

Repeat the above steps a few times to add multiple issues to your project.
For more information and other ways to add issues to your project, or about other items you can add to your project, see Adding items to your project.
Adding draft issues to your project
Next, add a draft issue to your project.
-
Place your cursor in the bottom row of the project, next to the .
-
Type your idea, then press Enter.
-
To add body text, click on the title of the draft issue. In the markdown input box that appears, enter the text for the draft issue body, then click Save.
Adding an iteration field
Next, create an iteration field so you can plan and track your work over repeating blocks of time. Iterations can be configured to suit how you and your team works, with customizable lengths and the ability to insert breaks.
- In table view, in the rightmost field header, click .

- Click New field.
- At the top of the dropdown, type the name of your new field.
- Select Iteration
- To change the duration of each iteration, type a new number, then select the dropdown and click either days or weeks.
- Click Save.

Creating a field to track priority
Now, create a custom field named Priority and containing the values: High, Medium, or Low.
- In table view, in the rightmost field header, click .
- Click New field.
- At the top of the dropdown, type the name of your new field.
- Select Single select
- Below "Options", type the first option, "High".
- To add additional fields, for "Medium" and "Low", click Add option.
- Click Save.
Specify a priority for all issues in your project.

Grouping issues by priority
Next, group all of the items in your project by priority to make it easier to focus on the high priority items.
-
Click next to the name of the currently open view.

-
Click Group.
-
Click Priority.
Now, move issues between groups to change their priority.
- Choose an issue.
- Drag and drop the issue into a different priority group. When you do this, the priority of the issue will change to be the priority of its new group.
Saving the priority view
When you grouped your issues by priority in the previous step, your project displayed an indicator to show that the view was modified. Save these changes so that your collaborators will also see the tasks grouped by priority.
-
Click next to the name of the currently open view.
-
Click Save changes.
You can share the URL with your team to keep everyone aligned on the project priorities.
When a view is saved, anyone who opens the project will see the saved view. Here, you grouped by priority, but you can also add other modifiers such as sort, filter, or layout. Next, you will create a new view with the layout modified.
Adding a board layout
To view the progress of your project's issues, you can switch to board layout.
The board layout is based on the status field, so specify a status for each issue in your project.
Then, create a new view.
- To the right of your existing views, click New view


Next, switch to board layout.
-
Click next to the name of the currently open view.
-
Under "Layout", click Board.
When you changed the layout, your project displayed an indicator to show that the view was modified. Save this view so that you and your collaborators can easily access it in the future.
-
Click next to the name of the currently open view.
-
Click Save changes.
To indicate the purpose of the view, give it a descriptive name.
-
Click next to the name of the currently open view.
-
Click Rename view.
-
Type the new name for your view.
-
To save changes, press Return.
Configure built-in automation
Next, configure the auto-add workflow to automatically add issues opened in a repository with a specific label to your project.
-
Navigate to your project.
-
In the top-right, click to open the menu.
-
In the menu, click Workflows.
-
In the "Default workflows" list, click Auto-add to project.
-
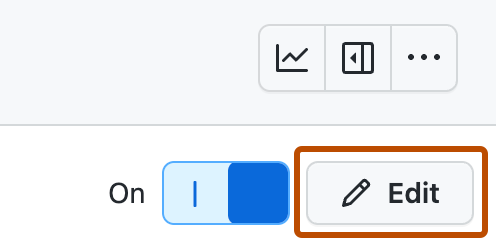
To start editing the workflow, in the top right, click Edit.
-
Under "Filters", select the repository you want to add items from.
-
Next to the repository selection, type the filter criteria you want items to match before they are automatically added to your project. For example, to catch all issues and PRs opened with the label "bug", use
is:issue,pr label:bug. -
To enable the new workflow, click Save and turn on workflow.

Finally, add a built in workflow to set the status to Todo when an item is added to your project.
- In the top-right, click to open the menu.
- In the menu, click Workflows.
- Under Default workflows, click Item added to project.
- Next to When, ensure that both
issuesandpull requestsare selected. - Next to Set, select Status:Todo.
- Click the Disabled toggle to enable the workflow.