Note: Projects (beta) is currently in public beta and subject to change.
Project command palette
Use the project command palette to quickly change settings and run commands in your project.
- To open the project command palette, press Command+K (Mac) or Ctrl+K (Windows/Linux).
- Start typing any part of a command or navigate through the command palette window to find a command. See the next sections for more examples of commands.
Changing the project layout
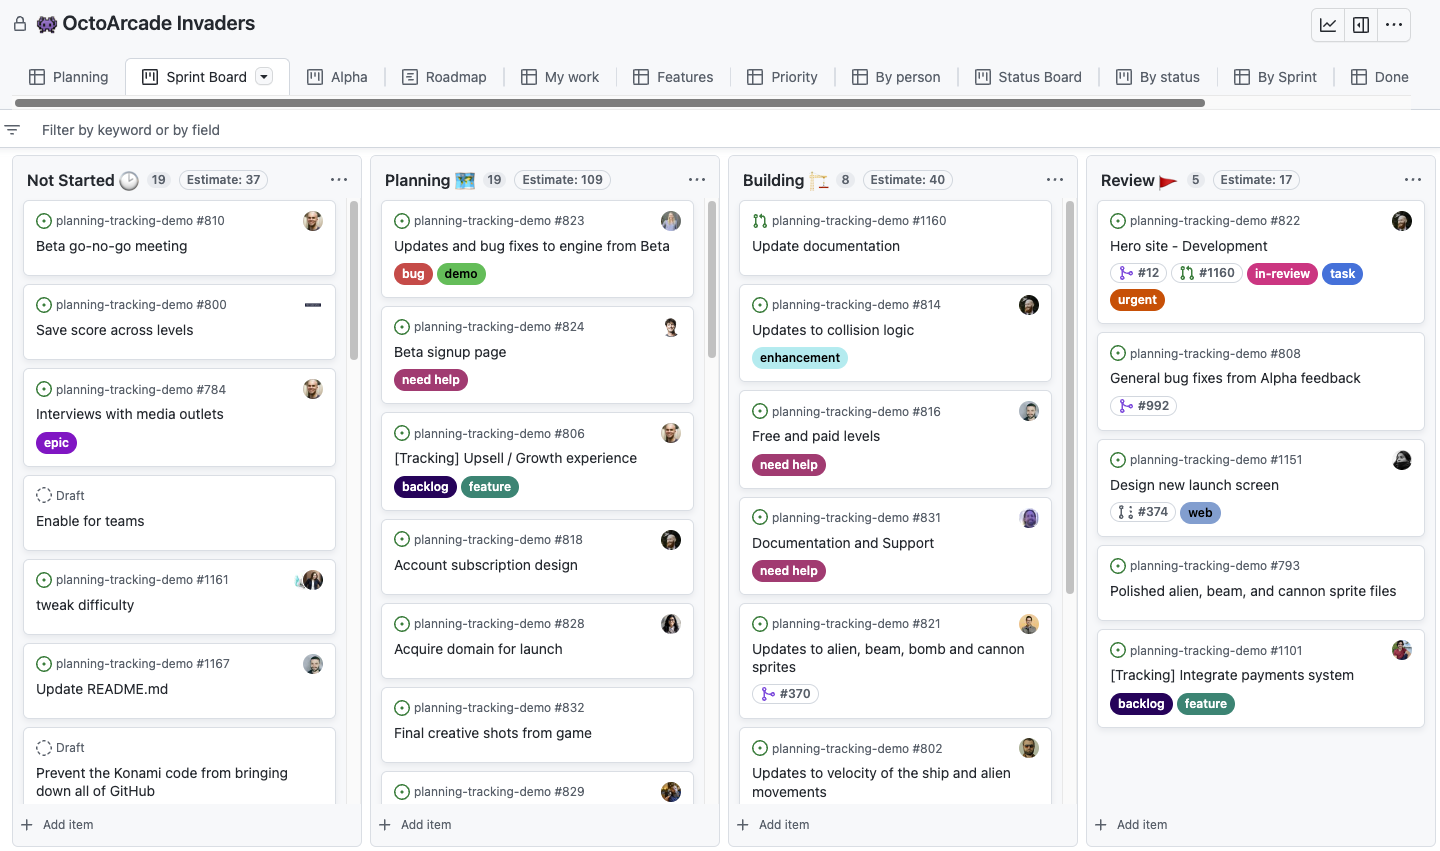
You can view your project as a table or as a board.
- To open the project command palette, press Command+K (Mac) or Ctrl+K (Windows/Linux).
- Start typing "Switch layout".
- Choose the required command. For example, Switch layout: Table.
Alternatively, click next to a view name and click Table or Board.
Showing and hiding fields
You can show or hide a specific field.
Showing and hiding fields in table layout
- To open the project command palette, press Command+K (Mac) or Ctrl+K (Windows/Linux).
- Start typing the action you want to take ("show" or "hide") or the name of the field.
- Choose the required command. For example, Show: Milestone.
Alternatively, click to the right of the table. In the drop-down menu that appears, indicate which fields to show or hide. A indicates which fields are displayed.
Alternatively, click next to the field name and click Hide field.
Showing and hiding fields in board layout
- Click next to the view name.
- Under configuration, click .
- In the menu that's displayed, select fields to add them and deselect fields to remove them from the view.
Reordering fields
You can change the order of fields.
- Click the field header.
- While clicking, drag the field to the required location.
Reordering rows
In table layout, you can change the order of rows.
- Click the number at the start of the row.
- While clicking, drag the row to the required location.
Sorting by field values
In table layout, you can sort items by a field value.
- To open the project command palette, press Command+K (Mac) or Ctrl+K (Windows/Linux).
- Start typing "Sort by" or the name of the field you want to sort by.
- Choose the required command. For example, Sort by: Assignees, asc.
Alternatively, click next to the field name that you want to sort by and click Sort ascending or Sort descending.
Note: When a table is sorted, you cannot manually reorder rows.
Follow similar steps to remove a sort.
- To open the project command palette, press Command+K (Mac) or Ctrl+K (Windows/Linux).
- Start typing "Remove sort-by".
- Choose Remove sort-by.
Alternatively, click next to the view name and click the menu item that indicates the current sort.
Grouping by field values in table layout
In the table layout, you can group items by a custom field value. When items are grouped, if you drag an item to a new group, the value of that group is applied. For example, if you group by "Status" and then drag an item with a status of In progress
to the Done
group, the status of the item will switch to Done
. Similarly, when you add a new item to a group, the new item is populated with the value of the group.
Note: Currently, you cannot group by title, labels, reviewers, or linked pull requests.
- To open the project command palette, press Command+K (Mac) or Ctrl+K (Windows/Linux).
- Start typing "Group by" or the name of the field you want to group by.
- Choose the required command. For example, Group by: Status.
Alternatively, click next to the field name that you want to group by and click Group by values.
Follow similar steps to remove a grouping.
- To open the project command palette, press Command+K (Mac) or Ctrl+K (Windows/Linux).
- Start typing "Remove group-by".
- Choose Remove group-by.
Alternatively, click next to the view name and click the menu item that indicates the current grouping.
Setting the column field in board layout
In the board layout, you choose any single select or iteration field for your columns. If you drag an item to a new column, the value of that column is applied to the dragged item. For example, if you use the "Status" field for your board columns and then drag an item with a status of In progress
to the Done
column, the status of the item will switch to Done
.
- To open the project command palette, press Command+K (Mac) or Ctrl+K (Windows/Linux).
- Start typing "Column field by" or the name of the field you want to use for your columns.
- Choose the required command. For example, Column field by: Status.
Alternatively, click next to the board view that you want to modify and click Column field. Then select the field that you want to use for the board columns.
Filtering items
Click at the top of the table to show the "Filter by keyword or by field" bar. Start typing the field name and value that you want to filter by. As you type, possible values will appear.
- To filter for any match of multiple values (an OR query), separate the values with a comma. For example
label:"good first issue",bug
will list all issues labelledgood first issue
orbug
. - To filter for the absence of a specific value, place
-
before your filter. For example,-label:"bug"
will only show items that do not have the labelbug
. - To filter for the absence of all values, enter
no:
followed by the field name. For example,no:assignee
will only show items that do not have an assignee. - To filter by state, enter
is:
. For example,is: issue
oris:open
. - Separate multiple filters with a space. For example,
status:"In progress" -label:"bug" no:assignee
will show only items that have a status ofIn progress
, do not have the labelbug
, and do not have an assignee. - To filter for the previous, current, or next iteration of an iteration field, use
@previous
,@current
, or@next
. For example,sprint:@current
. - To filter for items assigned to the viewer, use
@me
. For example,assignee:@me
. Anyone using this view will see items assigned to themselves. - To filter date and number fields, use
>
,>=
,<
,<=
, and..
range queries. For example:target:2022-03-01..2022-03-15
. For more information, see "Understanding the search syntax."
Alternatively, use the command palette.
- To open the project command palette, press Command+K (Mac) or Ctrl+K (Windows/Linux).
- Start typing "Filter by" or the name of the field you want to filter by.
- Choose the required command. For example, Filter by Status.
- Enter the value that you want to filter for. For example: "In progress". You can also filter for the absence of specific values (for example, choose "Exclude status" then choose a status) or the absence of all values (for example, "No status").
In board layout, you can click on item data to filter for items with that value. For example, click on an assignee to show only items for that assignee. To remove the filter, click the item data again.
For more information, see "Filtering projects."
Creating a project view
Project views allow you to quickly view specific aspects of your project. Each view is displayed on a separate tab in your project.
For example, you can have:
- A view that shows all items not yet started (filter on "Status").
- A view that shows the workload for each team (group by a custom "Team" field).
- A view that shows the items with the earliest target ship date (sort by a date field).
To add a new view:
- To open the project command palette, press Command+K (Mac) or Ctrl+K (Windows/Linux).
- Start typing "New view" (to create a new view) or "Duplicate view" (to duplicate the current view).
- Choose the required command.
Alternatively, click New view next to the rightmost view.
Alternatively, click next to a view name and click Duplicate view.
The new view is automatically saved.
Saving changes to a view
When you make changes to a view - for example, sorting, reordering, filtering, or grouping the data in a view - a dot is displayed next to the view name to indicate that there are unsaved changes.
If you don't want to save the changes, you can ignore this indicator. No one else will see your changes.
To save the current configuration of the view for all project members:
- To open the project command palette, press Command+K (Mac) or Ctrl+K (Windows/Linux).
- Start typing "Save view" or "Save changes to new view".
- Choose the required command.
Alternatively, click next to a view name and click Save view or Save changes to new view.
Reordering saved views
To change the order of the tabs that contain your saved views, click and drag a tab to a new location.
The new tab order is automatically saved.
Renaming a saved view
To rename a view:
- Double click the name in the project tab.
- Change the name.
- Press Enter, or click outside of the tab.
The name change is automatically saved.
Deleting a saved view
To delete a view:
- To open the project command palette, press Command+K (Mac) or Ctrl+K (Windows/Linux).
- Start typing "Delete view".
- Choose the required command.
Alternatively, click next to a view name and click Delete view.