You can create default issue templates and a default configuration file for issue templates for your organization or personal account. For more information, see Creating a default community health file.
Creating issue templates
-
On GitHub, navigate to the main page of the repository.
-
Under your repository name, click Settings. If you cannot see the "Settings" tab, select the dropdown menu, then click Settings.

-
In the "Features" section, under Issues, click Set up templates. You may need to enable Issues and refresh the page before you can see the button.


-
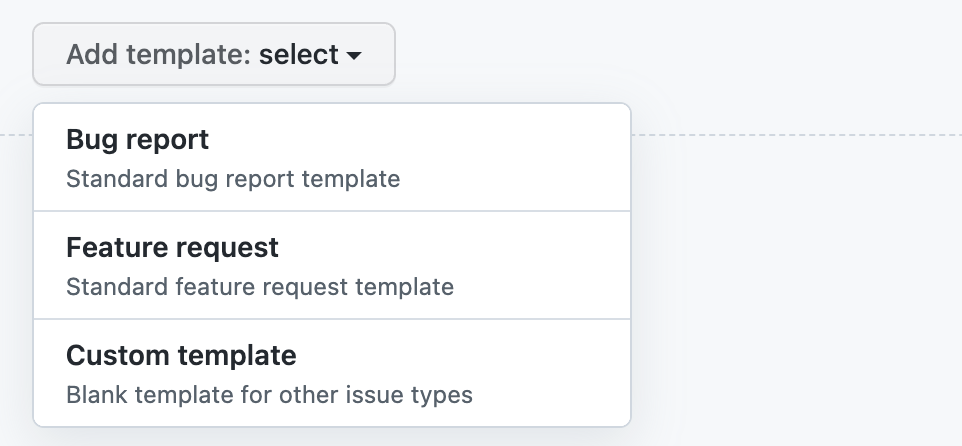
Use the Add template dropdown menu, and click on the type of template you'd like to create.
-
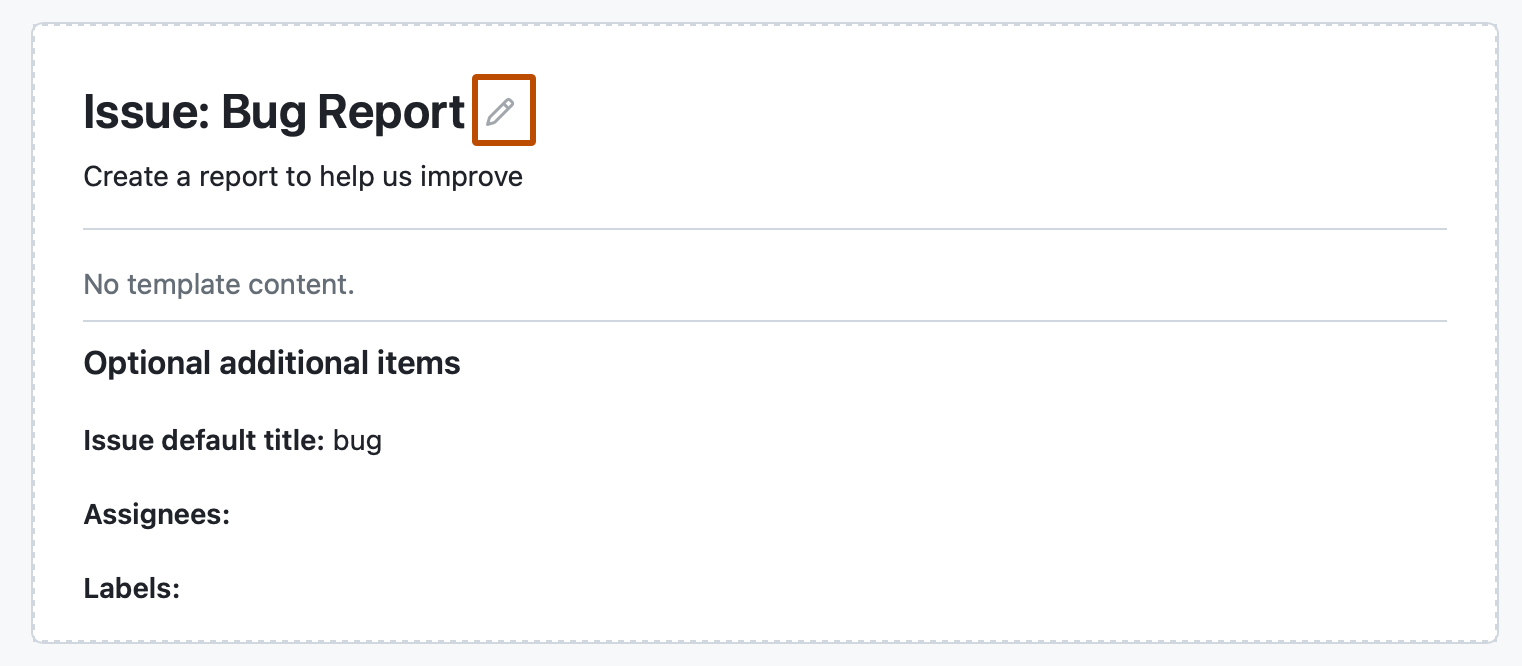
To preview or edit the template before committing it to the repository, next to the template, click Preview and edit.
-
To edit the template, click , and type in the fields to edit their contents.
-
To automatically set a default issue title, assign the issue to people with read access to the repository, or apply labels to issues raised from the template, use the fields under "Optional additional information." You can also add these details in the issue template with
title,labels, orassigneesin a YAML frontmatter format. -
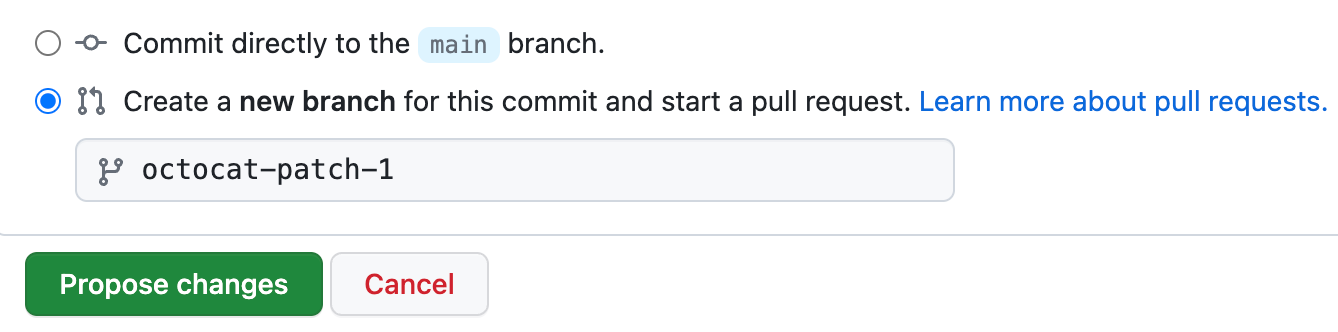
When you're finished editing and previewing your template, click Propose changes in the upper right corner of the page.
-
In the "Commit message" field, type a commit message describing your changes.
-
Below the commit message fields, select whether to commit your template directly to the default branch, or to create a new branch and open a pull request. For more information about pull requests, see About pull requests.
-
Click Commit changes. Once these changes are merged into the default branch, the template will be available for contributors to use when they open new issues in the repository.


Creating issue forms
Note
Issue forms are currently in public preview and subject to change.
With issue forms, you can create issue templates that have customizable web form fields. You can encourage contributors to include specific, structured information by using issue forms in your repository. Issue forms are written in YAML using the GitHub form schema. For more information, see Syntax for GitHub's form schema. If you're new to YAML and want to learn more, see Learn YAML in Y minutes.
To use an issue form in your repository, you must create a new file and add it to the .github/ISSUE_TEMPLATE folder in your repository.
Here is an example of an issue form configuration file.
name: Bug Report
description: File a bug report.
title: "[Bug]: "
labels: ["bug", "triage"]
projects: ["octo-org/1", "octo-org/44"]
assignees:
  - octocat
body:
  - type: markdown
    attributes:
      value: |
        Thanks for taking the time to fill out this bug report!
  - type: input
    id: contact
    attributes:
      label: Contact Details
      description: How can we get in touch with you if we need more info?
      placeholder: ex. email@example.com
    validations:
      required: false
  - type: textarea
    id: what-happened
    attributes:
      label: What happened?
      description: Also tell us, what did you expect to happen?
      placeholder: Tell us what you see!
      value: "A bug happened!"
    validations:
      required: true
  - type: dropdown
    id: version
    attributes:
      label: Version
      description: What version of our software are you running?
      options:
        - 1.0.2 (Default)
        - 1.0.3 (Edge)
      default: 0
    validations:
      required: true
  - type: dropdown
    id: browsers
    attributes:
      label: What browsers are you seeing the problem on?
      multiple: true
      options:
        - Firefox
        - Chrome
        - Safari
        - Microsoft Edge
  - type: textarea
    id: logs
    attributes:
      label: Relevant log output
      description: Please copy and paste any relevant log output. This will be automatically formatted into code, so no need for backticks.
      render: shell
  - type: checkboxes
    id: terms
    attributes:
      label: Code of Conduct
      description: By submitting this issue, you agree to follow our [Code of Conduct](https://example.com).
      options:
        - label: I agree to follow this project's Code of Conduct
          required: true
Here is the rendered version of the issue form.

- Choose a repository where you want to create an issue form. You can use an existing repository that you have write access to, or you can create a new repository. For more information about creating a repository, see Creating a new repository.
- In your repository, create a file called
.github/ISSUE_TEMPLATE/FORM-NAME.yml, replacingFORM-NAMEwith the name for your issue form. For more information about creating new files on GitHub, see Creating new files. - In the body of the new file, type the contents of your issue form. For more information, see Syntax for issue forms.
- Commit your file to the default branch of your repository. For more information, see Creating new files.
Configuring the template chooser
You can customize the issue template chooser that people see when creating a new issue in your repository by adding a config.yml file to the .github/ISSUE_TEMPLATE folder.
You can encourage contributors to use issue templates by setting blank_issues_enabled to false. If you set blank_issues_enabled to true, people will have the option to open a blank issue.
Note
If you used the legacy workflow to manually create an issue_template.md file in the .github folder and enable blank issues in your config.yml file, the template in issue_template.md will be used when people choose to open a blank issue. If you disable blank issues, the template will never be used.
If you prefer to receive certain reports outside of GitHub, you can direct people to external sites with contact_links.
Here is an example config.yml file.
blank_issues_enabled: false
contact_links:
  - name: GitHub Community Support
    url: https://github.com/orgs/community/discussions
    about: Please ask and answer questions here.
  - name: GitHub Security Bug Bounty
    url: https://bounty.github.com/
    about: Please report security vulnerabilities here.
Your configuration file will customize the template chooser when the file is merged into the repository's default branch.
-
On GitHub, navigate to the main page of the repository.
-
Above the list of files, select the Add file dropdown menu, then click Create new file.
Alternatively, you can click in the file tree view on the left.

-
In the file name field, type
.github/ISSUE_TEMPLATE/config.yml. -
In the body of the new file, type the contents of your configuration file.
-
Click Commit changes...
-
In the "Commit message" field, type a short, meaningful commit message that describes the change you made to the file. You can attribute the commit to more than one author in the commit message. For more information, see Creating a commit with multiple authors.
-
Below the commit message fields, decide whether to add your commit to the current branch or to a new branch. If your current branch is the default branch, you should choose to create a new branch for your commit and then create a pull request. For more information, see Creating a pull request.
-
Click Commit changes or Propose changes.


Changing the order of templates
You can set the order in which your issue templates will appear in the template chooser by making changes to the template filenames. The templates in .github/ISSUE_TEMPLATE are listed alphanumerically and grouped by filetype, with YAML files appearing before Markdown files.
To control the order of your templates, prefix the filenames with a number. For example: 1-bug.yml, 2-feature-request.yml, and 3-epic.yml.
If you have 10 or more templates, alphanumeric ordering means that 11-bug.yml will be positioned between 1-feature.yml and 2-support.yml. You can keep your intended ordering by prefixing your numeric filenames with an additional 0. For example: 01-feature.yml, 02-support.yml, and 11-bug.yml.