Headings
To create a heading, add one to six # symbols before your heading text. The number of # you use will determine the hierarchy level and typeface size of the heading.
# A first-level heading
## A second-level heading
### A third-level heading
When you use two or more headings, GitHub automatically generates a table of contents that you can access by clicking within the file header. Each heading title is listed in the table of contents and you can click a title to navigate to the selected section.

Styling text
You can indicate emphasis with bold, italic, strikethrough, subscript, or superscript text in comment fields and .md files.
| Style | Syntax | Keyboard shortcut | Example | Output |
|---|---|---|---|---|
| Bold | ** ** or __ __ | Command+B (Mac) or Ctrl+B (Windows/Linux) | **This is bold text** | This is bold text |
| Italic | * * or _ _ | Command+I (Mac) or Ctrl+I (Windows/Linux) | _This text is italicized_ | This text is italicized |
| Strikethrough | ~~ ~~ | None | ~~This was mistaken text~~ | |
| Bold and nested italic | ** ** and _ _ | None | **This text is _extremely_ important** | This text is extremely important |
| All bold and italic | *** *** | None | ***All this text is important*** | All this text is important |
| Subscript | <sub> </sub> | None | This is a <sub>subscript</ | This is a subscript text |
| Superscript | <sup> </sup> | None | This is a <sup>superscript</ | This is a superscript text |
| Underline | <ins> </ins> | None | This is an <ins>underlined</ | This is an underlined text |
Quoting text
You can quote text with a >.
Text that is not a quote

> Text that is a quote
Quoted text is indented with a vertical line on the left and displayed using gray type.

Note
When viewing a conversation, you can automatically quote text in a comment by highlighting the text, then typing R. You can quote an entire comment by clicking , then Quote reply. For more information about keyboard shortcuts, see Keyboard shortcuts.
Quoting code
You can call out code or a command within a sentence with single backticks. The text within the backticks will not be formatted. You can also press the Command+E (Mac) or Ctrl+E (Windows/Linux) keyboard shortcut to insert the backticks for a code block within a line of Markdown.
Use `git status` to list all new or modified files that haven't yet been committed.

To format code or text into its own distinct block, use triple backticks.
Some basic Git commands are:
```
git status
git add
git commit
```
For more information, see Creating and highlighting code blocks.
If you are frequently editing code snippets and tables, you may benefit from enabling a fixed-width font in all comment fields on GitHub. For more information, see About writing and formatting on GitHub.
Supported color models
In issues, pull requests, and discussions, you can call out colors within a sentence by using backticks. A supported color model within backticks will display a visualization of the color.
The background color is `#ffffff` for light mode and `#000000` for dark mode.

Here are the currently supported color models.
| Color | Syntax | Example | Output |
|---|---|---|---|
| HEX | `#RRGGBB` | `#0969DA` |  |
| RGB | `rgb(R,G,B)` | `rgb(9, 105, 218)` |  |
| HSL | `hsl(H,S,L)` | `hsl(212, 92%, 45%)` |  |
Note
- A supported color model cannot have any leading or trailing spaces within the backticks.
- The visualization of the color is only supported in issues, pull requests, and discussions.
Links
You can create an inline link by wrapping link text in brackets [ ], and then wrapping the URL in parentheses ( ). You can also use the keyboard shortcut Command+K to create a link. When you have text selected, you can paste a URL from your clipboard to automatically create a link from the selection.
You can also create a Markdown hyperlink by highlighting the text and using the keyboard shortcut Command+V. If you'd like to replace the text with the link, use the keyboard shortcut Command+Shift+V.
This site was built using [GitHub Pages](https://pages.github.com/).

Note
GitHub automatically creates links when valid URLs are written in a comment. For more information, see Autolinked references and URLs.
Section links
You can link directly to any section that has a heading. To view the automatically generated anchor in a rendered file, hover over the section heading to expose the icon and click the icon to display the anchor in your browser.

If you need to determine the anchor for a heading in a file you are editing, you can use the following basic rules:
- Letters are converted to lower-case.
- Spaces are replaced by hyphens (
-). Any other whitespace or punctuation characters are removed. - Leading and trailing whitespace are removed.
- Markup formatting is removed, leaving only the contents (for example,
_italics_becomesitalics). - If the automatically generated anchor for a heading is identical to an earlier anchor in the same document, a unique identifier is generated by appending a hyphen and an auto-incrementing integer.
For more detailed information on the requirements of URI fragments, see RFC 3986: Uniform Resource Identifier (URI): Generic Syntax, Section 3.5.
The code block below demonstrates the basic rules used to generate anchors from headings in rendered content.
# Example headings

## Sample Section

## This'll be a _Helpful_ Section About the Greek Letter Θ!
A heading containing characters not allowed in fragments, UTF-8 characters, two consecutive spaces between the first and second words, and formatting.

## This heading is not unique in the file

TEXT 1

## This heading is not unique in the file

TEXT 2

# Links to the example headings above

Link to the sample section: [Link Text](#sample-section).

Link to the helpful section: [Link Text](#thisll-be-a-helpful-section-about-the-greek-letter-Θ).

Link to the first non-unique section: [Link Text](#this-heading-is-not-unique-in-the-file).

Link to the second non-unique section: [Link Text](#this-heading-is-not-unique-in-the-file-1).
Note
If you edit a heading, or if you change the order of headings with "identical" anchors, you will also need to update any links to those headings as the anchors will change.
Relative links
You can define relative links and image paths in your rendered files to help readers navigate to other files in your repository.
A relative link is a link that is relative to the current file. For example, if you have a README file in root of your repository, and you have another file in docs/CONTRIBUTING.md, the relative link to CONTRIBUTING.md in your README might look like this:
[Contribution
guidelines for this project](docs/CONTRIBUTING.md)
GitHub will automatically transform your relative link or image path based on whatever branch you're currently on, so that the link or path always works. The path of the link will be relative to the current file. Links starting with / will be relative to the repository root. You can use all relative link operands, such as ./ and ../.
Your link text should be on a single line. The example below will not work.
[Contribution
guidelines for this project](docs/CONTRIBUTING.md)
Relative links are easier for users who clone your repository. Absolute links may not work in clones of your repository - we recommend using relative links to refer to other files within your repository.
Custom anchors
You can use standard HTML anchor tags (<a name="unique-anchor-name"></a>) to create navigation anchor points for any location in the document. To avoid ambiguous references, use a unique naming scheme for anchor tags, such as adding a prefix to the name attribute value.
Note
Custom anchors will not be included in the document outline/Table of Contents.
You can link to a custom anchor using the value of the name attribute you gave the anchor. The syntax is exactly the same as when you link to an anchor that is automatically generated for a heading.
For example:
# Section Heading

Some body text of this section.

<a name="my-custom-anchor-point"></a>
Some text I want to provide a direct link to, but which doesn't have its own heading.

(… more content…)

[A link to that custom anchor](#my-custom-anchor-point)
Tip
Custom anchors are not considered by the automatic naming and numbering behavior of automatic heading links.
Line breaks
If you're writing in issues, pull requests, or discussions in a repository, GitHub will render a line break automatically:
This example
Will span two lines
However, if you are writing in an .md file, the example above would render on one line without a line break. To create a line break in an .md file, you will need to include one of the following:
-
Include two spaces at the end of the first line.
This example
Will span two lines
-
Include a backslash at the end of the first line.
This example\ Will span two lines -
Include an HTML single line break tag at the end of the first line.
This example<br/>
Will span two lines
If you leave a blank line between two lines, both .md files and Markdown in issues, pull requests, and discussions will render the two lines separated by the blank line:
This example

Will have a blank line separating both lines
Images
You can display an image by adding ! and wrapping the alt text in [ ]. Alt text is a short text equivalent of the information in the image. Then, wrap the link for the image in parentheses ().

GitHub supports embedding images into your issues, pull requests, discussions, comments and .md files. You can display an image from your repository, add a link to an online image, or upload an image. For more information, see Uploading assets.
Note
When you want to display an image that is in your repository, use relative links instead of absolute links.
Here are some examples for using relative links to display an image.
| Context | Relative Link |
|---|---|
In a .md file on the same branch | / |
In a .md file on another branch | / |
| In issues, pull requests and comments of the repository | ../ |
In a .md file in another repository | / |
| In issues, pull requests and comments of another repository | ../ |
Note
The last two relative links in the table above will work for images in a private repository only if the viewer has at least read access to the private repository that contains these images.
For more information, see Relative Links.
The Picture element
The <picture> HTML element is supported.
Lists
You can make an unordered list by preceding one or more lines of text with -, *, or +.
- George Washington
* John Adams
+ Thomas Jefferson

To order your list, precede each line with a number.
1. James Madison
2. James Monroe
3. John Quincy Adams

Nested Lists
You can create a nested list by indenting one or more list items below another item.
To create a nested list using the web editor on GitHub or a text editor that uses a monospaced font, like Visual Studio Code, you can align your list visually. Type space characters in front of your nested list item until the list marker character (- or *) lies directly below the first character of the text in the item above it.
1. First list item
   - First nested list item
     - Second nested list item
Note
In the web-based editor, you can indent or dedent one or more lines of text by first highlighting the desired lines and then using Tab or Shift+Tab respectively.


To create a nested list in the comment editor on GitHub, which doesn't use a monospaced font, you can look at the list item immediately above the nested list and count the number of characters that appear before the content of the item. Then type that number of space characters in front of the nested list item.
In this example, you could add a nested list item under the list item 100. First list item by indenting the nested list item a minimum of five spaces, since there are five characters (100. ) before First list item.
100. First list item
     - First nested list item

You can create multiple levels of nested lists using the same method. For example, because the first nested list item has seven characters (␣␣␣␣␣-␣) before the nested list content First nested list item, you would need to indent the second nested list item by at least two more characters (nine spaces minimum).
100. First list item
     - First nested list item
       - Second nested list item

For more examples, see the GitHub Flavored Markdown Spec.
Task lists
To create a task list, preface list items with a hyphen and space followed by [ ]. To mark a task as complete, use [x].
- [x] #739
- [ ] https://github.com/octo-org/octo-repo/issues/740
- [ ] Add delight to the experience when all tasks are complete :tada:

If a task list item description begins with a parenthesis, you'll need to escape it with \:
- [ ] \(Optional) Open a followup issue
For more information, see About task lists.
Mentioning people and teams
You can mention a person or team on GitHub by typing @ plus their username or team name. This will trigger a notification and bring their attention to the conversation. People will also receive a notification if you edit a comment to mention their username or team name. For more information about notifications, see About notifications.
Note
A person will only be notified about a mention if the person has read access to the repository and, if the repository is owned by an organization, the person is a member of the organization.
@github/support What do you think about these updates?

When you mention a parent team, members of its child teams also receive notifications, simplifying communication with multiple groups of people. For more information, see About teams.
Typing an @ symbol will bring up a list of people or teams on a project. The list filters as you type, so once you find the name of the person or team you are looking for, you can use the arrow keys to select it and press either tab or enter to complete the name. For teams, enter the @organization/team-name and all members of that team will get subscribed to the conversation.
The autocomplete results are restricted to repository collaborators and any other participants on the thread.
Referencing issues and pull requests
You can bring up a list of suggested issues and pull requests within the repository by typing #. Type the issue or pull request number or title to filter the list, and then press either tab or enter to complete the highlighted result.
For more information, see Autolinked references and URLs.
Referencing external resources
If custom autolink references are configured for a repository, then references to external resources, like a JIRA issue or Zendesk ticket, convert into shortened links. To know which autolinks are available in your repository, contact someone with admin permissions to the repository. For more information, see Configuring autolinks to reference external resources.
Uploading assets
You can upload assets like images by dragging and dropping, selecting from a file browser, or pasting. You can upload assets to issues, pull requests, comments, and .md files in your repository.
Using emojis
You can add emoji to your writing by typing :EMOJICODE:, a colon followed by the name of the emoji.
@octocat :+1: This PR looks great - it's ready to merge! :shipit:

Typing : will bring up a list of suggested emoji. The list will filter as you type, so once you find the emoji you're looking for, press Tab or Enter to complete the highlighted result.
For a full list of available emoji and codes, see the Emoji-Cheat-Sheet.
Paragraphs
You can create a new paragraph by leaving a blank line between lines of text.
Footnotes
You can add footnotes to your content by using this bracket syntax:
Here is a simple footnote[^1].

A footnote can also have multiple lines[^2].

[^1]: My reference.
[^2]: To add line breaks within a footnote, prefix new lines with 2 spaces.
  This is a second line.
The footnote will render like this:

Note
The position of a footnote in your Markdown does not influence where the footnote will be rendered. You can write a footnote right after your reference to the footnote, and the footnote will still render at the bottom of the Markdown. Footnotes are not supported in wikis.
Alerts
Alerts are a Markdown extension based on the blockquote syntax that you can use to emphasize critical information. On GitHub, they are displayed with distinctive colors and icons to indicate the significance of the content.
Use alerts only when they are crucial for user success and limit them to one or two per article to prevent overloading the reader. Additionally, you should avoid placing alerts consecutively. Alerts cannot be nested within other elements.
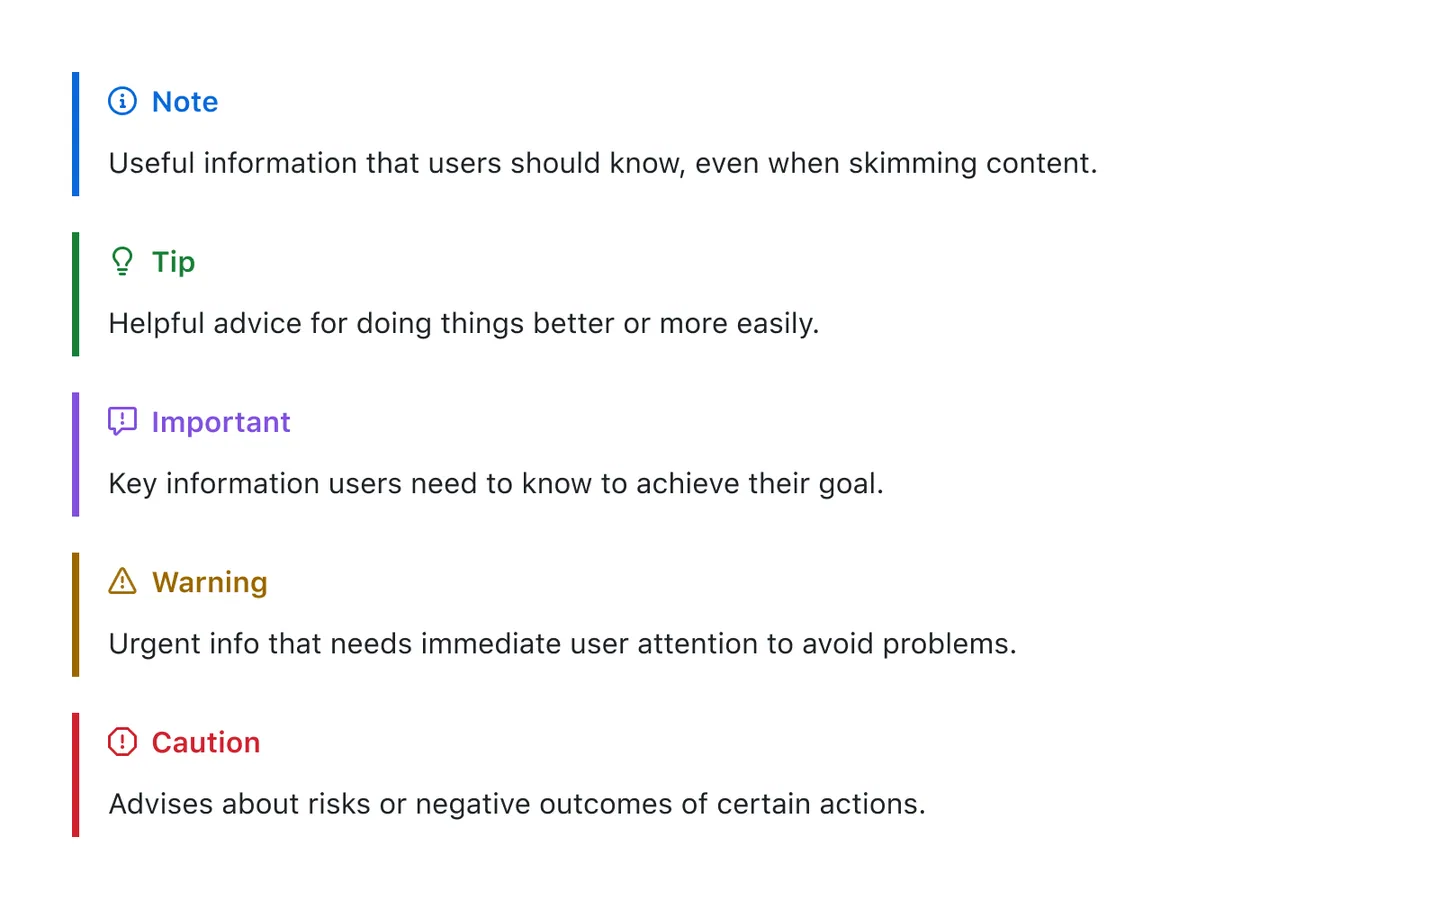
To add an alert, use a special blockquote line specifying the alert type, followed by the alert information in a standard blockquote. Five types of alerts are available:
> [!NOTE]
> Useful information that users should know, even when skimming content.

> [!TIP]
> Helpful advice for doing things better or more easily.

> [!IMPORTANT]
> Key information users need to know to achieve their goal.

> [!WARNING]
> Urgent info that needs immediate user attention to avoid problems.

> [!CAUTION]
> Advises about risks or negative outcomes of certain actions.
Here are the rendered alerts:
Hiding content with comments
You can tell GitHub to hide content from the rendered Markdown by placing the content in an HTML comment.
<!-- This content will not appear in the rendered Markdown -->
Ignoring Markdown formatting
You can tell GitHub to ignore (or escape) Markdown formatting by using \ before the Markdown character.
Let's rename \*our-new-project\* to \*our-old-project\*.

For more information on backslashes, see Daring Fireball's Markdown Syntax.
Note
The Markdown formatting will not be ignored in the title of an issue or a pull request.
Disabling Markdown rendering
When viewing a Markdown file, you can click Code at the top of the file to disable Markdown rendering and view the file's source instead.

Disabling Markdown rendering enables you to use source view features, such as line linking, which is not possible when viewing rendered Markdown files.