About self-hosted runners for GitHub Actions
GitHub Actions allows people who use your GitHub Enterprise Server instance to improve productivity by automating every phase of the software development workflow. For more information, see "About GitHub Actions for enterprises."
With GitHub Actions, developers can write and combine individual tasks called actions to create custom workflows. To enable GitHub Actions for your GitHub Enterprise Server instance, you must host at least one machine to execute jobs. This machine is called a self-hosted runner. Self-hosted runners can be physical, virtual, in a container, on-premises, or in a cloud. Your runner machine connects to GitHub Enterprise Server using the GitHub Actions self-hosted runner application. Self-hosted runners can run Linux, Windows, or macOS. For more information, see "About self-hosted runners."
This guide shows you how to apply a centralized management approach to self-hosted runners for GitHub Actions in your enterprise. In the guide, you'll complete the following tasks.
- Configure a limited policy to restrict the actions that can run within your enterprise
- Deploy a self-hosted runner for your enterprise
- Create a group to manage access to the runners available to your enterprise
- Optionally, further restrict the repositories that can use the runner
- Optionally, build custom tooling to automatically scale your self-hosted runners
You'll also find additional information about how to monitor and secure your self-hosted runners, how to access actions from GitHub.com, and how to customize the software on your runner machines.
After you finish the guide, users of your GitHub Enterprise Server instance will be able to run workflow jobs from GitHub Actions on a self-hosted runner machine.
Prerequisites
-
GitHub Actions must be enabled for GitHub Enterprise Server. A site administrator can enable and configure GitHub Actions for your instance. For more information, see "Getting started with GitHub Actions for GitHub Enterprise Server."
-
You must have access to the machine you will use as a self-hosted runner in your environment.
The connection between self-hosted runners and GitHub Enterprise Server is over HTTP (port 80) or HTTPS (port 443). To ensure connectivity over HTTPS, configure TLS for your GitHub Enterprise Server instance. For more information, see "Configuring TLS." For more information, see "About self-hosted runners."
- Your enterprise must own at least one organization. For more information, see "About organizations" and "Creating a new organization from scratch."
1. Configure policies for GitHub Actions
First, enable GitHub Actions for all organizations, and configure a policy to restrict the actions that can run on your GitHub Enterprise Server instance. Optionally, organization owners can further restrict these policies for each organization.
-
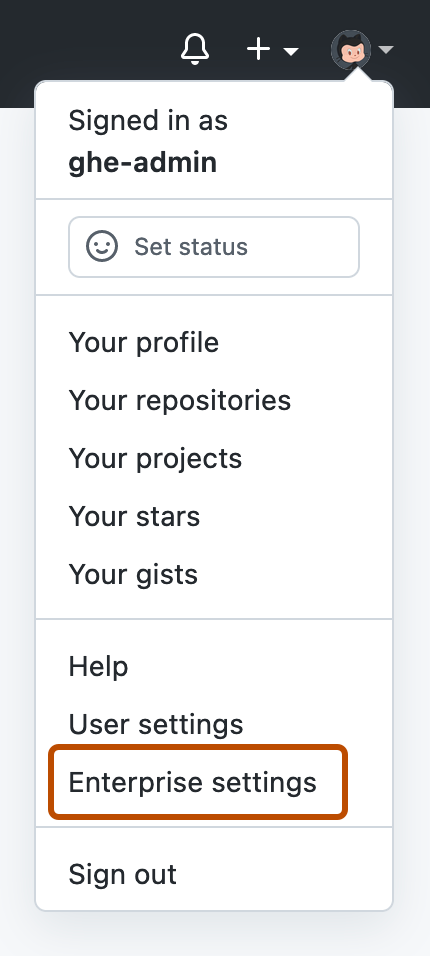
In the top-right corner of GitHub Enterprise Server, click your profile photo, then click Enterprise settings.
-
In the enterprise account sidebar, click Policies.
-
Under " Policies", click Actions.
-
Under "Policies", select Enable for all organizations.
-
To enable local actions and actions created by GitHub, select Allow select actions, then select Allow actions created by GitHub.
-
Click Save.

You can configure additional policies to restrict the actions available to users of your GitHub Enterprise Server instance. For more information, see "Enforcing policies for GitHub Actions in your enterprise."
2. Deploy the self-hosted runner for your enterprise
Next, add a self-hosted runner to your enterprise. GitHub Enterprise Server will guide you through installation of the necessary software on the runner machine. After you deploy the runner, you can verify connectivity between the runner machine and your GitHub Enterprise Server instance.
Adding the self-hosted runner
-
In the top-right corner of GitHub Enterprise Server, click your profile photo, then click Enterprise settings.
-
In the enterprise account sidebar, click Policies.
-
Under " Policies", click Actions.
-
Click the Runners tab.
-
Click New runner.
-
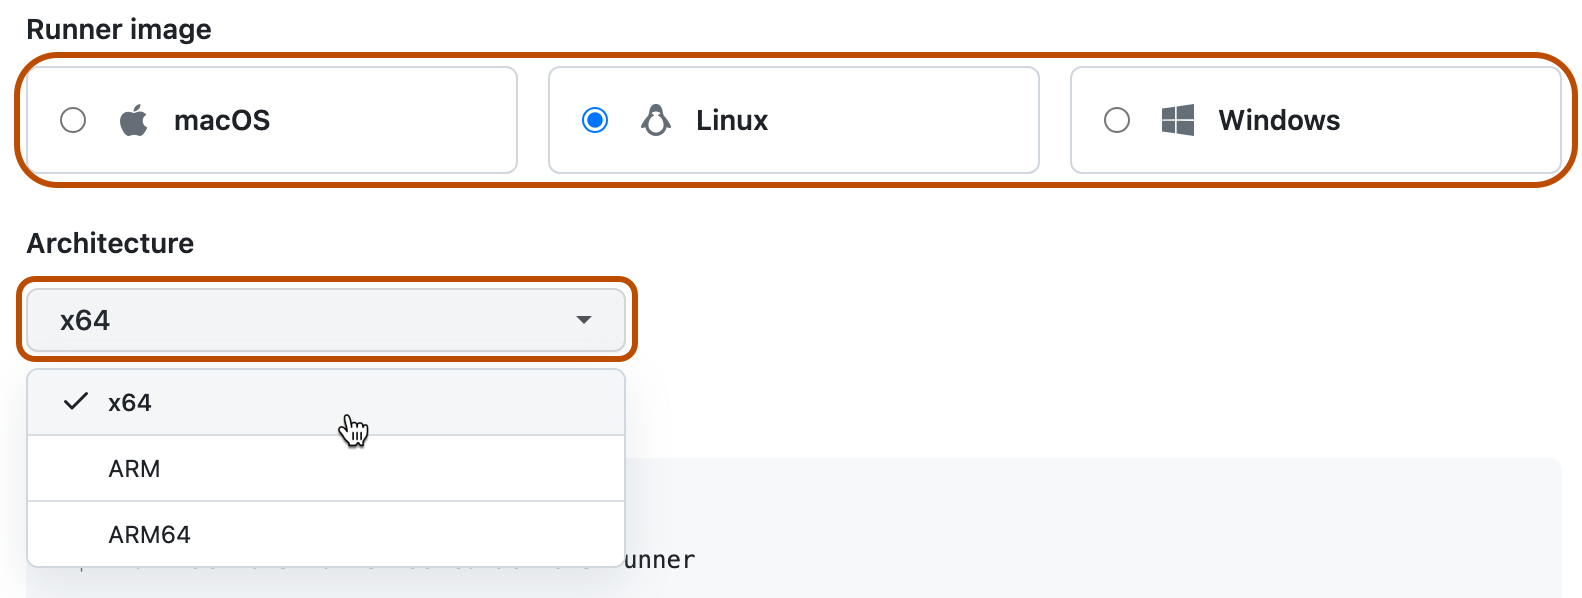
Select the operating system image and architecture of your self-hosted runner machine.
-
You will see instructions showing you how to download the runner application and install it on your self-hosted runner machine.
Open a shell on your self-hosted runner machine and run each shell command in the order shown.
Note: On Windows, if you want to install the self-hosted runner application as a service, you must open a shell with administrator privileges. We also recommend that you use
C:\actions-runneras the directory for the self-hosted runner application so that Windows system accounts can access the runner directory.The instructions walk you through completing these tasks:
- Downloading and extracting the self-hosted runner application.
- Running the
configscript to configure the self-hosted runner application and register it with GitHub Actions. Theconfigscript requires the destination URL and an automatically-generated time-limited token to authenticate the request.- On Windows, the
configscript also asks if you would like to install the self-hosted runner application as a service. For Linux and macOS, you can install a service after you finish adding the runner. For more information, see "Configuring the self-hosted runner application as a service."
- On Windows, the
- Running the self-hosted runner application to connect the machine to GitHub Actions.

Checking that your self-hosted runner was successfully added
After completing the steps to add a self-hosted runner, the runner and its status are now listed under "Self-hosted runners".
The self-hosted runner application must be active for the runner to accept jobs. When the runner application is connected to GitHub Enterprise Server and ready to receive jobs, you will see the following message on the machine's terminal.
√ Connected to GitHub

2019-10-24 05:45:56Z: Listening for Jobs
3. Manage access to the self-hosted runner using a group
You can create a runner group to manage access to the runner that you added to your enterprise. You'll use the group to choose which organizations can execute jobs from GitHub Actions on the runner.
GitHub Enterprise Server adds all new runners to a group. Runners can be in one group at a time. By default, GitHub Enterprise Server adds new runners to the "Default" group.
-
In the top-right corner of GitHub Enterprise Server, click your profile photo, then click Enterprise settings.
-
In the enterprise account sidebar, click Policies.
-
Under " Policies", click Actions.
-
Click the Runner groups tab.
-
Click New runner group.
-
Under "Group name", type a name for your runner group.
-
To choose a policy for organization access, under "Organization access", select the Organization access drop-down, and click Selected organizations.
-
To the right of the drop-down with the organization access policy, click .
-
Select the organizations you'd like to grant access to the runner group.
-
Optionally, to allow public repositories in the selected organizations to use runners in the group, select Allow public repositories.
Warning:
We recommend that you only use self-hosted runners with private repositories. This is because forks of your public repository can potentially run dangerous code on your self-hosted runner machine by creating a pull request that executes the code in a workflow.
For more information, see "About self-hosted runners."
-
Click Create group to create the group and apply the policy.
-
Click the "Runners" tab.
-
In the list of runners, click the runner that you deployed in the previous section.
-
Click Edit.
-
Click Runner groups .
-
In the list of runner groups, click the name of the group that you previously created.
-
Click Save to move the runner to the group.
You've now deployed a self-hosted runner that can run jobs from GitHub Actions within the organizations that you specified.
4. Further restrict access to the self-hosted runner
Optionally, organization owners can further restrict the access policy of the runner group that you created. For example, an organization owner could allow only certain repositories in the organization to use the runner group.
For more information, see "Managing access to self-hosted runners using groups."
5. Automatically scale your self-hosted runners
Optionally, you can build custom tooling to automatically scale the self-hosted runners for your GitHub Enterprise Server instance. For example, your tooling can respond to webhook events from your GitHub Enterprise Server instance to automatically scale a cluster of runner machines. For more information, see "Autoscaling with self-hosted runners."
Next steps
-
You can monitor self-hosted runners and troubleshoot common issues. For more information, see "Monitoring and troubleshooting self-hosted runners."
-
GitHub recommends that you review security considerations for self-hosted runner machines. For more information, see "Security hardening for GitHub Actions."
-
You can manually sync repositories on GitHub.com containing actions to your enterprise on GitHub Enterprise Server. Alternatively, you can allow members of your enterprise to automatically access actions from GitHub.com by using GitHub Connect. For more information, see the following.
-
You can customize the software available on your self-hosted runner machines, or configure your runners to run software similar to GitHub-hosted runners available for customers using GitHub.com. The software that powers runner machines for GitHub Actions is open source. For more information, see the
actions/runnerandactions/runner-imagesrepositories.