소개
Copilot을 사용하여 코딩하는 가장 좋은 방법, 버그 수정 방법, 다른 사람의 코드가 어떻게 작동하는지 등 코딩 관련 질문에 대한 답변을 얻을 수 있습니다. Copilot에서 수행할 수 있는 작업에 대한 자세한 내용은 GitHub Copilot이란?을(를) 참조하세요.
Copilot 사용 지침은 사용하려는 환경에 따라 달라집니다. 이 빠른 시작 버전은 GitHub에 대한 것입니다. 다른 환경에서 Copilot을 사용하는 방법에 대한 지침은 위의 탭을 클릭합니다.
GitHub Copilot 가입
Copilot을 사용하려면 Copilot 플랜에 액세스할 수 있는 개인 GitHub 계정이 필요합니다. 다음이 가능합니다.
- 플랜에 가입하지 않고 제한된 기능을 탐색하려면 Copilot Free로 시작하세요.
- Copilot Pro 또는 Copilot Pro(프로)+로 업그레이드하면 더 많은 기능, 모델, 요청 한도를 사용할 수 있습니다.
GitHub Copilot의 다양한 플랜에 대한 자세한 내용은 GitHub Copilot 플랜을(를) 참조하세요.
첫 번째 질문하기
-
GitHub에서 리포지토리로 이동하여 파일을 엽니다.
-
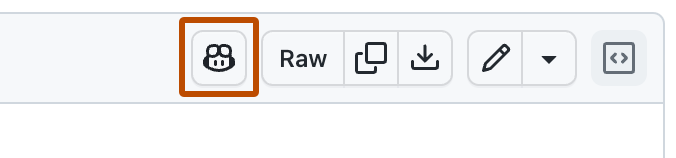
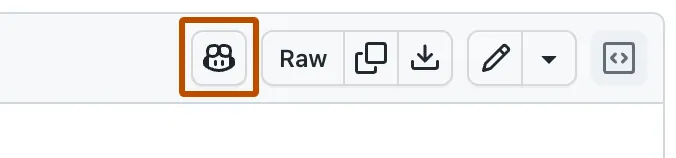
파일 보기의 오른쪽 위에 있는 Copilot 아이콘()을 클릭합니다.
-
채팅 패널 하단의 "Copilot에 질문하기" 상자에 질문을 입력하고 Enter 키를 누릅니다.
예를 들어 다음과 같이 입력할 수 있습니다.
- 이 파일을 설명해 주세요.
- 이 코드를 개선하려면 어떻게 해야 하나요?
- 이 코드를 테스트하려면 어떻게 해야 하나요?
Copilot이(가) 패널의 요청에 응답합니다.
-
후속 질문을 하여 대화를 계속할 수 있습니다. 예를 들어 "자세히 알려주세요"를 입력하면 Copilot이(가) 마지막 설명을 확장합니다.
문의할 수 있는 기타 질문
GitHub의 GitHub Copilot 채팅를 사용하여 더 많은 작업을 수행할 수 있습니다. 예시:
- 소프트웨어 개발에 대한 일반적인 질문
- 리포지토리에 대한 탐색적 질문
- 지식 기반에 대한 질문
- 당겨받기 요청의 변경 내용 확인
- 특정 이슈 또는 커밋에 대한 질문
자세한 내용은 GitHub에서 GitHub Copilot에 질문하기을(를) 참조하세요.
다음 단계
- **GitHub Copilot 채팅에 대해 자세히 알아보려면 **IDE에서 GitHub Copilot에 질문하기.
- IDE에서 Copilot 코드 완료 제안 가져오기 - GitHub Copilot을 사용하여 IDE에서 코드 제안 가져오기을(를) 참조하세요.
- 효과적으로 프롬프트를 작성하는 방법 알아보기 - Copilot Chat의 프롬프트 엔지니어링을(를) 참조하세요.
- 모바일 디바이스에서 Copilot 사용 - GitHub Mobile에서 GitHub Copilot에 질문하기을(를) 참조하세요.
- 명령줄에서 Copilot 사용 - 명령줄에서 GitHub Copilot 사용하기을(를) 참조하세요.
GitHub Copilot은 에디터에 입력할 때 코딩 제안을 제공합니다. 또한 코딩하는 가장 좋은 방법, 버그 수정 방법, 다른 사람의 코드가 작동하는 방법 등 Copilot 코딩 관련 질문을 할 수도 있습니다. Copilot에서 수행할 수 있는 작업에 대한 자세한 내용은 GitHub Copilot이란?을(를) 참조하세요.
Copilot 사용 지침은 사용하려는 환경에 따라 달라집니다. 이 빠른 시작 버전은 Windows Terminal에 대한 것입니다. 다른 환경에서 Copilot을 사용하는 방법에 대한 지침은 위의 탭을 클릭합니다.
GitHub Copilot 가입
Copilot을 사용하려면 Copilot 플랜에 액세스할 수 있는 개인 GitHub 계정이 필요합니다. 다음이 가능합니다.
- 플랜에 가입하지 않고 제한된 기능을 탐색하려면 Copilot Free로 시작하세요.
- Copilot Pro 또는 Copilot Pro(프로)+로 업그레이드하면 더 많은 기능, 모델, 요청 한도를 사용할 수 있습니다.
GitHub Copilot의 다양한 플랜에 대한 자세한 내용은 GitHub Copilot 플랜을(를) 참조하세요.
필수 조건
- Windows Terminal Canary. 터미널 채팅은 Windows Terminal Canary에서만 사용할 수 있습니다.
터미널 채팅에서 Copilot 사용
Windows Terminal Canary를 설치한 후 터미널 채팅에서 Copilot을 사용하여 명령줄 관련 질문을 할 수 있습니다.
-
드롭다운 메뉴에서 Settings를 엽니다.

-
터미널 채팅(실험적) 설정으로 이동합니다.

-
Service Providers 아래에서 GitHub Copilot 및 Authenticate via GitHub를 선택하여 로그인하세요.


GitHub Copilot와 채팅
참고 항목
조직에서 GitHub Copilot에 액세스할 수 있는 경우, 조직 소유자가 CLI의 GitHub Copilot를 비활성화하면 Windows Terminal에서 GitHub Copilot을 사용할 수 없습니다. 조직에서 Copilot Business에 대한 정책과 기능 관리하기을(를) 참조하세요.
-
드롭다운 메뉴에서 터미널 채팅(실험적) 을 엽니다.
-
터미널 채팅의 채팅 창에서
how do i list all markdown files in my directory를 입력한 다음, Enter 키를 누릅니다.Copilot의 답변이 질문 아래에 표시됩니다.
-
답변을 클릭하여 명령줄에 삽입하세요.
다음 단계
- Copilot 코드 완성 자세히 알아보기 - GitHub Copilot을 사용하여 IDE에서 코드 제안 가져오기을(를) 참조하세요.
- **GitHub Copilot 채팅에 대해 자세히 알아보려면 **IDE에서 GitHub Copilot에 질문하기.
- 효과적으로 프롬프트를 작성하는 방법 알아보기 - Copilot Chat의 프롬프트 엔지니어링을(를) 참조하세요.
- 모바일 디바이스에서 Copilot 사용 - GitHub Mobile에서 GitHub Copilot에 질문하기을(를) 참조하세요.
- 명령줄에서 Copilot 사용 - CLI에 GitHub Copilot 사용자 지정을(를) 참조하세요.
- 편집기에서 Copilot 구성 - 편집기 내에서 GitHub Copilot을(를) 활성화 또는 비활성화하고 에 대해 선호하는 바로 가기 키를 직접 만들 수 있습니다. 사용자 환경에서 GitHub Copilot 구성하기을(를) 참조하세요.
GitHub Copilot은 에디터에 입력할 때 코딩 제안을 제공합니다. 또한 코딩하는 가장 좋은 방법, 버그 수정 방법, 다른 사람의 코드가 작동하는 방법 등 Copilot 코딩 관련 질문을 할 수도 있습니다. Copilot에서 수행할 수 있는 작업에 대한 자세한 내용은 GitHub Copilot이란?을(를) 참조하세요.
Copilot 사용 지침은 사용하려는 환경에 따라 달라집니다. 이 빠른 시작 버전은 Visual Studio Code용입니다. 다른 환경에서 Copilot을 사용하는 방법에 대한 지침은 위의 탭을 클릭합니다.
GitHub Copilot 가입
Copilot을 사용하려면 Copilot 플랜에 액세스할 수 있는 개인 GitHub 계정이 필요합니다. 다음이 가능합니다.
- 플랜에 가입하지 않고 제한된 기능을 탐색하려면 Copilot Free로 시작하세요.
- Copilot Pro 또는 Copilot Pro(프로)+로 업그레이드하면 더 많은 기능, 모델, 요청 한도를 사용할 수 있습니다.
GitHub Copilot의 다양한 플랜에 대한 자세한 내용은 GitHub Copilot 플랜을(를) 참조하세요.
필수 조건
- Visual Studio Code의 최신 버전입니다. Visual Studio Code 다운로드 페이지를 참조하세요.
- Visual Studio Code의 GitHub에 로그인합니다. 인증에 문제가 있는 경우 GitHub Copilot의 일반적인 문제 해결하기을(를) 참조하세요.
GitHub Copilot와 채팅
GitHub Copilot 확장을 설치한 후 Copilot 코딩 관련 질문을 할 수 있습니다.
참고 항목
조직에서 GitHub Copilot에 액세스할 수 있는 경우 조직 소유자가 채팅을 사용하지 않도록 설정한 경우 GitHub Copilot 채팅을 사용할 수 없습니다. 조직에서 Copilot Business에 대한 정책과 기능 관리하기을(를) 참조하세요.
-
기존 코드 파일을 엽니다.
-
작업 모음에서 채팅 보기를 엽니다.

-
채팅 보기 아래쪽의 채팅 입력 필드에
explain this file을 입력합니다. -
Enter 키를 누릅니다.
Copilot이(가) 채팅 보기에 응답합니다.
-
편집기에서 주석을 달지 않은 코드 줄을 하나 이상 선택합니다.
-
채팅 입력 필드에
add comments to these lines을 입력합니다. -
Copilot에서 제안하는 주석이 마음에 들면 채팅 보기에서 제안된 코드를 마우스로 가리키고 "커서에 삽입" 아이콘을 클릭하여 선택한 줄을 제안된 코드로 바꿉니다.


첫 번째 코드 완료 제안 가져오기
다음 예시에서는 JavaScript를 사용하지만 다른 언어도 비슷하게 작동합니다. GitHub Copilot은 다양한 언어와 광범위한 프레임워크에 대한 제안을 제공하지만 Python, JavaScript, TypeScript, Ruby, Go, C# 및 C++에서 특히 잘 작동합니다. GitHub Copilot은(는) 데이터베이스에 대한 쿼리 생성, API 및 프레임워크에 대한 제안 생성을 지원하며 코드 개발로서의 인프라에 도움이 될 수 있습니다.
-
Visual Studio Code를 엽니다.
-
Visual Studio Code에서 새 JavaScript(*.js) 파일을 만듭니다.
-
JavaScript 파일에 다음 함수 헤더를 입력합니다.
JavaScript function calculateDaysBetweenDates(begin, end) {function calculateDaysBetweenDates(begin, end) {
GitHub Copilot은 자동으로 전체 함수 본문을 회색 텍스트로 제안합니다. 정확한 제안은 다를 수 있습니다.
- 제안을 수락하려면 Tab 키를 누릅니다.
다음 단계
- Copilot 코드 완성 자세히 알아보기 - GitHub Copilot을 사용하여 IDE에서 코드 제안 가져오기을(를) 참조하세요.
- **GitHub Copilot 채팅에 대해 자세히 알아보려면 **IDE에서 GitHub Copilot에 질문하기.
- 효과적으로 프롬프트를 작성하는 방법 알아보기 - Copilot Chat의 프롬프트 엔지니어링을(를) 참조하세요.
- 전문가처럼 Copilot 사용 - GitHub Copilot을(를) 위한 효과적인 프롬프트 작성 방법을 알아봅니다. 자세한 내용은 Visual Studio Code 문서의 VS Code에서 GitHub Copilot 사용 모범 사례를 참조하세요.
- 다음 편집 제안에 대해 알아보기 - 다음 편집 제안 정보를 참조하세요.
- 모바일 디바이스에서 Copilot 사용 - GitHub Mobile에서 GitHub Copilot에 질문하기을(를) 참조하세요.
- 명령줄에서 Copilot 사용 - CLI에 GitHub Copilot 사용자 지정을(를) 참조하세요.
- 편집기에서 Copilot 구성 - 편집기 내에서 GitHub Copilot을(를) 활성화 또는 비활성화하고 에 대해 선호하는 바로 가기 키를 직접 만들 수 있습니다. 사용자 환경에서 GitHub Copilot 구성하기을(를) 참조하세요.
GitHub Copilot은 에디터에 입력할 때 코딩 제안을 제공합니다. 또한 코딩하는 가장 좋은 방법, 버그 수정 방법, 다른 사람의 코드가 작동하는 방법 등 Copilot 코딩 관련 질문을 할 수도 있습니다. Copilot에서 수행할 수 있는 작업에 대한 자세한 내용은 GitHub Copilot이란?을(를) 참조하세요.
Copilot 사용 지침은 사용하려는 환경에 따라 달라집니다. 이 빠른 시작 버전은 Visual Studio에 대한 것입니다. 다른 환경에서 Copilot을 사용하는 방법에 대한 지침은 위의 탭을 클릭합니다.
GitHub Copilot 가입
Copilot을 사용하려면 Copilot 플랜에 액세스할 수 있는 개인 GitHub 계정이 필요합니다. 다음이 가능합니다.
- 플랜에 가입하지 않고 제한된 기능을 탐색하려면 Copilot Free로 시작하세요.
- Copilot Pro 또는 Copilot Pro(프로)+로 업그레이드하면 더 많은 기능, 모델, 요청 한도를 사용할 수 있습니다.
GitHub Copilot의 다양한 플랜에 대한 자세한 내용은 GitHub Copilot 플랜을(를) 참조하세요.
필수 조건
- Visual Studio의 호환 버전. Visual Studio에서 을(를) 사용하려면 Windows용 Visual Studio 버전 2022 17.8 이상이 설치되어 있어야 합니다. 자세한 내용은 Microsoft 설명서에서 Visual Studio 설치를 참조하세요.
- Visual Studio용 GitHub Copilot 확장. Copilot 확장 프로그램을 설치하는 방법에 대한 지침은 Microsoft 설명서에서 Visual Studio에 GitHub Copilot 설치를 참조하세요.
- GitHub 계정을 Visual Studio에 추가합니다. Microsoft 설명서에서 GitHub 계정을 키 체인에 추가를 참조하세요.
GitHub Copilot와 채팅
GitHub Copilot 확장을 설치한 후 Copilot 코딩 관련 질문을 할 수 있습니다.
참고 항목
조직에서 GitHub Copilot에 액세스할 수 있는 경우 조직 소유자가 채팅을 사용하지 않도록 설정한 경우 GitHub Copilot 채팅을 사용할 수 없습니다. 조직에서 Copilot Business에 대한 정책과 기능 관리하기을(를) 참조하세요.
-
기존 코드 파일을 엽니다.
-
Visual Studio 메뉴 모음에서 View, GitHub Copilot 채팅 을 차례로 클릭합니다.
-
Copilot Chat 창에
what does this file do를 입력한 다음, Enter 키를 누르세요.Copilot의 답변이 질문 아래에 표시됩니다.
-
편집기에서 코드 줄을 선택합니다.
-
Copilot Chat 창에
explain this line를 입력한 다음, Enter 키를 누르세요.
첫 번째 코드 완료 제안 가져오기
다음 예시에서는 JavaScript를 사용하지만 다른 언어도 비슷하게 작동합니다. GitHub Copilot은 다양한 언어와 광범위한 프레임워크에 대한 제안을 제공하지만 Python, JavaScript, TypeScript, Ruby, Go, C# 및 C++에서 특히 잘 작동합니다. GitHub Copilot은(는) 데이터베이스에 대한 쿼리 생성, API 및 프레임워크에 대한 제안 생성을 지원하며 코드 개발로서의 인프라에 도움이 될 수 있습니다.
-
Visual Studio를 엽니다.
-
Visual Studio에서 새 JavaScript(*.js) 파일을 만듭니다.
-
JavaScript 파일에 다음 함수 헤더를 입력합니다.
JavaScript function calculateDaysBetweenDates(begin, end) {function calculateDaysBetweenDates(begin, end) {
GitHub Copilot은 자동으로 전체 함수 본문을 회색 텍스트로 제안합니다. 정확한 제안은 다를 수 있습니다.
- 제안을 수락하려면 Tab 키를 누릅니다.
다음 단계
- Copilot 코드 완성 자세히 알아보기 - GitHub Copilot을 사용하여 IDE에서 코드 제안 가져오기을(를) 참조하세요.
- **GitHub Copilot 채팅에 대해 자세히 알아보려면 **IDE에서 GitHub Copilot에 질문하기.
- 효과적으로 프롬프트를 작성하는 방법 알아보기 - Copilot Chat의 프롬프트 엔지니어링을(를) 참조하세요.
- 전문가처럼 프롬프트 표시하기 - YouTube에서 Visual Studio GitHub Copilot을 사용하여 프롬프트 엔지니어링을 시청하세요.
- 모바일 디바이스에서 Copilot 사용 - GitHub Mobile에서 GitHub Copilot에 질문하기을(를) 참조하세요.
- 명령줄에서 Copilot 사용 - CLI에 GitHub Copilot 사용자 지정을(를) 참조하세요.
- 편집기에서 Copilot 구성 - 편집기 내에서 GitHub Copilot을(를) 활성화 또는 비활성화하고 에 대해 선호하는 바로 가기 키를 직접 만들 수 있습니다. 사용자 환경에서 GitHub Copilot 구성하기을(를) 참조하세요.
GitHub Copilot은 에디터에 입력할 때 코딩 제안을 제공합니다. 또한 코딩하는 가장 좋은 방법, 버그 수정 방법, 다른 사람의 코드가 작동하는 방법 등 Copilot 코딩 관련 질문을 할 수도 있습니다. Copilot에서 수행할 수 있는 작업에 대한 자세한 내용은 GitHub Copilot이란?을(를) 참조하세요.
Copilot 사용 지침은 사용하려는 환경에 따라 달라집니다. 이 빠른 시작 버전은 JetBrains IDE용입니다. 다른 환경에서 Copilot을 사용하는 방법에 대한 지침은 위의 탭을 클릭합니다.
GitHub Copilot 가입
Copilot을 사용하려면 Copilot 플랜에 액세스할 수 있는 개인 GitHub 계정이 필요합니다. 다음이 가능합니다.
- 플랜에 가입하지 않고 제한된 기능을 탐색하려면 Copilot Free로 시작하세요.
- Copilot Pro 또는 Copilot Pro(프로)+로 업그레이드하면 더 많은 기능, 모델, 요청 한도를 사용할 수 있습니다.
GitHub Copilot의 다양한 플랜에 대한 자세한 내용은 GitHub Copilot 플랜을(를) 참조하세요.
필수 조건
- 호환되는 JetBrains IDE입니다. Copilot은(는) 많은 수의 JetBrains IDE에서 지원됩니다. 전체 목록은 IDE에서 GitHub Copilot에 질문하기을(를) 참조하세요.
- GitHub Copilot 확장의 최신 버전입니다. JetBrains Marketplace에서 GitHub Copilot 플러그 인을 참조하세요. 설치 지침은 사용자 환경에 GitHub Copilot 확장 설치을(를) 참조하세요.
- JetBrains IDE에서 GitHub에 로그인합니다. 인증 지침은 사용자 환경에 GitHub Copilot 확장 설치을(를) 참조하세요.
GitHub Copilot와 채팅
GitHub Copilot 플러그 인을 설치한 후 Copilot 코딩 관련 질문을 할 수 있습니다.
참고 항목
조직에서 GitHub Copilot에 액세스할 수 있는 경우 조직 소유자가 채팅을 사용하지 않도록 설정한 경우 GitHub Copilot 채팅을 사용할 수 없습니다. 조직에서 Copilot Business에 대한 정책과 기능 관리하기을(를) 참조하세요.
-
기존 코드 파일을 엽니다.
-
JetBrains IDE 창의 오른쪽에서 Copilot Chat 아이콘을 클릭하여 Copilot Chat 창을 엽니다.

-
Copilot Chat 창에
what does this file do를 입력한 다음, Enter 키를 누르세요.Copilot의 답변이 질문 아래에 표시됩니다.
-
편집기에서 코드 줄을 선택합니다.
-
Copilot Chat 창에
explain this line를 입력한 다음, Enter 키를 누르세요.
첫 번째 코드 완료 제안 가져오기
다음 예시에서는 JavaScript를 사용하지만 다른 언어도 비슷하게 작동합니다. GitHub Copilot은 다양한 언어와 광범위한 프레임워크에 대한 제안을 제공하지만 Python, JavaScript, TypeScript, Ruby, Go, C# 및 C++에서 특히 잘 작동합니다. GitHub Copilot은(는) 데이터베이스에 대한 쿼리 생성, API 및 프레임워크에 대한 제안 생성을 지원하며 코드 개발로서의 인프라에 도움이 될 수 있습니다.
-
JetBrains 편집기에서 새 JavaScript(*.js) 파일을 만듭니다.
-
JavaScript 파일에 다음 함수 헤더를 입력합니다.
JavaScript function calculateDaysBetweenDates(begin, end) {function calculateDaysBetweenDates(begin, end) {
GitHub Copilot은 자동으로 전체 함수 본문을 회색 텍스트로 제안합니다. 정확한 제안은 다를 수 있습니다.
- 제안을 수락하려면 Tab 키를 누릅니다.
다음 단계
- Copilot 코드 완성 자세히 알아보기 - GitHub Copilot을 사용하여 IDE에서 코드 제안 가져오기을(를) 참조하세요.
- **GitHub Copilot 채팅에 대해 자세히 알아보려면 **IDE에서 GitHub Copilot에 질문하기.
- 효과적으로 프롬프트를 작성하는 방법 알아보기 - Copilot Chat의 프롬프트 엔지니어링을(를) 참조하세요.
- 모바일 디바이스에서 Copilot 사용 - GitHub Mobile에서 GitHub Copilot에 질문하기을(를) 참조하세요.
- 명령줄에서 Copilot 사용 - CLI에 GitHub Copilot 사용자 지정을(를) 참조하세요.
- 편집기에서 Copilot 구성 - 편집기 내에서 GitHub Copilot을(를) 활성화 또는 비활성화하고 에 대해 선호하는 바로 가기 키를 직접 만들 수 있습니다. 사용자 환경에서 GitHub Copilot 구성하기을(를) 참조하세요.