Note: GitHub-hosted runners are not currently supported on GitHub Enterprise Server. You can see more information about planned future support on the GitHub public roadmap.
About runner groups
To control access to runners at the organization and/or enterprise levels, enterprise and organization owners can use runner groups.
Runner groups are used to collect sets of runners and create a security boundary around them. You can then decide which organizations or repositories are permitted to run jobs on those sets of machines. Enterprise administrators can configure access policies that control which organizations and workflows in an enterprise have access to the runner group.
When you grant access to a runner group, you can see the runner group listed in the organization's runner settings. Optionally, you can assign additional granular repository and workflow access policies to the runner group.
When new runners are created, they are automatically assigned to the default group unless otherwise specified. Runners can only be in one group at a time. You can move runners from one runner group to another. For more information, see "Moving a runner to a group."
Creating a self-hosted runner group for an organization
Warning: We recommend that you only use self-hosted runners with private repositories. This is because forks of your public repository can potentially run dangerous code on your self-hosted runner machine by creating a pull request that executes the code in a workflow.
For more information, see "About self-hosted runners."
All organizations have a single default runner group. Organizations within an enterprise account can create additional groups. Organization admins can allow individual repositories access to a runner group. For information about how to create a runner group with the REST API, see "Actions."
If no group is specified during the registration process, runners are automatically added to a default group. You can later move the runner from the default group to a custom group. For more information, see "Moving a runner to a group."
When creating a group, you must choose a policy that defines which repositories and workflows have access to the runner group.
-
On your GitHub Enterprise Server instance, navigate to the main page of the organization.
-
Under your organization name, click Settings. If you cannot see the "Settings" tab, select the dropdown menu, then click Settings.

-
In the left sidebar, click Actions, then click Runner groups.
-
In the "Runner groups" section, click New runner group.
-
Enter a name for your runner group.
-
Assign a policy for repository access.
You can configure a runner group to be accessible to a specific list of repositories, or to all repositories in the organization. By default, only private repositories can access runners in a runner group, but you can override this. This setting can't be overridden if configuring an organization's runner group that was shared by an enterprise.
-
Assign a policy for workflow access.
You can configure a runner group to be accessible to a specific list of workflows, or to all workflows. This setting can't be overridden if you are configuring an organization's runner group that was shared by an enterprise. If you specify what workflow can access the runner group, you must use the full path to the workflow, including the repository name and owner, and you must pin the workflow to a branch, tag, or full SHA. For example:
octo-org/octo-repo/.github/workflows/build.yml@v2, octo-org/octo-repo/.github/workflows/deploy.yml@d6dc6c96df4f32fa27b039f2084f576ed2c5c2a5, monalisa/octo-test/.github/workflows/test.yml@main.Only jobs directly defined within the selected workflows will have access to the runner group. Organization-owned runner groups cannot access workflows from a different organization in the enterprise; instead, you must create an enterprise-owned runner group.
-
Click Create group to create the group and apply the policy.

Creating a self-hosted runner group for an enterprise
Warning: We recommend that you only use self-hosted runners with private repositories. This is because forks of your public repository can potentially run dangerous code on your self-hosted runner machine by creating a pull request that executes the code in a workflow.
For more information, see "About self-hosted runners."
Enterprises can add their runners to groups for access management. Enterprises can create groups of runners that are accessible to specific organizations in the enterprise account or to specific workflows. Organization owners can then assign additional granular repository or workflow access policies to the enterprise runner groups. For information about how to create a runner group with the REST API, see the enterprise endpoints in the GitHub Actions REST API.
If no group is specified during the registration process, runners are automatically added to a default group. You can later move the runner from the default group to a custom group. For more information, see "Moving a runner to a group."
When creating a group, you must choose a policy that defines which organizations have access to the runner group.
-
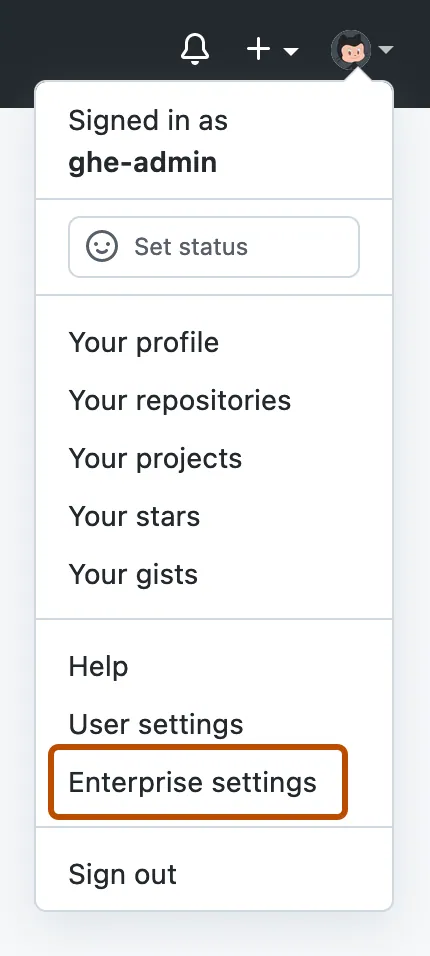
In the top-right corner of GitHub Enterprise Server, click your profile photo, then click Enterprise settings.

-
In the enterprise account sidebar, click Policies.
-
Under " Policies", click Actions.
-
Click the Runner groups tab.
-
Click New runner group.
-
Under "Group name", type a name for your runner group.
-
To choose a policy for organization access, select the Organization access dropdown menu and click a policy. You can configure a runner group to be accessible to a specific list of organizations, or all organizations in the enterprise. By default, only private repositories can access runners in a runner group, but you can override this.
-
Assign a policy for workflow access.
You can configure a runner group to be accessible to a specific list of workflows, or to all workflows. This setting can't be overridden if you are configuring an organization's runner group that was shared by an enterprise. If you specify what workflow can access the runner group, you must use the full path to the workflow, including the repository name and owner, and you must pin the workflow to a branch, tag, or full SHA. For example:
octo-org/octo-repo/.github/workflows/build.yml@v2, octo-org/octo-repo/.github/workflows/deploy.yml@d6dc6c96df4f32fa27b039f2084f576ed2c5c2a5, monalisa/octo-test/.github/workflows/test.yml@main.Only jobs directly defined within the selected workflows will have access to the runner group.
-
Click Save group to create the group and apply the policy.
Changing which organizations can access a runner group
Warning: We recommend that you only use self-hosted runners with private repositories. This is because forks of your public repository can potentially run dangerous code on your self-hosted runner machine by creating a pull request that executes the code in a workflow.
For more information, see "About self-hosted runners."
For runner groups in an enterprise, you can change what organizations in the enterprise can access a runner group.
-
In the top-right corner of GitHub Enterprise Server, click your profile photo, then click Enterprise settings.
-
In the enterprise account sidebar, click Policies.
-
Under " Policies", click Actions.
-
Click the Runner groups tab.
-
Under "Organization access," use the dropdown menu to click Selected organizations.
- To the right of the dropdown menu, click .
- In the popup, use the checkboxes to select organizations that can use this runner group.
-
Click Save group.
Changing which repositories can access a runner group
Warning: We recommend that you only use self-hosted runners with private repositories. This is because forks of your public repository can potentially run dangerous code on your self-hosted runner machine by creating a pull request that executes the code in a workflow.
For more information, see "About self-hosted runners."
For runner groups in an organization, you can change what repositories in the organization can access a runner group.
-
Navigate to the main page of the organization where your runner groups are located.
-
Click Settings.
-
In the left sidebar, click Actions, then click Runner groups.
-
In the list of groups, click the runner group you'd like to configure.
-
Under "Repository access," use the dropdown menu to click Selected repositories.
- To the right of the dropdown menu, click .
- In the popup, use the checkboxes to select repositories that can access this runner group.
-
Click Save group.
Changing which workflows can access a runner group
Warning: We recommend that you only use self-hosted runners with private repositories. This is because forks of your public repository can potentially run dangerous code on your self-hosted runner machine by creating a pull request that executes the code in a workflow.
For more information, see "About self-hosted runners."
You can configure a runner group to run either selected workflows or all workflows. For example, you might use this setting to protect secrets that are stored on runners or to standardize deployment workflows by restricting a runner group to run only a specific reusable workflow. This setting cannot be overridden if you are configuring an organization's runner group that was shared by an enterprise.
- Changing which workflows can access an organization runner group
- Changing which workflows can access an enterprise runner group
Changing which workflows can access an organization runner group
-
Navigate to the main page of the organization where your runner groups are located.
-
Click Settings.
-
In the left sidebar, click Actions, then click Runner groups.
-
In the list of groups, click the runner group you'd like to configure.
-
Under Workflow access, select the dropdown menu and click Selected workflows.
-
Click .
-
Enter a comma separated list of the workflows that can access the runner group. Use the full path, including the repository name and owner. Pin the workflow to a branch, tag, or full SHA. For example:
octo-org/octo-repo/.github/workflows/build.yml@v2, octo-org/octo-repo/.github/workflows/deploy.yml@d6dc6c96df4f32fa27b039f2084f576ed2c5c2a5, monalisa/octo-test/.github/workflows/test.yml@main.Only jobs directly defined within the selected workflows will have access to the runner group.
Organization-owned runner groups cannot access workflows from a different organization in the enterprise; instead, you must create an enterprise-owned runner group.
-
Click Save.
Changing which workflows can access an enterprise runner group
-
In the top-right corner of GitHub Enterprise Server, click your profile photo, then click Enterprise settings.
-
In the enterprise account sidebar, click Policies.
-
Under " Policies", click Actions.
-
Click the Runner groups tab.
-
In the list of groups, click the runner group you'd like to configure.
-
Under Workflow access, select the dropdown menu and click Selected workflows.
-
Click .
-
Enter a comma separated list of the workflows that can access the runner group. Use the full path, including the repository name and owner. Pin the workflow to a branch, tag, or full SHA. For example:
octo-org/octo-repo/.github/workflows/build.yml@v2, octo-org/octo-repo/.github/workflows/deploy.yml@d6dc6c96df4f32fa27b039f2084f576ed2c5c2a5, monalisa/octo-test/.github/workflows/test.yml@main.Only jobs directly defined within the selected workflows will have access to the runner group.
Organization-owned runner groups cannot access workflows from a different organization in the enterprise; instead, you must create an enterprise-owned runner group.
-
Click Save.
Changing the name of a runner group
You can edit the name of your runner groups at the enterprise and organization levels.
Changing the name of an organization runner group
-
Navigate to the main page of the organization where your runner groups are located.
-
Click Settings.
-
In the left sidebar, click Actions, then click Runner groups.
-
In the list of groups, click the runner group you'd like to configure.
-
Enter the new runner group name in the text field under "Group name."
-
Click Save.
Changing the name of an enterprise runner group
-
In the top-right corner of GitHub Enterprise Server, click your profile photo, then click Enterprise settings.
-
In the enterprise account sidebar, click Policies.
-
Under " Policies", click Actions.
-
Click the Runner groups tab.
-
In the list of groups, click the runner group you'd like to configure.
-
Enter the new runner group name in the text field under "Group name."
-
Click Save.
Automatically adding a self-hosted runner to a group
You can use the configuration script to automatically add a new runner to a group. For example, this command registers a new runner and uses the --runnergroup parameter to add it to a group named rg-runnergroup.
./config.sh --url $org_or_enterprise_url --token $token --runnergroup rg-runnergroup
The command will fail if the runner group doesn't exist:
Could not find any self-hosted runner group named "rg-runnergroup".
Moving a self-hosted runner to a group
If you don't specify a runner group during the registration process, your new runners are automatically assigned to the default group, and can then be moved to another group.
Moving an organization runner to a group
-
On your GitHub Enterprise Server instance, navigate to the main page of the organization.
-
Under your organization name, click Settings. If you cannot see the "Settings" tab, select the dropdown menu, then click Settings.
-
In the left sidebar, click Actions, then click Runners.
-
In the "Runners" list, click the runner that you want to configure.
-
Select the Runner group drop-down.
-
In "Move runner to group", choose a destination group for the runner.
Moving an enterprise runner to a group
-
In the top-right corner of GitHub Enterprise Server, click your profile photo, then click Enterprise settings.
-
In the enterprise account sidebar, click Policies.
-
Under " Policies", click Actions.
-
Click the Runners tab.
-
In the "Runners" list, click the runner that you want to configure.
-
Select the Runner group drop-down.
-
In "Move runner to group", choose a destination group for the runner.
Removing a self-hosted runner group
In order to remove a runner group, you must first move or remove all of the runners from the group.
Removing a runner group from an organization
-
Navigate to the main page of the organization where your runner groups are located.
-
Click Settings.
-
In the left sidebar, click Actions, then click Runner groups.
-
In the list of groups, to the right of the group you want to delete, click .
-
To remove the group, click Remove group.
-
Review the confirmation prompts, and click Remove this runner group.
Removing a runner group from an enterprise
-
In the top-right corner of GitHub Enterprise Server, click your profile photo, then click Enterprise settings.
-
In the enterprise account sidebar, click Policies.
-
Under " Policies", click Actions.
-
Click the Runner groups tab.
-
In the list of groups, to the right of the group you want to delete, click .
-
To remove the group, click Remove group.
-
Review the confirmation prompts, and click Remove this runner group.