You can set up a prebuild configuration for the combination of a specific branch of your repository with a specific dev container configuration file.
Any branches created from a prebuild-enabled parent branch will typically also get prebuilds for the same dev container configuration. This is because prebuilds for child branches that use the same dev container configuration as the parent branch are, for the most part, identical, so developers can benefit from faster codespace creation times on those branches also. See Introduction to dev containers.
Typically, when you configure prebuilds for a branch, prebuilds will be available for multiple machine types. However, if your repository is greater than 32 GB, prebuilds won't be available for 2-core and 4-core machine types, since the storage these provide is limited to 32 GB.
Prerequisites
Prebuilds are created using GitHub Actions. As a result, GitHub Actions must be enabled for the repository for which you are configuring prebuilds. See Managing GitHub Actions settings for a repository.
You can set up prebuilds in any repository owned by a personal account. The prebuild will consume storage space that will either incur a billable charge or, for repositories owned by your personal account, will use some of your monthly included storage.
Note
If you create prebuilds for a forked repository, the storage cost of those prebuilds is subtracted from your monthly included storage, while available. If you have used all of your included storage, and you have set up billing, your personal account will be billed. This is true even when the codespaces you create for a fork are paid for by the organization that owns the parent repository. See About billing for GitHub Codespaces.
For repositories owned by an organization, you can set up prebuilds if the organization is on a GitHub Team or GitHub Enterprise plan. Additionally, you must have added a payment method and set a spending limit for GitHub Codespaces on the organization account or its parent enterprise. See Managing the spending limit for GitHub Codespaces and GitHub’s plans.
Configuring prebuilds
-
On GitHub, navigate to the main page of the repository.
-
Under your repository name, click Settings. If you cannot see the "Settings" tab, select the dropdown menu, then click Settings.

-
In the "Code & automation" section of the side bar, click Codespaces.
-
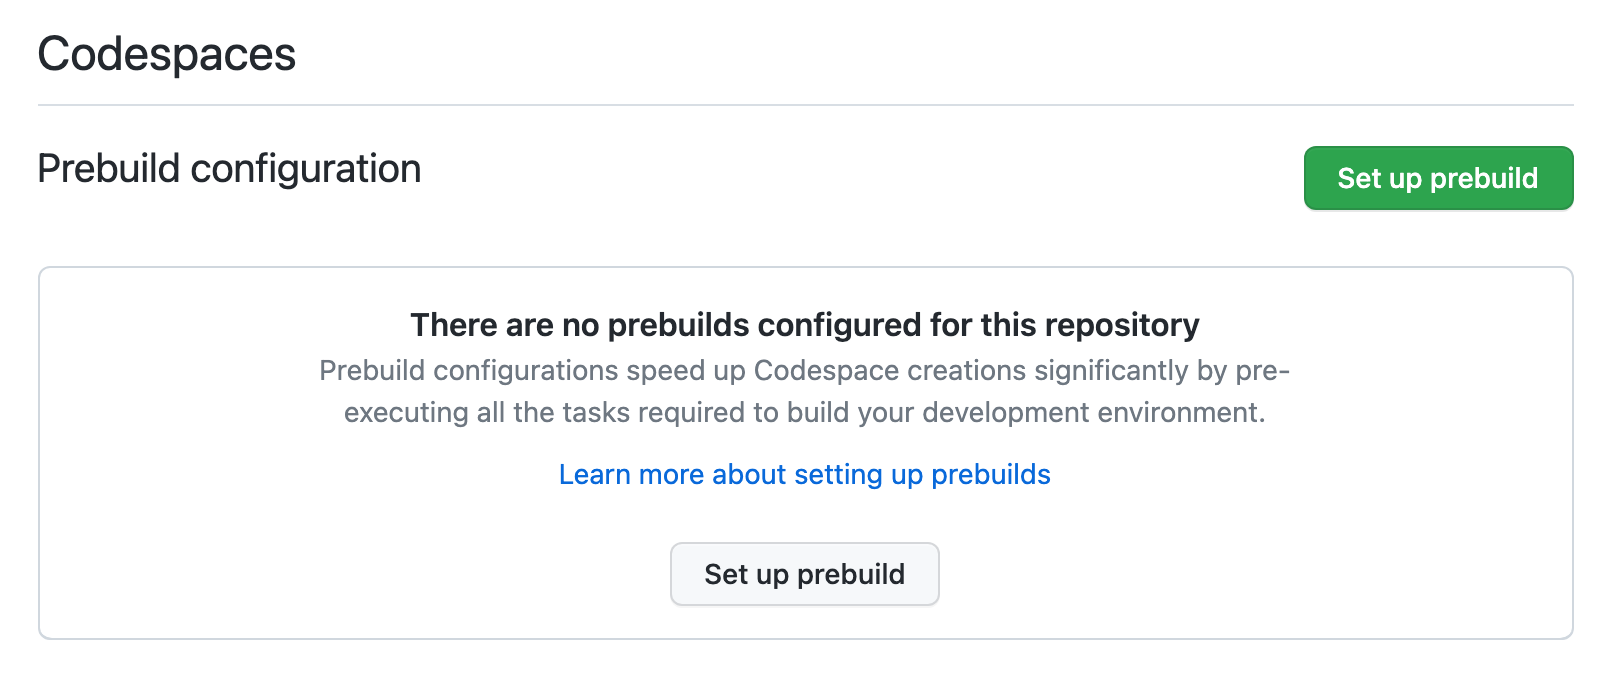
In the "Prebuild configuration" section of the page, click Set up prebuild.
-
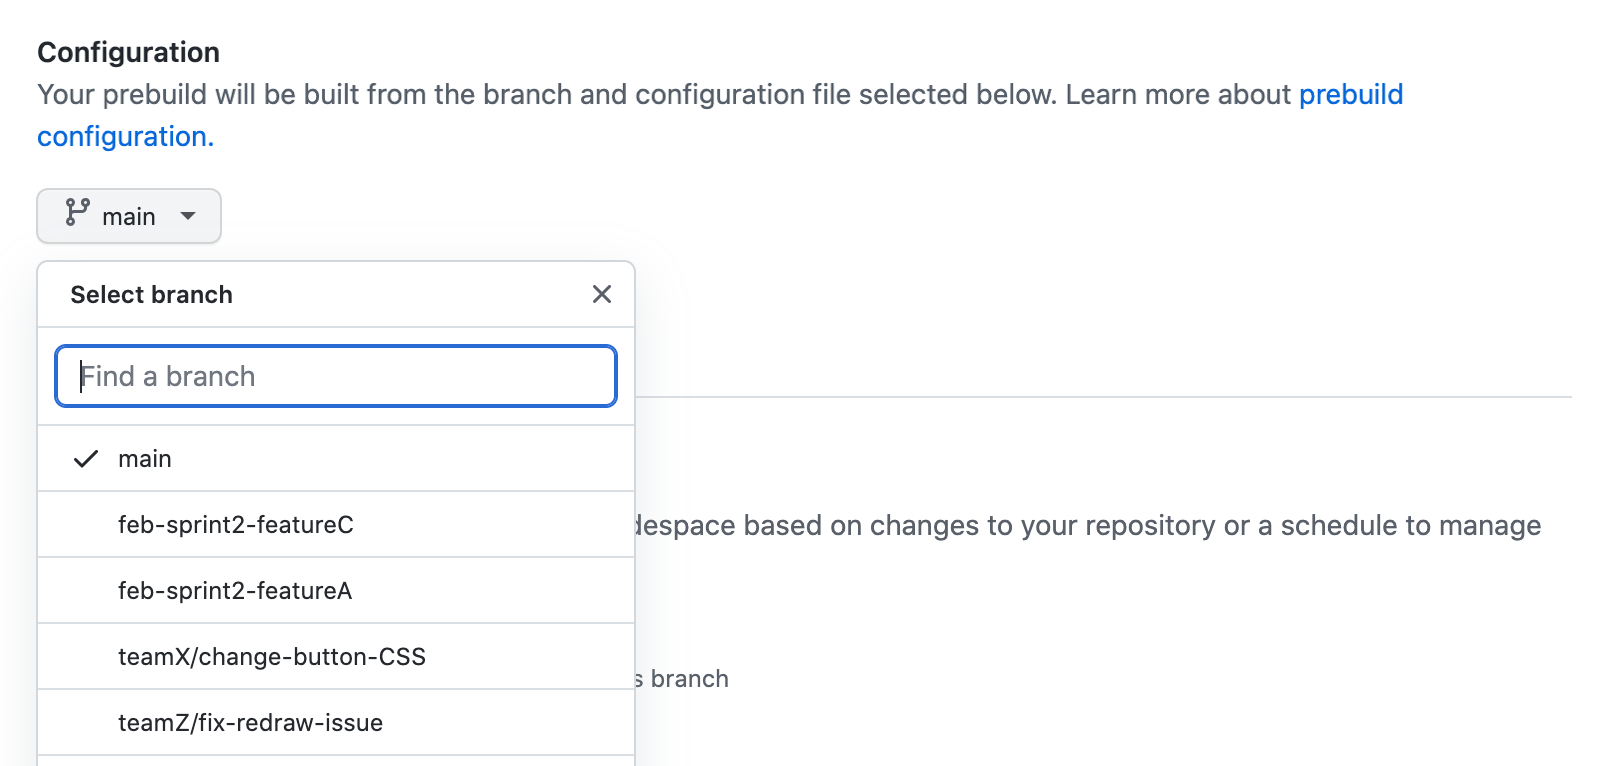
Choose the branch for which you want to set up prebuilds.
Note
Any branches created from a prebuild-enabled base branch will typically also get prebuilds for the same dev container configuration. For example, if you enable prebuilds for a dev container configuration file on the default branch of the repository, branches based on the default branch will, in most cases, also get prebuilds for the same dev container configuration.
-
Optionally, in the Configuration file dropdown menu that's displayed, choose the
devcontainer.jsonconfiguration file that you want to use for your prebuilds. See Introduction to dev containers.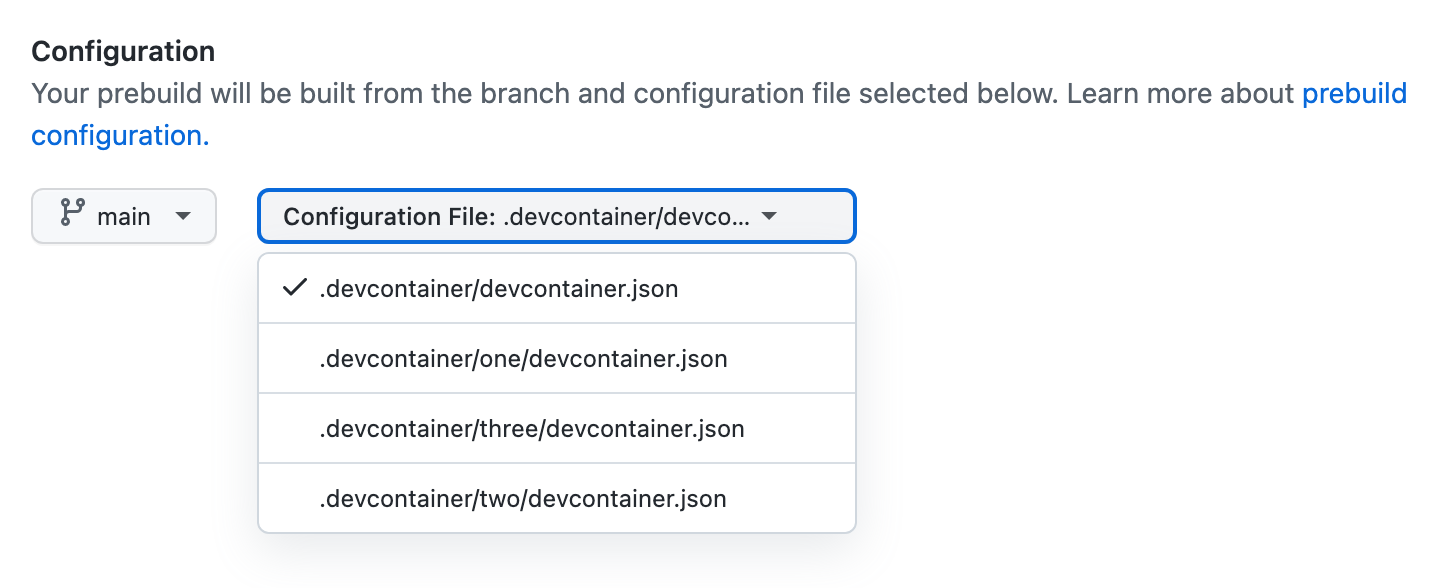
-
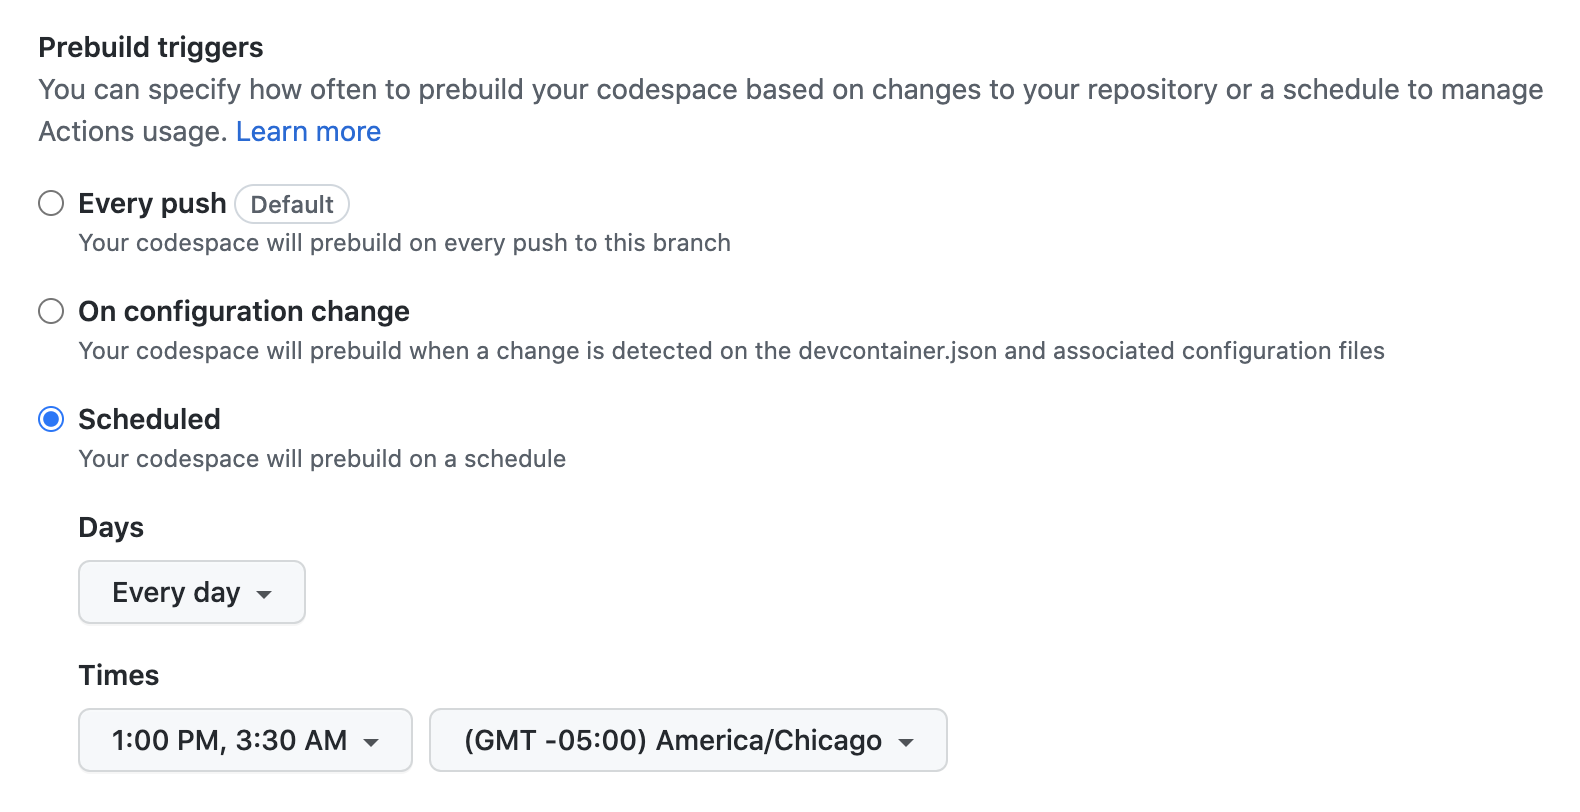
Choose how you want to automatically trigger prebuild updates.
-
Every push (the default setting) - With this setting, prebuilds will be updated on every push made to the given branch. This will ensure that codespaces generated from a prebuild always contain the latest codespace configuration, including any recently added or updated dependencies.
-
On configuration change - With this setting, prebuilds will be updated every time any of the following files is changed:
-
.devcontainer/devcontainer.jsonNote
Prebuild updates are not triggered by changes to
devcontainer.jsonfiles within subdirectories of.devcontainer. -
The Dockerfile referenced in the
build.dockerfileproperty of the.devcontainer/devcontainer.jsonfile.
This setting ensures that changes to the dev container configuration files for the repository are used when a codespace is generated from a prebuild. The GitHub Actions workflow that updates the prebuilds will run less often, so this option will use fewer GitHub Actions minutes. However, this option will not guarantee that codespaces always include recently added or updated dependencies, so these may have to be added or updated manually after a codespace has been created.
-
-
Scheduled - With this setting, you can have your prebuilds updated on a custom schedule that's defined by you. This can reduce consumption of GitHub Actions minutes, however, with this option, codespaces may be created that do not use the latest dev container configuration changes.
-
-
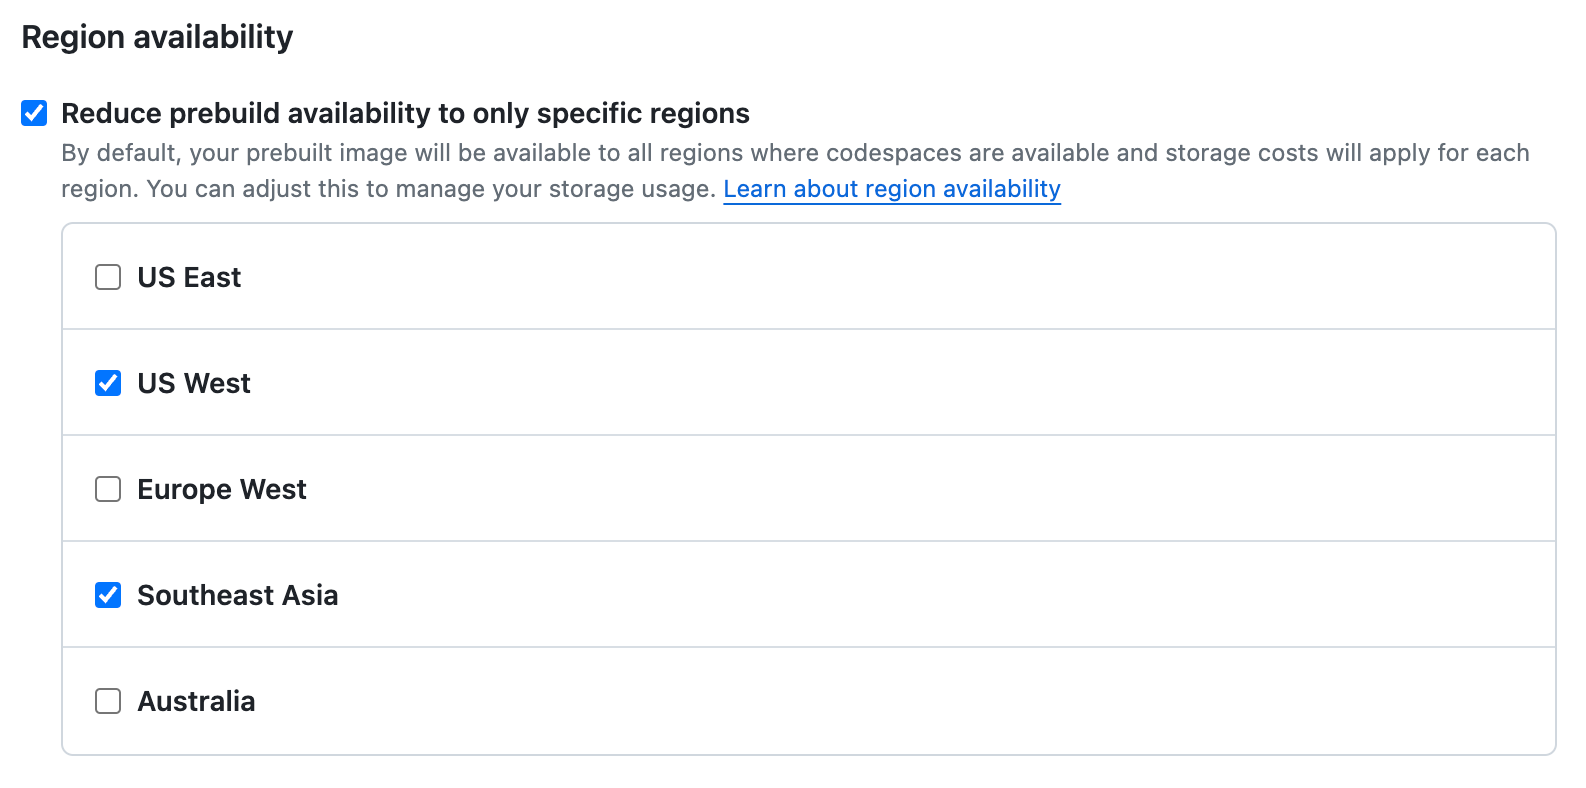
Optionally, select Reduce prebuild available to only specific regions to create prebuilds only in specified regions. Select the regions in which you want prebuilds to be available.
By default, prebuilds are created in all of the available regions, incurring storage charges per prebuild.
Note
- The prebuild in each region incurs individual storage charges. You should, therefore, only enable prebuilds for regions in which you know they'll be used. See About billing for GitHub Codespaces.
- Developers can set their default region for GitHub Codespaces, which can allow you to enable prebuilds for fewer regions. See Setting your default region for GitHub Codespaces.
-
Optionally, under Template history, set the number of prebuild versions to be retained. You can input any number between 1 and 5. The default number of saved versions is 2, which means that only the latest prebuild and the previous version are saved.

Depending on your prebuild trigger settings, your prebuild could change with each push or on each dev container configuration change. Retaining older versions of prebuilds enables you to create a prebuild from an older commit with a different dev container configuration than the current prebuild. This setting allows you to set the number of retained versions to a level that is appropriate for your needs.
If you set the number of prebuild versions to save to 1, GitHub Codespaces will only save the latest version of the prebuild and will delete the older version each time the template is updated. This means you will not get a prebuilt codespace if you go back to an older dev container configuration.
There is a storage cost associated with each prebuild version that's retained. For example, if you are generating prebuilds in 4 regions and retaining 2 versions, you will be charged for storage of up to 8 prebuilds. See About billing for GitHub Codespaces.
-
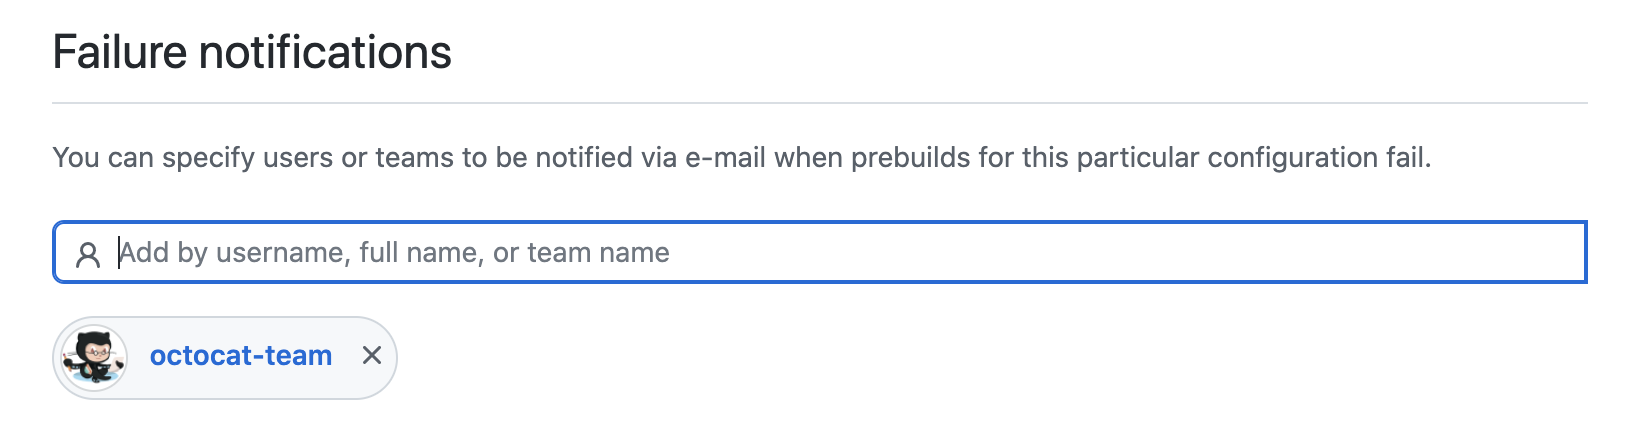
Optionally, add users or teams to notify when the prebuild workflow run fails for this configuration. You can begin typing a username, team name, or full name, then click the name once it appears to add them to the list. The users or teams you add will receive an email when prebuild failures occur, containing a link to the workflow run logs to help with further investigation.
Note
People will only receive notifications of failed prebuilds if they have enabled notifications for failed Actions workflows in their personal settings. See Configuring notifications.
-
Optionally, at the bottom of the page, click Show advanced options.

In the "Advanced options" section, if you select Disable prebuild optimization, codespaces will be created without a prebuild if the latest prebuild workflow has failed or is currently running. See Troubleshooting prebuilds.
-
Click Create.
If the dev container configuration for the repository specifies permissions for accessing other repositories, you will be shown an authorization page. For more information on how this is specified in the
devcontainer.jsonfile, see Managing access to other repositories within your codespace.Click to view the details of the requested permissions.

Click Authorize and continue to grant these permissions for creation of prebuilds. Alternatively, you can click Continue without authorizing but, if you do so, codespaces created from the resulting prebuilds may not work properly.
Note
Users who create codespaces using this prebuild will also be asked to grant these permissions.


After you create a prebuild configuration it is listed on the GitHub Codespaces page of your repository settings. A GitHub Actions workflow is queued and then run to create prebuilds in the regions you specified, based on the branch and dev container configuration file you selected.

For information about editing and deleting prebuild configurations, see Managing prebuilds.
Configuring environment variables
To allow the prebuild process to access environment variables required to create your development environment, you can set these either as Codespaces repository secrets or as Codespaces organization secrets. Secrets that you create in this way will be accessible by anyone who creates a codespace from this repository. See Managing development environment secrets for your repository or organization.
Prebuilds cannot use any user-level secrets while building your environment, because these are not available until after the codespace has been created.
Configuring time-consuming tasks to be included in the prebuild
You can use the onCreateCommand and updateContentCommand commands in your devcontainer.json to include time-consuming processes as part of the prebuild creation. See the Visual Studio Code documentation, devcontainer.json reference.
onCreateCommand is run only once, when the prebuild is created, whereas updateContentCommand is run at creation of the prebuild and at subsequent updates to it. Incremental builds should be included in updateContentCommand since they represent the source of your project and need to be included for every prebuild update.