About external storage for GitHub Actions
GitHub Actions uses external blob storage to store data generated by workflow runs. Stored data includes workflow logs, caches, and user-uploaded build artifacts. For more information, see "Getting started with GitHub Actions for GitHub Enterprise Server."
There are two options for configuring GitHub Enterprise Server to connect to your external storage provider:
- OpenID Connect (OIDC)
- Traditional credentials-based authentication using secrets
We recommend using OIDC where possible, as you won't need create or manage sensitive and long-lived credential secrets for your storage provider, and risk them being exposed. After defining a trust with OIDC, your cloud storage provider automatically issues short-lived access tokens to your GitHub Enterprise Server instance, which automatically expire.
Prerequisites
Before enabling GitHub Actions, make sure you have completed the following steps:
-
Create your Azure storage account for storing workflow data. GitHub Actions stores its data as block blobs, and two storage account types are supported:
-
A general-purpose storage account (also known as
general-purpose v1orgeneral-purpose v2) using the standard performance tier.Warning: Using the premium performance tier with a general-purpose storage account is not supported. The standard performance tier must be selected when creating the storage account, and it cannot be changed later.
-
A BlockBlobStorage storage account, which uses the premium performance tier.
For more information on Azure storage account types and performance tiers, see the Azure documentation.
-
-
Review the hardware requirements for GitHub Actions. For more information, see "Getting started with GitHub Actions for GitHub Enterprise Server."
-
TLS must be configured for your GitHub Enterprise Server instance's domain. For more information, see "Configuring TLS."
Note: We strongly recommend that you configure TLS on GitHub Enterprise Server with a certificate signed by a trusted authority. Although a self-signed certificate can work, extra configuration is required for your self-hosted runners, and it is not recommended for production environments.
-
If you have an HTTP Proxy Server configured on your GitHub Enterprise Server instance:
-
You must add
.localhostand127.0.0.1to the HTTP Proxy Exclusion list. -
If your external storage location is not routable, then you must also add your external storage URL to the exclusion list.
For more information on changing your proxy settings, see "Configuring an outbound web proxy server."
-
If you are using OIDC for the connection to your storage provider, you must expose the following OIDC token service URLs on your GitHub Enterprise Server instance to the public internet:
https://HOSTNAME/_services/token/.well-known/openid-configuration
https://HOSTNAME/_services/token/.well-known/jwks
This ensures that the storage provider can contact your GitHub Enterprise Server instance for authentication.
Enabling GitHub Actions with Azure Blob storage using OIDC (recommended)
To configure GitHub Enterprise Server to use OIDC with an Azure storage account, you must first register a Microsoft Entra ID (previously known as Azure AD) application with OIDC credentials, then configure your storage account, and finally configure GitHub Enterprise Server to access the storage container using the Entra ID.
1. Register an Entra ID application
-
Log in to the Microsoft Entra admin center.
-
Register a new application in Entra ID. For more information, see Quickstart: Register an application with the Microsoft identity platform on Microsoft Learn.
-
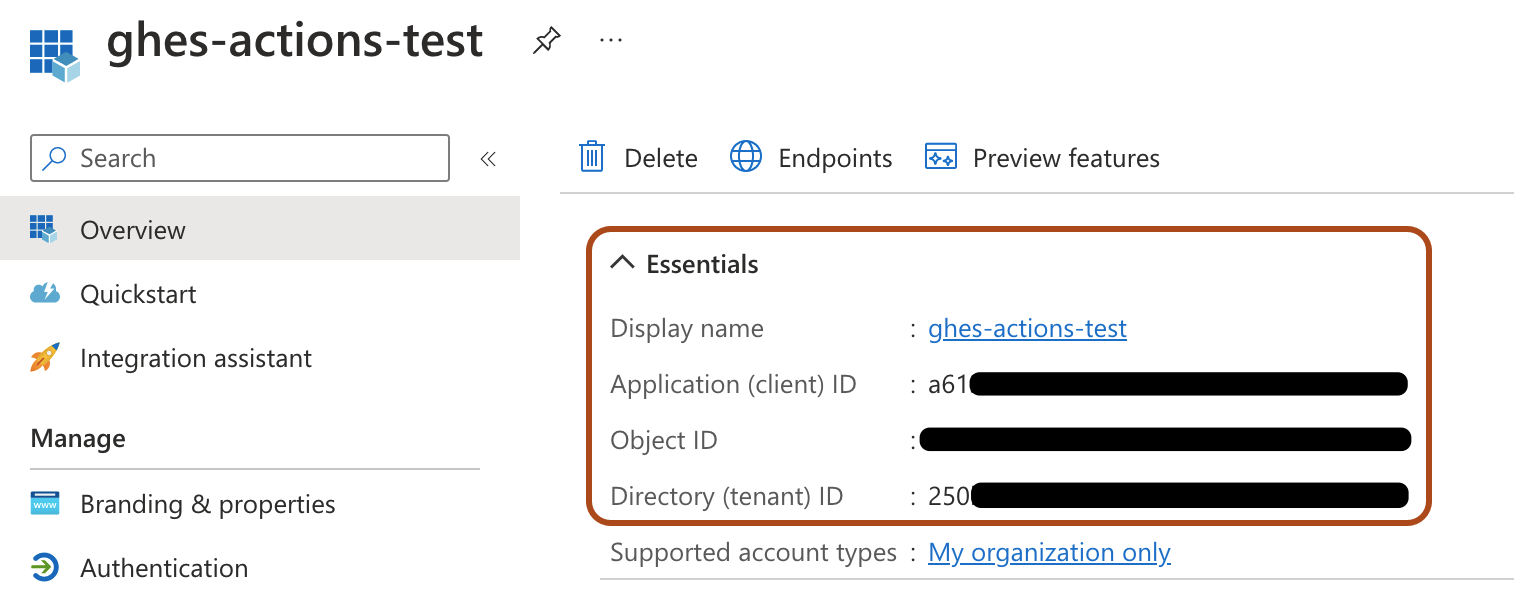
In your Entra ID application, under "Essentials", take note of the values for "Application (client) ID" and "Directory (tenant) ID". These values are used later.
-
In your Entra ID application, under "Manage", click Certificates & secrets, select the Federated credentials tab, then click Add credential.
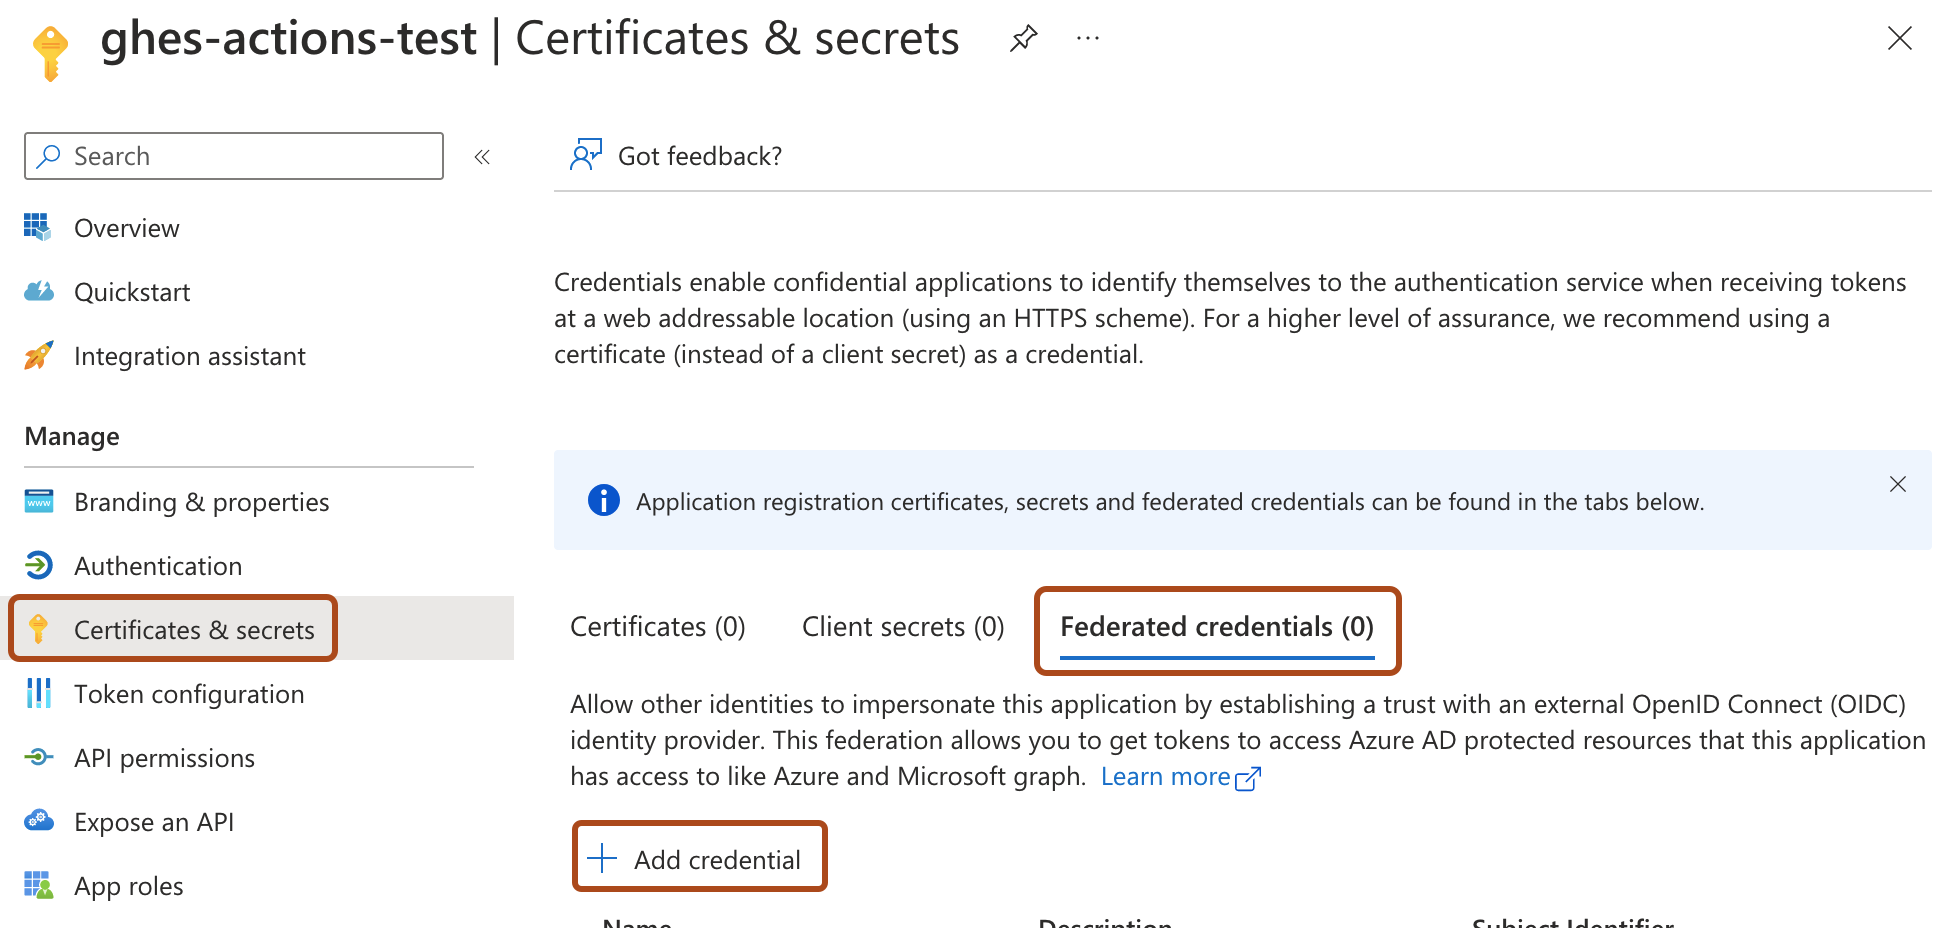
-
Enter the following details for the credential:
-
For "Federated credential scenario", select Other issuer.
-
For "Issuer", enter
https://HOSTNAME/_services/token, whereHOSTNAMEis the public hostname for your GitHub Enterprise Server instance. For example,https://my-ghes-host.example.com/_services/token. -
For "Subject identifier", enter the public hostname for your GitHub Enterprise Server instance. For example,
my-ghes-host.example.com.Note: The subject identifier must only have the hostname of your GitHub Enterprise Server instance, and must not include the protocol.
-
For "Name", enter a name for the credential.
-
Click Add.
-


2. Configure your storage account
-
In the Microsoft Azure portal, navigate to your storage account.
-
Click Access Control (IAM), then click Add, and select Add role assignment.
-
For the role, select "Storage Blob Data Owner", then click Next.
-
For members, click Select members, and then search for and select the name of the Entra ID application you created earlier. Click Select.
-
Click Review + assign, review the role assignment, then click Review + assign again.
-
In the left menu, under "Settings", click Endpoints.
-
Under "Blob service", take note of the value for "Blob service", specifically the blob endpoint suffix. This is the value after
https://<storageaccountname>.blob. It is typicallycore.windows.net, but might vary depending on your Azure region or account type.For example, if your blob service URL is
https://my-storage-account.blob.core.windows.net, the blob endpoint suffix iscore.windows.net.Note your storage account name and blob endpoint suffix, as these values are used later.
3. Configuring GitHub Enterprise Server to connect to Entra ID using OIDC
-
From an administrative account on GitHub Enterprise Server, in the upper-right corner of any page, click .
-
If you're not already on the "Site admin" page, in the upper-left corner, click Site admin.
-
In the " Site admin" sidebar, click Management Console.
-
In the "Settings"" sidebar, click Actions.
-
Under "GitHub Actions", select Enable GitHub Actions.
-
Under "Artifact & Log Storage", next to "Azure Blob Storage", click Setup.
-
Under "Authentication", select OpenID Connect (OIDC), and enter the values for your storage that you noted down in the previous procedures:
- Entra ID tenant ID
- Entra ID client ID
- Azure storage account name
- Azure blob endpoint suffix
-
Click the Test storage settings button to validate your storage settings.
If there are any errors validating the storage settings, check the settings with your storage provider and try again.
-
Under the "Settings" sidebar, click Save settings.
Note: Saving settings in the Management Console restarts system services, which could result in user-visible downtime.
-
Wait for the configuration run to complete.
Enabling GitHub Actions with Azure Blob storage using a connection string
-
From an administrative account on GitHub Enterprise Server, in the upper-right corner of any page, click .
-
If you're not already on the "Site admin" page, in the upper-left corner, click Site admin.
-
In the " Site admin" sidebar, click Management Console.
-
In the "Settings"" sidebar, click Actions.
-
Under "GitHub Actions", select Enable GitHub Actions.
-
Under "Artifact & Log Storage", next to "Azure Blob Storage", click Setup.
-
Under "Authentication", select Credentials-based, and enter your Azure storage account's connection string. For more information on getting the connection string for your storage account, see the Azure documentation.
-
Click the Test storage settings button to validate your storage settings.
If there are any errors validating the storage settings, check the settings with your storage provider and try again.
-
Under the "Settings" sidebar, click Save settings.
Note: Saving settings in the Management Console restarts system services, which could result in user-visible downtime.
-
Wait for the configuration run to complete.
Next steps
After the configuration run has successfully completed, GitHub Actions will be enabled on your GitHub Enterprise Server instance. For your next steps, such as managing GitHub Actions access permissions and adding self-hosted runners, return to "Getting started with GitHub Actions for GitHub Enterprise Server."