Getting access to GitHub Copilot
There are different ways to get access to Copilot.
| Type of user | How to get access to Copilot |
|---|---|
| Individual |
|
| Organization/Enterprise member |
|
About the GitHub Copilot extension in JetBrains IDEs
Installing the GitHub Copilot extension in JetBrains IDEs allows you to chat with Copilot in your IDE and receive coding suggestions from Copilot as you type.
To see instructions for other popular coding environments, use the tool switcher at the top of the page.
Version compatibility
For information about version compatibility of the GitHub Copilot extension in JetBrains IDEs, see GitHub Copilot Versions in the JetBrains Marketplace.
About the license for the GitHub Copilot plugin in JetBrains IDEs
GitHub, Inc. is the licensor of the JetBrains plugin. The end user license agreement for this plugin is the GitHub Terms for Additional Products and Features and use of this plugin is subject to those terms. JetBrains has no responsibility or liability in connection with the plugin or such agreement. By using the plugin, you agree to the foregoing terms.
Installing the GitHub Copilot plugin in your JetBrains IDE
The following procedure will guide you through installation of the GitHub Copilot plugin in IntelliJ IDEA. Steps to install the plugin in another supported IDE may differ.
-
Make sure you have access to GitHub Copilot. For information, see What is GitHub Copilot?.
-
Make sure you have a JetBrains IDE that is compatible with GitHub Copilot. GitHub Copilot is compatible with the following IDEs:
- IntelliJ IDEA (Ultimate, Community, Educational)
- Android Studio
- AppCode
- CLion
- Code With Me Guest
- DataGrip
- DataSpell
- GoLand
- JetBrains Client
- MPS
- PhpStorm
- PyCharm (Professional, Community, Educational)
- Rider
- RubyMine
- RustRover
- WebStorm
- Writerside
See the JetBrains IDEs tool finder to download.
-
Install the GitHub Copilot plugin for JetBrains. See GitHub Copilot plugin in the JetBrains Marketplace.
-
After GitHub Copilot is installed, click Restart IDE.
-
After your JetBrains IDE has restarted, click the Tools menu. Click GitHub Copilot, then click Login to GitHub.
Note
If you're using a Copilot subscription for a managed user account account on GHE.com, you'll need to update some settings before you sign in. See Using GitHub Copilot with an account on GHE.com.

-
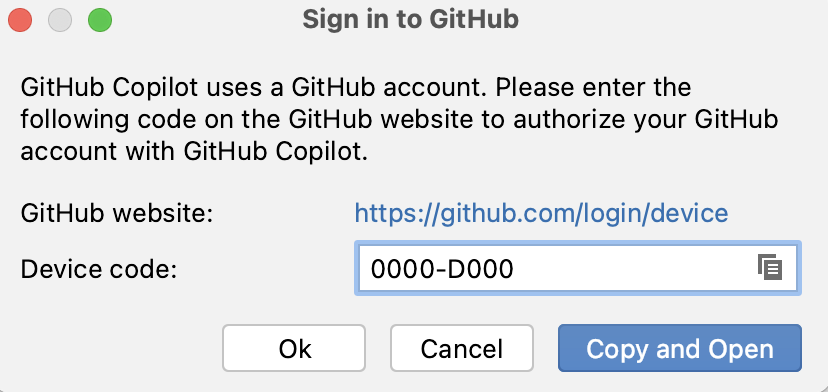
In the "Sign in to GitHub" dialog box, to copy the device code and open the device activation window, click Copy and Open.
-
A device activation window will open in your browser. Paste the device code, then click Continue.
-
GitHub will request the necessary permissions for GitHub Copilot. To approve these permissions, click Authorize GitHub Copilot Plugin.
-
After the permissions have been approved, your JetBrains IDE will show a confirmation. To begin using GitHub Copilot, click OK.


Next steps
- Get started with Copilot - Learn how to use Copilot in your preferred coding environment. See Getting code suggestions in your IDE with GitHub Copilot.