
Краткое руководство по спискам задач

Следуйте этому руководству, чтобы узнать, как создавать и изменять списки задач в пользовательском интерфейсе и с помощью Markdown.

Note: Tasklists are in private beta and subject to change. We have currently paused onboarding to the beta.

Introduction

This guide demonstrates how to use tasklists to split up a larger piece of work into multiple tasklists and multiple subtasks. You will learn how to create a tasklist using the UI, how to create a tasklist using Markdown, how to make changes to a tasklist, and how to integrate your new tasklists with a project.

To help demonstrate how tasklists can be used to divide work into smaller subtasks, this guide will follow a scenario where we need to create a landing page for a new feature. Feel free to follow this guide but incorporate your own scenario.

Prerequisites

As you follow this guide, you will create several issues in a repository. You will need a repository that you are able to create issues in.

Creating an issue to track the work of adding a new landing page

In this step, we will create the parent issue to track the subtasks required to publish the new landing page.

  1. Navigate to the repository where you want to track the work.
  2. Create a new blank issue with the title "Tracking issue for landing page." For more information, see "Creating an issue."

Creating the first tasklist

Tasklists are added to the opening comment of an issue (the issue description). Issues can contain multiple tasklists with different titles. This is a great way to categorize your subtasks.

  1. Go to the issue you just created. If you have not already done so, press Submit new issue.
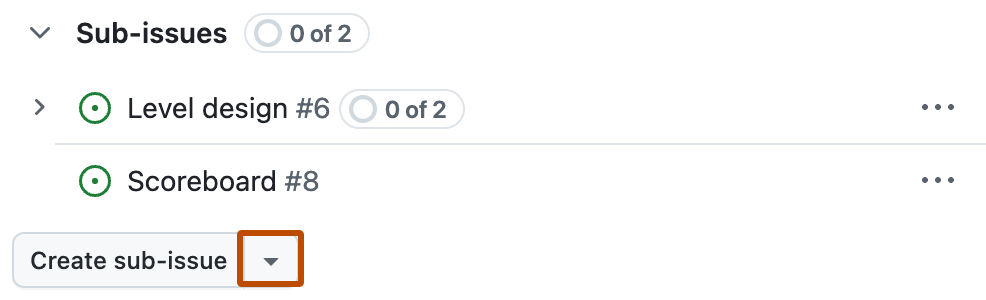
  2. At the bottom of the issue description, click Add tasklist.

Screenshot an issue. The "Add tasklist" button is highlighted with an orange outline.

This will insert an empty tasklist into your issue.

Adding draft tasks

Draft tasks are text items that are added to your tasklist. Draft tasks appear in your tasklist with a checkbox. You can use draft tasks to quickly sketch out the requirements and subtasks for your project and, optionally, later convert them into issues.

  1. If the text field is not already focused, click Add item to Tasks.

    Screenshot of a tasklist. The "Add item to Tasks" field is highlighted with an orange rectangle.

  2. Add some draft tasks to sketch out this work. Type your draft task and then press Enter after each one.

    For our example landing page scenario, you can add:

    • "Design new landing page"
    • "Create content for landing page"
    • "Translate content into supported languages"

Converting a draft task into an issue

You can convert your draft tasks into issues. You can convert draft tasks when you're ready to start work on a particular task. The issues are created in the same repository you have used for your tracking issue.

  1. Next to the "Design new landing page" draft task, click .

    Screenshot of a tasklist. To the right of a draft task, the tracking block item menu is outlined in orange.

  2. In the menu, click Convert to issue.

Assigning yourself to the new issue

You can now assign yourself to the new issue without leaving your tasklist.

  1. Next to the "Design new landing page" issue in your tasklist, click .

    Screenshot of a tasklist. To the right of a task, the tracking block item menu, which is labeled with a horizontal kebab icon, is outlined in dark orange.

  2. In the context menu, click Set assignees.

  3. In the list of people, select yourself.

You can also use this context menu to set labels and add an issue to a project.

Renaming a tasklist

You can change the title of a tasklist to better represent the tasks it is tracking. This is particularly useful when you have multiple tasklists in the same issue and want to segment your tasks.

  1. In the top-right of your tasklist, click .

    Screenshot of a tasklist. The tracking block item menu, which is labeled with a horizontal kebab icon, is outlined in dark orange.

  2. In the menu, click Rename.

  3. Type a new title for your tasklist and press Enter.

    For our example landing page scenario, you could rename this tasklist to "Landing page content."

Creating a second tasklist using Markdown

You can create multiple tasklists in a single issue. Each tasklist has its own tasks and title. You can add tasklists using the Add tasklist button or by entering Markdown when you edit the issue.

  1. At the top of the issue description (the opening comment), click .

    Screenshot of an issue containing a tasklist. The "Show options" button is highlighted with an orange rectangle.

  2. In the menu, click Edit.

  3. In the issue description, below your first tasklist, add the Markdown below:

    Markdown
    ```[tasklist]
    ### Tasks
    - [ ] Draft task
    ```
    
  4. To change the title of this tasklist, type a new title after ### . For example, change ### Tasks to ### Backend changes.

In the next two sections, we will make further changes to the Markdown before saving the comment.

Adding draft tasks using Markdown

You can quickly add new draft tasks by just typing them directly into your tasklist using Markdown.

  1. Add new draft tasks by create a new line after the last task, typing - [ ] and your new task. For example, - [ ] Sign-up form.
  2. Edit an existing draft task by modifying the text after - [ ]. For example, change - [ ] Draft task to - [ ] Database schema.

Adding existing issues using Markdown

You can also track existing issues by adding them to your tasklist. You can add existing issues using Markdown or in the UI by pasting the issue URL. You can add issues and pull requests from any repository you have access to.

  1. Start typing - [ ] on a new line and then paste the full URL of an issue. For example, - [ ] https://github.com/octo-org/octo-repo/issues/45
  2. Click Update comment.

Screenshot of an issue being edited. There are two tasklists present and the "Update comment" button is highlighted with an orange rectangle.

You will see your new second tasklist displayed beneath your first tasklist.

Tracking progress

Tasklists help you quickly see the status and progress of the tasks you have chosen to track.

  1. To the left of one of your draft tasks, select the checkbox to mark that task as done.
  2. Click on the issue that you previously converted from a draft.
  3. In the converted issue, at the bottom of the page, click Close issue.

When you return to your tasklist and refresh the page, you can see that the issue you just closed now has an icon indicating that is closed. At the top of the issue, below the title, the progress is indicated as "2 of 6 tasks."

Screenshot of an issue containing two tasklists. One issue is closed and one draft task is marked as completed. The progress information is highlighted with an orange rectangle.

Integrate with a project

The relationships you build in your tasklists are available in your projects. You can quickly see the progress made in each issue, browse through the subtasks, and setup views that use your tasklists.

  1. Navigate to a project that's owned by the same user or organization account that you have used for your tasklist and issues. If you don't have a project available, you can create one. For more information, see "Creating a project."

  2. Create a new view in your project using the table layout. For more information on views, see "Managing your views."

  3. Add one of the issues from your tasklists to your project. For more information on adding items to projects, see "Adding items to your project."

  4. Click next to the name of the currently open view.

    Screenshot showing the tabs at the top of a project. The view menu icon is highlighted with an orange outline.

  5. In the menu, click Group by and then select Tracked by. This creates a view where your issues are grouped by the issue that is tracking them.

Issues and pull requests are not automatically added to a project when they are added to a tasklist. When you group a view by the "Tracked by" field, GitHub Enterprise Cloud will prompt you add other issues associated with the tasklist.

  1. If there are issues in your tasklists that are not part of your project, you can click 1 item not in this project below the group.

Screenshot of a project in the table layout. At the bottom of a group, "1 item not in this project" is highlighted with an orange rectangle.

  1. In the list of issues, click on the issue you want to add. If you have multiple issues, you can choose to add all of them.

Conclusion

After following this guide, you have created a tracking issue with two tasklists, made changes to those tasklists in the UI and directly with Markdown, converted a draft task into an issue, and integrated your tasklist data with a project.

To learn more about managing the items in your tasklist, see "Managing tasks in a tasklist." For more information on integrating tasklists with your projects, see "Using projects and tasklists."