はじめに
Copilot を使用すると、コーディングに関する質問 (コーディングに最適な方法、バグの修正方法、他のユーザーのコードのしくみなど) に対する回答を取得できます。 Copilot でできることの詳細については、「GitHub Copilot とは何ですか?」を参照してください。
Copilot を使用する手順は、どこでそれを使用するかによって異なります。 このクイックスタートのバージョンは、GitHub 用です。 他の環境で Copilot を使用する手順については、上のタブをクリックしてください。
GitHub Copilot にサインアップする
Copilot を使うには、Copilot プランにアクセスできる個人用の GitHub アカウントが必要です。 次のことを実行できます。
- Copilot Free から始めて、プランをサブスクライブしないで限られた機能を調べます。
- Copilot Pro または Copilot Pro+ にアップグレードすると、さらに多くの機能、モデル、リクエストの制限のロックが解除されます。
GitHub Copilot のさまざまなプランの詳細については、「GitHub Copilot のプラン」を参照してください。
最初の質問をする
-
GitHub で、リポジトリに移動し、ファイルを開きます。
-
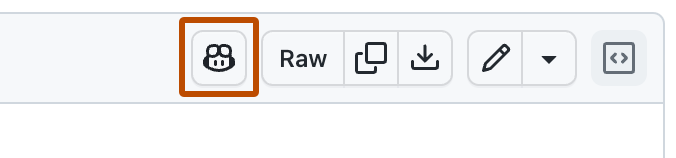
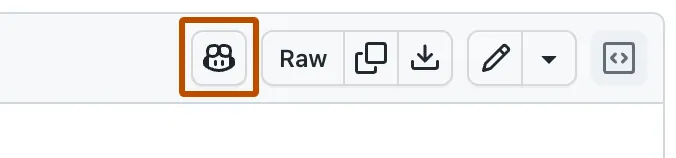
ファイル ビューの右上にある [Copilot] アイコン () をクリックします。
-
チャット パネルの下部にある [Copilot に質問する] ボックスに質問を入力し、Enter キーを押します。
たとえば、次のように入力できます。
Explain this file.How could I improve this code?How can I test this code?
Copilot は、パネル内のリクエストに応答します。
-
フォローアップの質問をして、会話を続けることができます。 たとえば、「tell me more」(もっと詳しく) と入力することで、Copilot を取得して最新のコメントを展開できます。
尋ねられるその他の質問
GitHub Copilot Chat in GitHub では、他にもさまざまなことができます。 次に例を示します。
- ソフトウェア開発に関する一般的な質問をする
- リポジトリについて探索的な質問をする
- ナレッジ ベースについて質問する
- pull request の変更について調べる
- 特定の問題やコミットに関する質問
詳しくは、「Asking GitHub Copilot questions in GitHub」をご覧ください。
次のステップ
- GitHub Copilot Chat の詳細については、「Asking GitHub Copilot questions in your IDE」を参照してください。
- IDE で Copilot コード補完候補を取得する - 「Getting code suggestions in your IDE with GitHub Copilot」を参照してください。
- 有効なプロンプトを記述する方法 - 「GitHub Copilot Chat のプロンプト エンジニアリング」を参照してください。
- モバイル デバイスで Copilot を使用する - 「Asking GitHub Copilot questions in GitHub Mobile」を参照してください。
- コマンド ラインで Copilot を使用する - 「コマンド ラインでの GitHub Copilot の使用」を参照してください。
GitHub Copilot では、エディターでの入力時にコーディングの提案が提供されます。 また、コーディングに最適な方法、バグの修正方法、他のユーザーのコードのしくみなど、Copilot コーディング関連の質問をすることもできます。 Copilot でできることの詳細については、「GitHub Copilot とは何ですか?」を参照してください。
Copilot を使用する手順は、どこでそれを使用するかによって異なります。 このクイックスタートのバージョンは、Windows Terminal 用です。 他の環境で Copilot を使用する手順については、上のタブをクリックしてください。
GitHub Copilot にサインアップする
Copilot を使うには、Copilot プランにアクセスできる個人用の GitHub アカウントが必要です。 次のことを実行できます。
- Copilot Free から始めて、プランをサブスクライブしないで限られた機能を調べます。
- Copilot Pro または Copilot Pro+ にアップグレードすると、さらに多くの機能、モデル、リクエストの制限のロックが解除されます。
GitHub Copilot のさまざまなプランの詳細については、「GitHub Copilot のプラン」を参照してください。
前提条件
- Windows Terminal Canary。 ターミナル チャットを使用できるのは、Windows Terminal Canary のみです。
ターミナル チャットで Copilot を使用する
Windows Terminal Canary をインストールしたら、ターミナル チャットで Copilot を使用して、コマンド ライン関連の質問をすることができます。
-
ドロップダウン メニューから [Settings] を開きます。
![[Settings] 項目が強調表示されている Windows Terminal のドロップダウン メニューのスクリーンショット。](/assets/cb-29558/images/help/copilot/windows-terminal-dropdown.png)
-
[Terminal Chat (Experimental)] の設定に移動します。
![[Terminal Chat (Experimental)] 項目が強調表示されている Windows Terminal の [Settings] メニューのスクリーンショット。](/assets/cb-49400/images/help/copilot/windows-terminal-settings.png)
-
[Service Providers] で、[GitHub Copilot] と [Authenticate via GitHub] を選択してサインインします。
![[Settings] 項目が強調表示されている Windows Terminal のドロップダウン メニューのスクリーンショット。](/assets/cb-29558/mw-1440/images/help/copilot/windows-terminal-dropdown.webp)
![[Terminal Chat (Experimental)] 項目が強調表示されている Windows Terminal の [Settings] メニューのスクリーンショット。](/assets/cb-49400/mw-1440/images/help/copilot/windows-terminal-settings.webp)
GitHub Copilot とチャットする
メモ
Organization を介して GitHub Copilot にアクセスできる場合、organization の所有者が GitHub Copilot in the CLI を無効にしていると、Windows Terminal で GitHub Copilot を使用することはできません。 「組織での Copilot のポリシーと機能の管理」をご覧ください。
-
ドロップダウン メニューで [Terminal Chat (Experimental)] を開きます。
-
ターミナル チャットのチャット ウィンドウで、「
how do i list all markdown files in my directory」を入力して、Enter キーを押します。Copilot の回答が質問の下に表示されます。
-
回答をクリックしてコマンド ラインに挿入します。
次のステップ
- Copilot コード補完の詳細を確認する - 「Getting code suggestions in your IDE with GitHub Copilot」を参照してください。
- GitHub Copilot Chat の詳細を確認する - 「Asking GitHub Copilot questions in your IDE」を参照してください。
- 有効なプロンプトを記述する方法 - 「GitHub Copilot Chat のプロンプト エンジニアリング」を参照してください。
- モバイル デバイスで Copilot を使用する - 「Asking GitHub Copilot questions in GitHub Mobile」を参照してください。
- コマンド ラインで Copilot を使用する - 「CLI での GitHub Copilot のカスタマイズ」を参照してください。
- エディターで Copilot を構成する - エディター内から GitHub Copilot を有効または無効にしたり、Copilot 用に独自の優先キーボード ショートカットを作成したりできます。 「Configuring GitHub Copilot in your environment」をご覧ください。
GitHub Copilot では、エディターでの入力時にコーディングの提案が提供されます。 また、コーディングに最適な方法、バグの修正方法、他のユーザーのコードのしくみなど、Copilot コーディング関連の質問をすることもできます。 Copilot でできることの詳細については、「GitHub Copilot とは何ですか?」を参照してください。
Copilot を使用する手順は、どこでそれを使用するかによって異なります。 このクイックスタートのバージョンは、Visual Studio Code 用です。 他の環境で Copilot を使用する手順については、上のタブをクリックしてください。
GitHub Copilot にサインアップする
Copilot を使うには、Copilot プランにアクセスできる個人用の GitHub アカウントが必要です。 次のことを実行できます。
- Copilot Free から始めて、プランをサブスクライブしないで限られた機能を調べます。
- Copilot Pro または Copilot Pro+ にアップグレードすると、さらに多くの機能、モデル、リクエストの制限のロックが解除されます。
GitHub Copilot のさまざまなプランの詳細については、「GitHub Copilot のプラン」を参照してください。
前提条件
- Visual Studio Code の最新バージョン。 Visual Studio Code のダウンロード ページを参照してください。
- Visual Studio Code での GitHub にサイン インします。 認証に issue が発生した場合は、「GitHub Copilot での一般的な問題のトラブルシューティング」を参照してください。
GitHub Copilot とチャットする
GitHub Copilot 拡張機能をインストールしたら、Copilot にコーディング関連の質問をすることができます。
メモ
Organization を介して GitHub Copilot にアクセスできる場合、organization 所有者 が会話を無効にしている場合、GitHub Copilot Chat を使用することはできません。 「組織での Copilot のポリシーと機能の管理」をご覧ください。
-
既存のコード ファイルを開く
-
アクティビティ バーからチャット ビューを開きます。

-
チャット ビューの下部にあるチャット入力フィールドに、次のように入力します:
explain this file。 -
Enter キーを押します。
Copilot はチャット ビューで応答します。
-
エディターで、コメントされていないコード行を 1 行以上選択します。
-
チャット入力フィールドに、次のように入力します:
add comments to these lines。 -
Copilot が提案するコメントが気に入ったら、提案されたコードをチャット ビューでホバーし、[カーソル位置に挿入] アイコンをクリックして、選択した行を候補のコードに置き換えます。
![チャット ビューの [カーソル位置に挿入] アイコンのスクリーンショット。](/assets/cb-107687/images/help/copilot/insert-at-cursor-vscode.png)

![チャット ビューの [カーソル位置に挿入] アイコンのスクリーンショット。](/assets/cb-107687/mw-1440/images/help/copilot/insert-at-cursor-vscode.webp)
最初のコード補完候補を取得する
次の例では JavaScript を使用しますが、他の言語も同様に動作します。 GitHub Copilot は、多数の言語とさまざまなフレームワークに対する候補を提示しますが、特に Python、JavaScript、TypeScript、Ruby、Go、C#、C++ に適しています。 GitHub Copilot は、データベースのクエリ生成や、API とフレームワークの候補の生成にも役立ちますし、コード開発としてインフラストラクチャを構築することもできます。
-
Visual Studio Code を開きます。
-
Visual Studio Code で、新しい JavaScript ( *.js) のファイルを作成します。
-
JavaScript ファイルで、次の関数ヘッダーを入力します。
JavaScript function calculateDaysBetweenDates(begin, end) {function calculateDaysBetweenDates(begin, end) {
GitHub Copilot によって、関数本体全体が灰色のテキストで自動的に提案されます。 実際に表示される候補はこのとおりではない場合があります。
- 候補を受け入れるには、Tab キーを押します。
次のステップ
- Copilot コード補完の詳細を確認する - 「Getting code suggestions in your IDE with GitHub Copilot」を参照してください。
- GitHub Copilot Chat の詳細を確認する - 「Asking GitHub Copilot questions in your IDE」を参照してください。
- 有効なプロンプトを記述する方法 - 「GitHub Copilot Chat のプロンプト エンジニアリング」を参照してください。
- プロのように Copilot を使用する - GitHub Copilot の有効なプロンプトを記述する方法について説明します。 詳細については、Visual Studio Code ドキュメントの「GitHub Copilot in VS Code を使うためのベスト プラクティス」を参照してください。
- 次の編集候補 について理解する - 「次の編集候補 について」を参照してください。
- モバイル デバイスで Copilot を使用する - 「Asking GitHub Copilot questions in GitHub Mobile」を参照してください。
- コマンド ラインで Copilot を使用する - 「CLI での GitHub Copilot のカスタマイズ」を参照してください。
- エディターで Copilot を構成する - エディター内から GitHub Copilot を有効または無効にしたり、Copilot 用に独自の優先キーボード ショートカットを作成したりできます。 「Configuring GitHub Copilot in your environment」をご覧ください。
GitHub Copilot では、エディターでの入力時にコーディングの提案が提供されます。 また、コーディングに最適な方法、バグの修正方法、他のユーザーのコードのしくみなど、Copilot コーディング関連の質問をすることもできます。 Copilot でできることの詳細については、「GitHub Copilot とは何ですか?」を参照してください。
Copilot を使用する手順は、どこでそれを使用するかによって異なります。 このクイックスタートのバージョンは、Visual Studio 用です。 他の環境で Copilot を使用する手順については、上のタブをクリックしてください。
GitHub Copilot にサインアップする
Copilot を使うには、Copilot プランにアクセスできる個人用の GitHub アカウントが必要です。 次のことを実行できます。
- Copilot Free から始めて、プランをサブスクライブしないで限られた機能を調べます。
- Copilot Pro または Copilot Pro+ にアップグレードすると、さらに多くの機能、モデル、リクエストの制限のロックが解除されます。
GitHub Copilot のさまざまなプランの詳細については、「GitHub Copilot のプラン」を参照してください。
前提条件
- 互換性のあるバージョンの Visual Studio です。 Visual Studio で GitHub Copilot を使うには、Windows 用の Visual Studio 2022 17.8 以降がインストールされている必要があります。 詳細については、Microsoft ドキュメントの「Visual Studio のインストール」を参照してください。
- Visual Studio Code の GitHub Copilot 拡張機能。 Copilot 拡張機能をインストールする方法については、Microsoft ドキュメントの「Visual Studio で GitHub Copilot をインストールする」を参照してください。
- GitHub アカウントを Visual Studio に追加します。 Microsoft ドキュメントの「Visual Studio のキーチェーンに GitHub アカウントを追加する」を参照してください。
GitHub Copilot とチャットする
GitHub Copilot 拡張機能をインストールしたら、Copilot にコーディング関連の質問をすることができます。
メモ
Organization を介して GitHub Copilot にアクセスできる場合、organization 所有者 が会話を無効にしている場合、GitHub Copilot Chat を使用することはできません。 「組織での Copilot のポリシーと機能の管理」をご覧ください。
-
既存のコード ファイルを開く
-
Visual Studio メニュー バーの [View] をクリックし、次に [GitHub Copilot Chat] をクリックします。
-
Copilot Chat ウィンドウで、
what does this file doと入力してから Enter キーを押します。Copilot の回答が質問の下に表示されます。
-
エディターでコード行を選択します。
-
Copilot Chat ウィンドウで、
explain this lineと入力してから Enter キーを押します。
最初のコード補完候補を取得する
次の例では JavaScript を使用しますが、他の言語も同様に動作します。 GitHub Copilot は、多数の言語とさまざまなフレームワークに対する候補を提示しますが、特に Python、JavaScript、TypeScript、Ruby、Go、C#、C++ に適しています。 GitHub Copilot は、データベースのクエリ生成や、API とフレームワークの候補の生成にも役立ちますし、コード開発としてインフラストラクチャを構築することもできます。
-
Visual Studio を開きます。
-
Visual Studio で、新しい JavaScript ( *.js) のファイルを作成します。
-
JavaScript ファイルで、次の関数ヘッダーを入力します。
JavaScript function calculateDaysBetweenDates(begin, end) {function calculateDaysBetweenDates(begin, end) {
GitHub Copilot によって、関数本体全体が灰色のテキストで自動的に提案されます。 実際に表示される候補はこのとおりではない場合があります。
- 候補を受け入れるには、Tab キーを押します。
次のステップ
- Copilot コード補完の詳細を確認する - 「Getting code suggestions in your IDE with GitHub Copilot」を参照してください。
- GitHub Copilot Chat の詳細を確認する - 「Asking GitHub Copilot questions in your IDE」を参照してください。
- 有効なプロンプトを記述する方法 - 「GitHub Copilot Chat のプロンプト エンジニアリング」を参照してください。
- プロのようなプロンプト - YouTube で「GitHub Copilot を使った Visual Studio のプロンプト エンジニアリング」をご覧ください。
- モバイル デバイスで Copilot を使用する - 「Asking GitHub Copilot questions in GitHub Mobile」を参照してください。
- コマンド ラインで Copilot を使用する - 「CLI での GitHub Copilot のカスタマイズ」を参照してください。
- エディターで Copilot を構成する - エディター内から GitHub Copilot を有効または無効にしたり、Copilot 用に独自の優先キーボード ショートカットを作成したりできます。 「Configuring GitHub Copilot in your environment」をご覧ください。
GitHub Copilot では、エディターでの入力時にコーディングの提案が提供されます。 また、コーディングに最適な方法、バグの修正方法、他のユーザーのコードのしくみなど、Copilot コーディング関連の質問をすることもできます。 Copilot でできることの詳細については、「GitHub Copilot とは何ですか?」を参照してください。
Copilot を使用する手順は、どこでそれを使用するかによって異なります。 このクイックスタートのバージョンは、JetBrains IDE 用です。 他の環境で Copilot を使用する手順については、上のタブをクリックしてください。
GitHub Copilot にサインアップする
Copilot を使うには、Copilot プランにアクセスできる個人用の GitHub アカウントが必要です。 次のことを実行できます。
- Copilot Free から始めて、プランをサブスクライブしないで限られた機能を調べます。
- Copilot Pro または Copilot Pro+ にアップグレードすると、さらに多くの機能、モデル、リクエストの制限のロックが解除されます。
GitHub Copilot のさまざまなプランの詳細については、「GitHub Copilot のプラン」を参照してください。
前提条件
- 互換性のある JetBrains IDE。 Copilot は、さまざまな JetBrains IDE でサポートされています。 完全な一覧については、「Asking GitHub Copilot questions in your IDE」を参照してください。
- GitHub Copilot 拡張機能の最新バージョン。 JetBrains Marketplace で「GitHub Copilot プラグイン」を確認してください。 インストール手順については、「環境への GitHub Copilot 拡張機能のインストール」を参照してください。
- JetBrains IDE で GitHub にサインインします。 認証手順については、「環境への GitHub Copilot 拡張機能のインストール」を参照してください。
GitHub Copilot とチャットする
GitHub Copilot プラグインをインストールしたら、Copilot にコーディング関連の質問をすることができます。
メモ
Organization を介して GitHub Copilot にアクセスできる場合、organization 所有者 が会話を無効にしている場合、GitHub Copilot Chat を使用することはできません。 「組織での Copilot のポリシーと機能の管理」をご覧ください。
-
既存のコード ファイルを開く
-
JetBrains IDE ウィンドウの右側にある Copilot Chat アイコンをクリックして、[Copilot Chat] ウィンドウを開きます。

-
Copilot Chat ウィンドウで、
what does this file doと入力してから Enter キーを押します。Copilot の回答が質問の下に表示されます。
-
エディターでコード行を選択します。
-
Copilot Chat ウィンドウで、
explain this lineと入力してから Enter キーを押します。
最初のコード補完候補を取得する
次の例では JavaScript を使用しますが、他の言語も同様に動作します。 GitHub Copilot は、多数の言語とさまざまなフレームワークに対する候補を提示しますが、特に Python、JavaScript、TypeScript、Ruby、Go、C#、C++ に適しています。 GitHub Copilot は、データベースのクエリ生成や、API とフレームワークの候補の生成にも役立ちますし、コード開発としてインフラストラクチャを構築することもできます。
-
JetBrains エディターで、新しい JavaScript ( *.js) のファイルを作成します。
-
JavaScript ファイルで、次の関数ヘッダーを入力します。
JavaScript function calculateDaysBetweenDates(begin, end) {function calculateDaysBetweenDates(begin, end) {
GitHub Copilot によって、関数本体全体が灰色のテキストで自動的に提案されます。 実際に表示される候補はこのとおりではない場合があります。
- 候補を受け入れるには、Tab キーを押します。
次のステップ
- Copilot コード補完の詳細を確認する - 「Getting code suggestions in your IDE with GitHub Copilot」を参照してください。
- GitHub Copilot Chat の詳細を確認する - 「Asking GitHub Copilot questions in your IDE」を参照してください。
- 有効なプロンプトを記述する方法 - 「GitHub Copilot Chat のプロンプト エンジニアリング」を参照してください。
- モバイル デバイスで Copilot を使用する - 「Asking GitHub Copilot questions in GitHub Mobile」を参照してください。
- コマンド ラインで Copilot を使用する - 「CLI での GitHub Copilot のカスタマイズ」を参照してください。
- エディターで Copilot を構成する - エディター内から GitHub Copilot を有効または無効にしたり、Copilot 用に独自の優先キーボード ショートカットを作成したりできます。 「Configuring GitHub Copilot in your environment」をご覧ください。