Note: Your site administrator must enable secret scanning for your GitHub Enterprise Server instance before you can use this feature. For more information, see "Configuring secret scanning for your appliance."
You may not be able to enable or disable secret scanning, if an enterprise owner has set a GitHub Advanced Security (GHAS) policy at the enterprise level. For more information, see "Enforcing policies for code security and analysis for your enterprise."
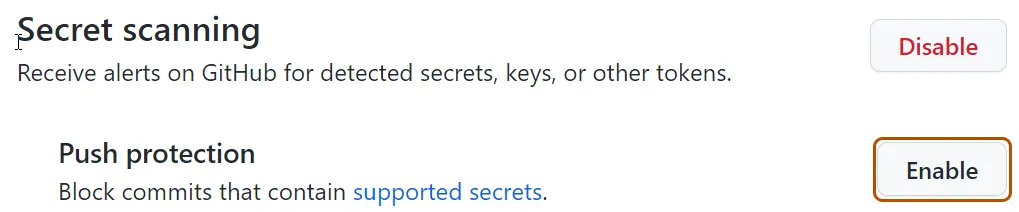
About push protection for repositories and organizations
Up to now, secret scanning checks for secrets after a push and alerts users to exposed secrets. When you enable push protection for your organization or repository, secret scanning also checks pushes for high-confidence secrets (those identified with a low false positive rate). Secret scanning lists any secrets it detects so the author can review the secrets and remove them or, if needed, allow those secrets to be pushed.
If a contributor bypasses a push protection block for a secret, GitHub:
- creates an alert in the Security tab of the repository in the state described in the table below.
- adds the bypass event to the audit log.
You can monitor security alerts to discover when users are bypassing push protections and creating alerts. For more information, see "Auditing security alerts."
This table shows the behavior of alerts for each way a user can bypass a push protection block.
| Bypass reason | Alert behavior |
|---|---|
| It's used in tests | GitHub creates a closed alert, resolved as "used in tests" |
| It's a false positive | GitHub creates a closed alert, resolved as "false positive" |
| I'll fix it later | GitHub creates an open alert |
For information on the secrets and service providers supported for push protection, see "Secret scanning patterns."
Enabling secret scanning as a push protection
For you to use secret scanning as a push protection in public repositories, the organization or repository needs to have secret scanning enabled. For more information, see "Managing security and analysis settings for your organization," "Managing security and analysis settings for your repository," and "About GitHub Advanced Security."
Organization owners, security managers, and repository administrators can also enable push protection for secret scanning via the API. For more information, see "Repositories" and expand the "Properties of the security_and_analysis object" section in the REST API documentation.
Note: When you fork a repository with secret scanning as a push protection enabled, this is not enabled by default on the fork. You can enable it on the fork the same way you enable it on a standalone repository.
Enabling secret scanning as a push protection for an organization
You can use the organization settings page for "Code security and analysis" to enable or disable secret scanning as a push protection for all existing repositories in an organization.
-
On your GitHub Enterprise Server instance, navigate to the main page of the organization.
-
Under your organization name, click Settings. If you cannot see the "Settings" tab, select the dropdown menu, then click Settings.

-
In the "Security" section of the sidebar, click Code security and analysis.
-
Under "Code security and analysis", find "GitHub Advanced Security."
-
Under "Secret scanning", under "Push protection", click Enable all.
-
Optionally, click "Automatically enable for repositories added to secret scanning."

For more information about enabling security features across an organization, see "Securing your organization."
Enabling secret scanning as a push protection for a repository
-
On your GitHub Enterprise Server instance, navigate to the main page of the repository.
-
Under your repository name, click Settings. If you cannot see the "Settings" tab, select the dropdown menu, then click Settings.

-
In the "Security" section of the sidebar, click Code security and analysis.
-
Under "Code security and analysis", find "GitHub Advanced Security."
-
Under "Secret scanning", under "Push protection", click Enable.


Using secret scanning as a push protection from the command line
When you attempt to push a supported secret to a repository or organization with secret scanning as a push protection enabled, GitHub will block the push. You can remove the secret from your branch or follow a provided URL to allow the push.
Up to five detected secrets will be displayed at a time on the command line. If a particular secret has already been detected in the repository and an alert already exists, GitHub will not block that secret.
If you confirm a secret is real, you need to remove the secret from your branch, from all the commits it appears in, before pushing again. For more information about remediating blocked secrets, see "Pushing a branch blocked by push protection."
If you confirm a secret is real and that you intend to fix it later, you should aim to remediate the secret as soon as possible. For example, you might revoke the secret and remove the secret from the repository's commit history. Real secrets that have been exposed must be revoked to avoid unauthorized access. You might consider first rotating the secret before revoking it. For more information, see "Removing sensitive data from a repository."
Notes:
- If your git configuration supports pushes to multiple branches, and not only to the current branch, your push may be blocked due to additional and unintended refs being pushed. For more information, see the
push.defaultoptions in the Git documentation. - If secret scanning upon a push times out, GitHub will still scan your commits for secrets after the push.
Allowing a blocked secret to be pushed
If GitHub blocks a secret that you believe is safe to push, you can allow the secret and specify the reason why it should be allowed.
When you allow a secret to be pushed, an alert is created in the Security tab. GitHub closes the alert and doesn't send a notification if you specify that the secret is a false positive or used only in tests. If you specify that the secret is real and that you will fix it later, GitHub keeps the security alert open and sends notifications to the author of the commit, as well as to repository administrators. For more information, see "Managing alerts from secret scanning."
- Visit the URL returned by GitHub when your push was blocked.
- Choose the option that best describes why you should be able to push the secret.
- If the secret is only used in tests and poses no threat, click It's used in tests.
- If the detected string is not a secret, click It's a false positive.
- If the secret is real but you intend to fix it later, click I'll fix it later.
- Click Allow me to push this secret.
- Reattempt the push on the command line within three hours. If you have not pushed within three hours, you will need to repeat this process.
Using secret scanning as a push protection from the web UI
When you use the web UI to attempt to commit a supported secret to a repository or organization with secret scanning as a push protection enabled, GitHub will block the commit.
You will see a dialog box with information about the secret's location, as well as options allowing you to push the secret. The secret will also be underlined in the file so you can easily find it.
GitHub will only display one detected secret at a time in the web UI. If a particular secret has already been detected in the repository and an alert already exists, GitHub will not block that secret.
You can remove the secret from the file using the web UI. Once you remove the secret, you will be able to commit your changes.
Bypassing push protection for a secret
If you confirm a secret is real, you need to remove the secret from your branch, from all the commits it appears in, before pushing again. For more information about remediating blocked secrets, see "Pushing a branch blocked by push protection."
If you confirm a secret is real and that you intend to fix it later, you should aim to remediate the secret as soon as possible. For more information, see "Removing sensitive data from a repository."
If GitHub blocks a secret that you believe is safe to push, you can allow the secret and specify the reason why it should be allowed.
When you allow a secret to be pushed, an alert is created in the Security tab. GitHub closes the alert and doesn't send a notification if you specify that the secret is a false positive or used only in tests. If you specify that the secret is real and that you will fix it later, GitHub keeps the security alert open and sends notifications to the author of the commit, as well as to repository administrators. For more information, see "Managing alerts from secret scanning."
- In dialog box that appeared when GitHub blocked your commit, review the name and location of the secret.
- Choose the option that best describes why you should be able to push the secret.
- If the secret is only used in tests and poses no threat, click It's used in tests.
- If the detected string is not a secret, click It's a false positive.
- If the secret is real but you intend to fix it later, click I'll fix it later.
- Click Allow secret.