Note
- Using GitHub Codespaces with JetBrains IDEs is currently in public preview and is subject to change.
- To work on a codespace in a JetBrains IDE you must use release 2023.3.* or 2024.1.* of the JetBrains Gateway.
About Codespaces in JetBrains IDEs
If you use a JetBrains IDE to work on your code, you can take advantage of working in a codespace. You do this by using the JetBrains Gateway application.
After installing the JetBrains Gateway, you can set JetBrains as your default editor for Codespaces. If you do, then whenever you open a codespace from GitHub, the JetBrains Gateway will launch to allow you to choose your JetBrains IDE and connect to the codespace.
When you work in a codespace, you use the JetBrains thin client application on your local computer. This provides the graphical interface for the full JetBrains IDE of your choice, which runs on the remote virtual machine that hosts your codespace. The thin client is always used, even if the full JetBrains IDE is installed locally. Any local JetBrains IDE settings are imported and used by the thin client.
Note
Only existing codespaces are available in the JetBrains Gateway. You can create codespaces in GitHub, or by using GitHub CLI. For more information, see Creating a codespace for a repository.
The JetBrains remote development connection process
The basic process behind using a codespace in your JetBrains IDE is as follows.
- In the JetBrains Gateway application you select one of your active or stopped codespaces.
- You then choose which JetBrains IDE you want to use.
- The selected JetBrains IDE is then downloaded to the remote virtual machine that hosts your codespace and source code.
- The JetBrains thin client application is then downloaded to your local machine and started.
- The client application connects to the full backend IDE.
- You can work on your code in the client application in just the same way you would in a local environment.
Prerequisites
To work in a codespace in a JetBrains IDE you need:
- A valid JetBrains license
- The JetBrains Gateway application, versions 2023.3.* or 2024.1.*
- An existing codespace running on a virtual machine that has at least 4 cores. The codespace must also be running an SSH server. For more information, see Codespace running an SSH server.
JetBrains license
You must have a JetBrains license that supports the IDE you choose in the JetBrains Gateway.
JetBrains Gateway
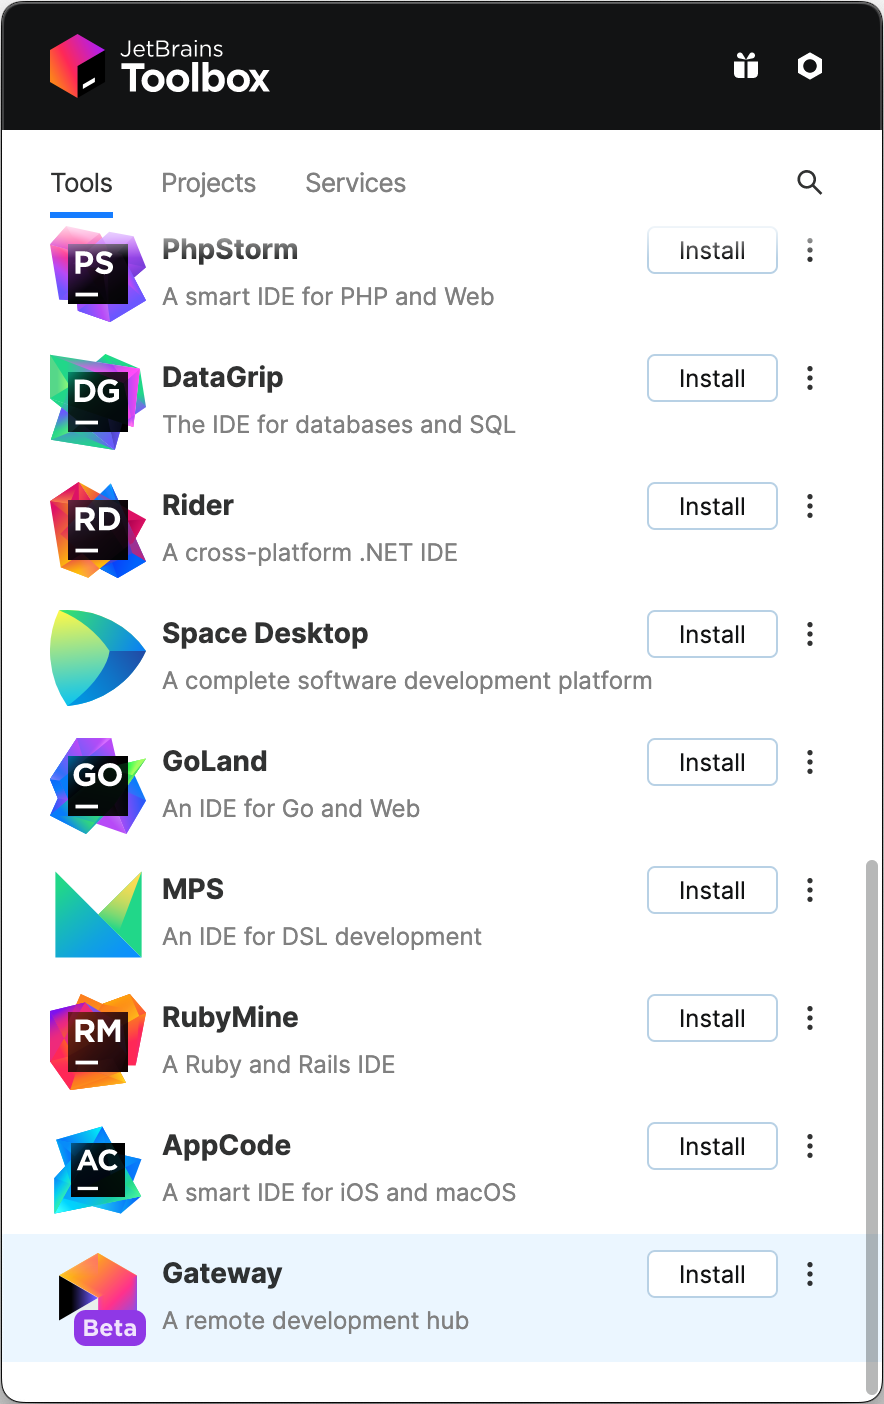
You can install and update the JetBrains Gateway from the JetBrains Toolbox application.
-
Download and install the JetBrains Toolbox.
-
Open the JetBrains Toolbox.
-
Find Gateway in the list of available tools.
-
To the right of Gateway, click the ellipsis (...), then click Available versions.
-
In the list of versions, beside a supported version (see Prerequisites), click Install.

Codespace running an SSH server
You must have an existing codespace to connect to, and the virtual machine that hosts the codespace must have at least 4 cores. You can create a codespace on GitHub, in Visual Studio Code, or by using GitHub CLI. For more information, see Creating a codespace for a repository.
The codespace you connect to must be running an SSH server. The default dev container image includes an SSH server, which is started automatically. If your codespaces are not created from the default image, you can install and start an SSH server by adding the following to the features object in your devcontainer.json file.
"features": {
    // ...
    "ghcr.io/devcontainers/features/sshd:1": {
        "version": "latest"
    },
    // ...
}
For more information about the devcontainer.json file and the default container image, see Introduction to dev containers.
Note
For help with connecting to your codespace over SSH, see Troubleshooting GitHub Codespaces clients.
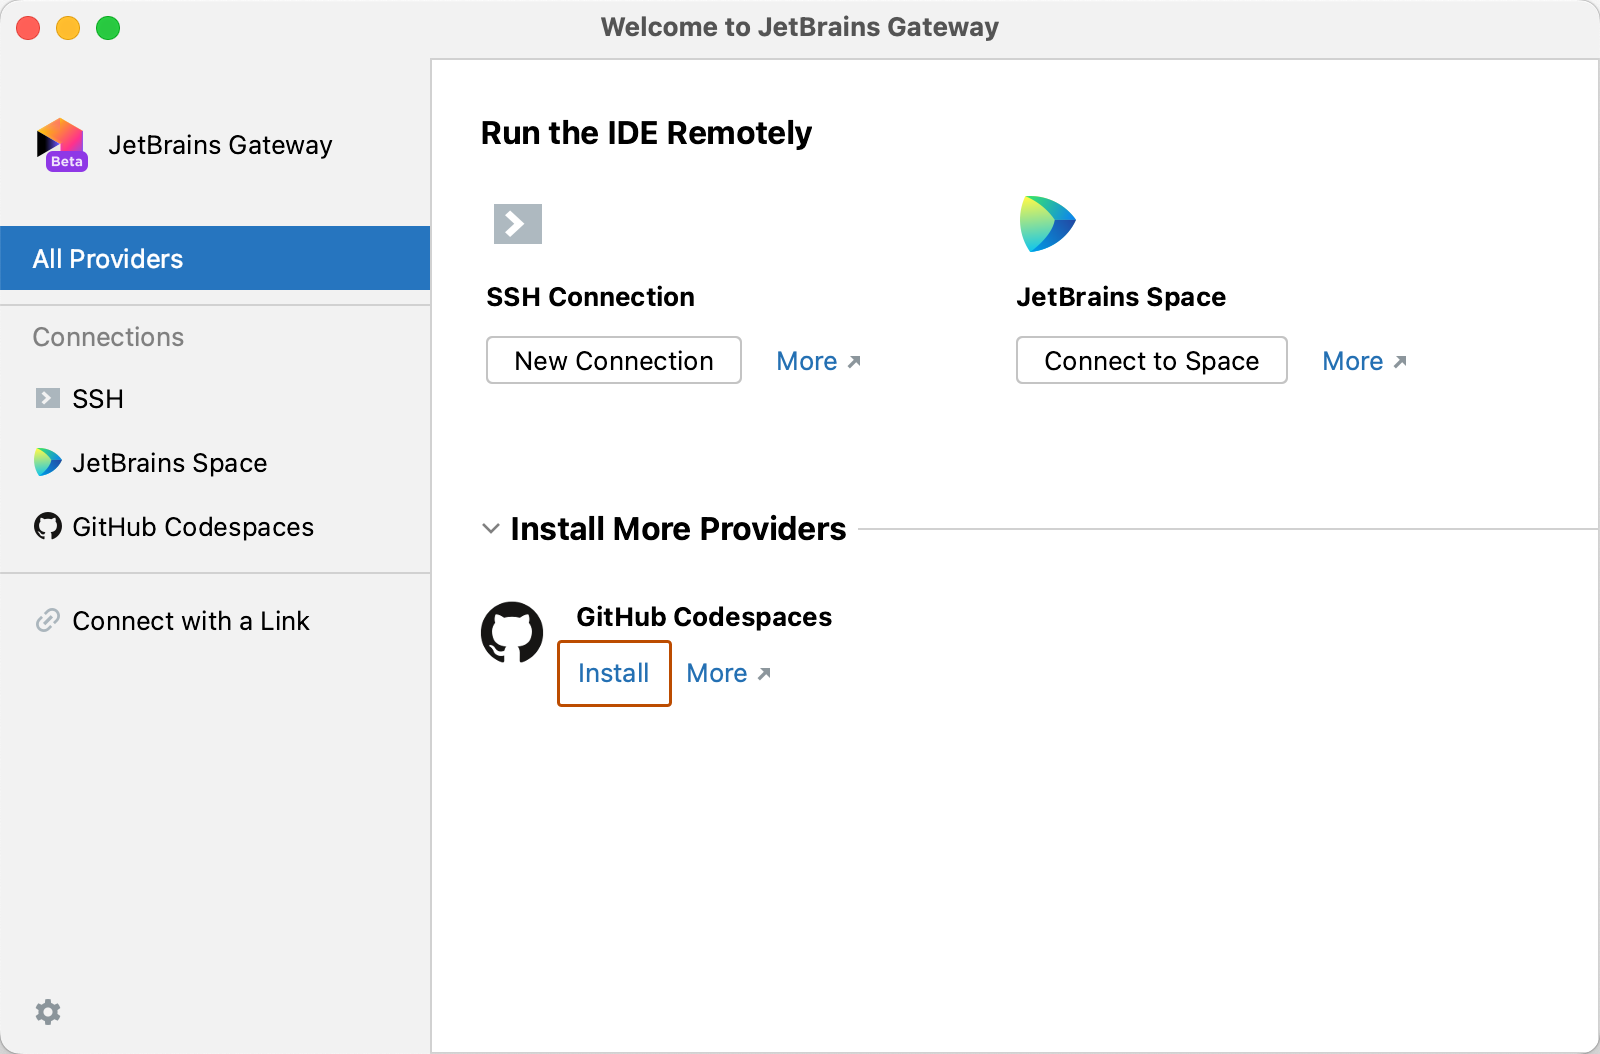
Setting up the JetBrains Gateway
The first time you use JetBrains Gateway for GitHub Codespaces, you must install the Codespaces plugin. You must also allow the JetBrains Gateway to access GitHub using your GitHub account.
-
Open the JetBrains Toolbox application.
-
In the list of installed tools, click Gateway.
-
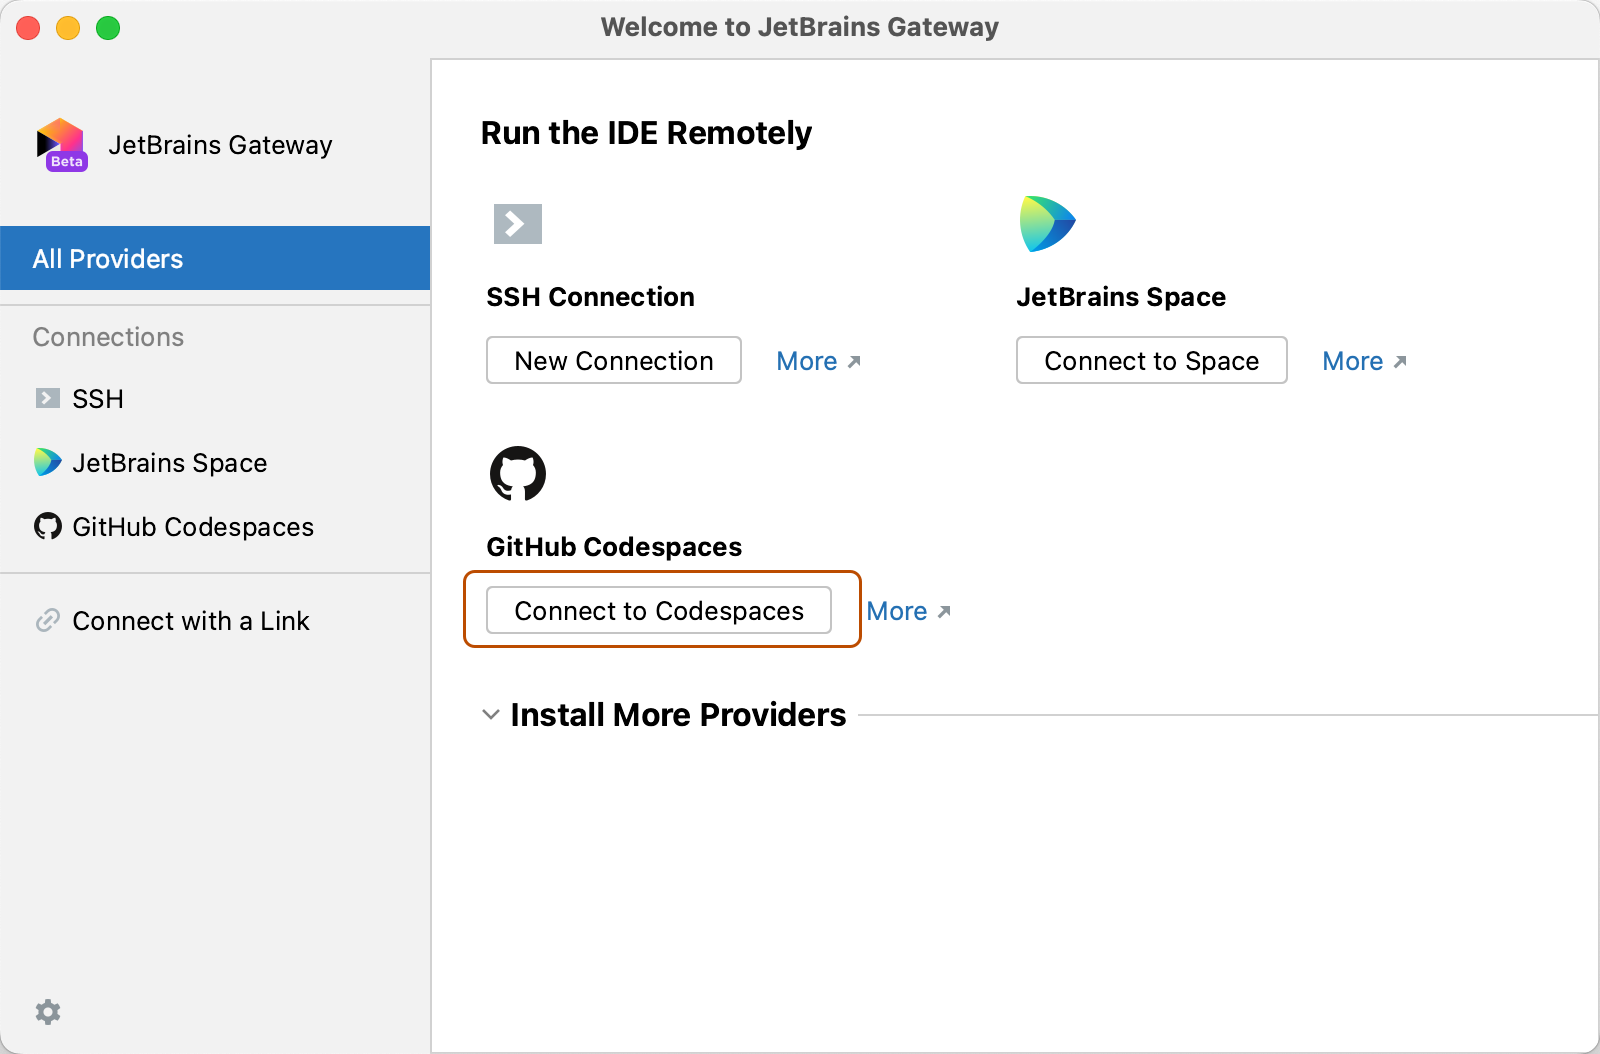
Under Install More Providers click the Install link for GitHub Codespaces.
-
Click Connect to Codespace.
-
The first time you connect, you're prompted to choose whether you want to allow GitHub to collect anonymized usage data, to improve functionality and user experience. Click Allow or Deny.
You can change your choice later, if required, in the settings for the GitHub Codespaces plugin, which you can access within the JetBrains Gateway settings.
-
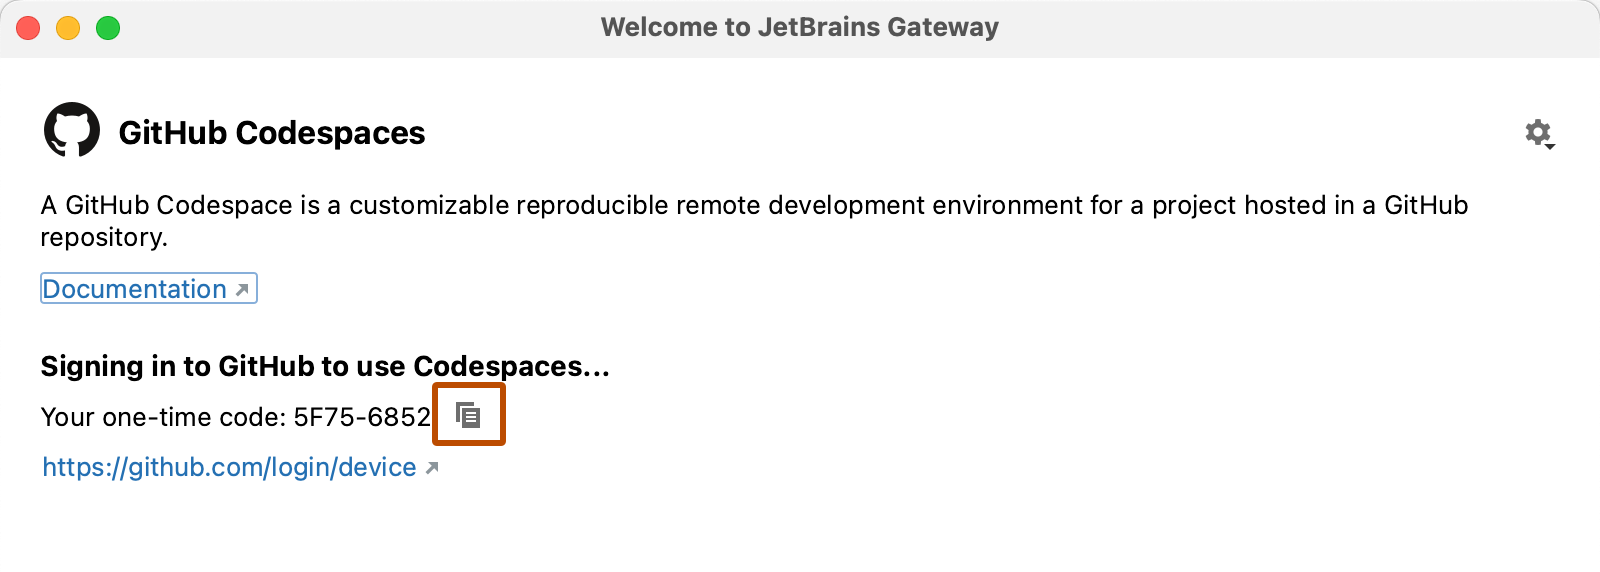
In the "Welcome to JetBrains Gateway" dialog, click Sign In with GitHub.
-
Click the icon beside the one-time code to copy it.
-
Click the login link, below the login code.
-
If you are not currently signed in to GitHub, the sign-in page is displayed.
- Enter your details and click Sign in.
- Verify your authentication, for example by entering a two-factor authentication code.
-
On the "Device activation" page, paste the copied code and click Continue.
-
If you belong to organizations, the "Single sign-on to your organizations" page is displayed. Click Authorize beside the organizations you want to authorize the JetBrains Gateway to access, then click Continue.
-
On the "Authorize GitHub Codespaces for JetBrains" page, click Authorize GitHub.
-
Return to the JetBrains Gateway application and open a codespace from the list of your currently active or stopped codespaces, see step 3 of the following procedure.


Opening a codespace in your JetBrains IDE
If you have set the JetBrains Gateway as your default editor, then the Gateway will launch automatically when you open a codespace from GitHub.
If the JetBrains Gateway is not your default editor, you can still open a codespace in JetBrains by going to the "Your codespaces" page at github.com/codespaces and clicking the ellipsis (...) to the right of the codespace you want to open. For more information, see "Opening an existing codespace."
Alternatively, you can also open the JetBrains Gateway and select an existing codespace, as described in the following procedure.
-
Open the JetBrains Gateway application.
-
Click Connect to Codespaces.
-
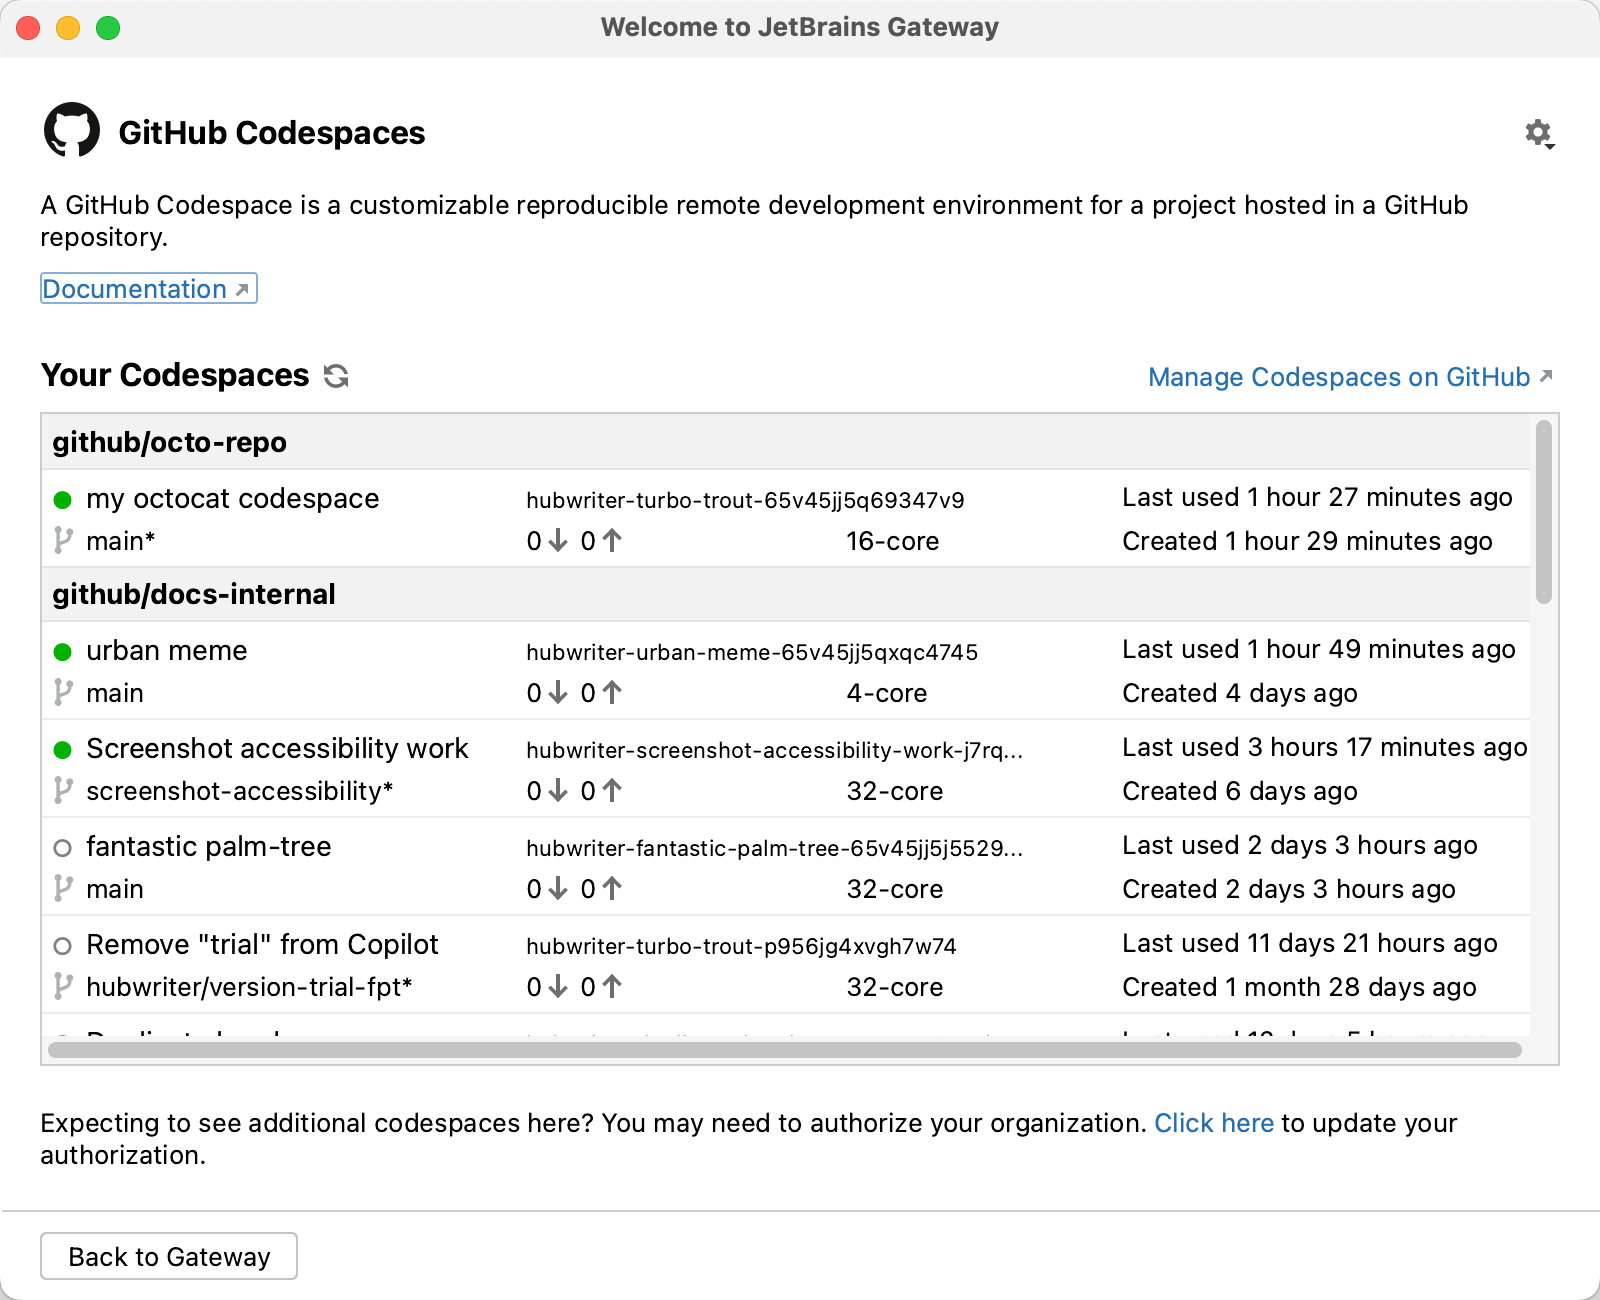
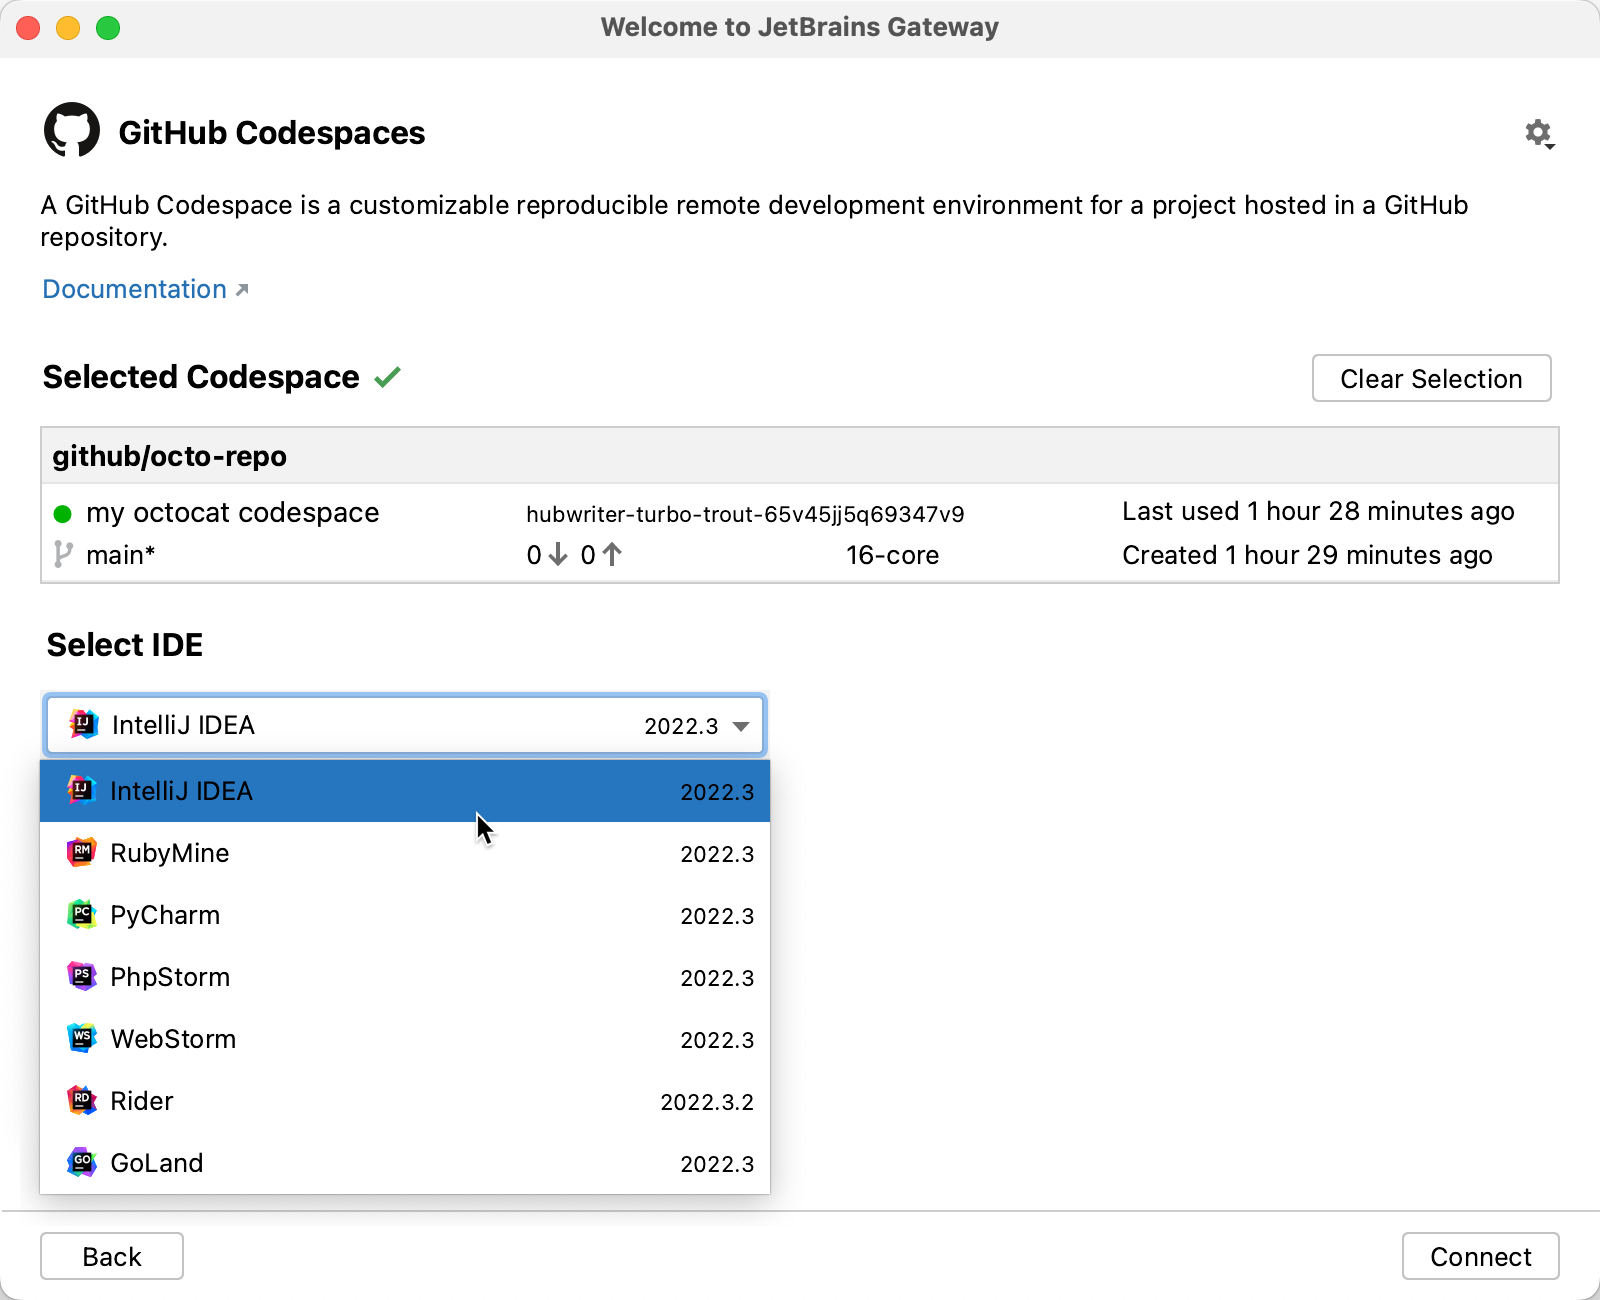
In the "Your Codespaces" list, click the codespace you want to work in.
-
In the "Available IDEs" list, click the JetBrains IDE you want to use. The Gateway will remember your choice the next time you connect to a codespace.
-
Click Connect.
Note
-
If you chose Rider as your JetBrains IDE and the repository contains multiple solution files, the "Set Solution Path" dialog is displayed prompting you to choose which solution you want to work in. Choose a solution file from the dropdown menu and click OK.
If the repository doesn't have a solution file, Rider opens in a basic project directory view and will have limited capabilities. For instance, you won't get .NET-specific code navigation. If there is just a single solution file in the repository it will be used automatically, without the prompt being displayed. For more information, see "Create and open projects and solutions" in the JetBrains documentation.
-
If you are running a firewall, then the first time you connect to a remote resource you may be prompted to allow the JetBrains Gateway to communicate across your network.
The first time you connect to a codespace, the backend IDE will be downloaded to the remote machine. This may take a few minutes. The next time you connect to the same codespace this step won't be necessary, making the connection process quicker.
The backend IDE is then started. Again, this step will not be required in future if you are reconnecting to a backend IDE that you have left running.
The client application is then launched.
-

