Note
Los detalles que agregues a tu perfil público serán visibles para todos los usuarios de GitHub, incluidos los usuarios de regiones en las que la legislación, normativa o normas culturales locales puedan poner en peligro la expresión de tu identidad. Respetamos la decisión de todos los usuarios sobre si compartir o no información sobre ellos mismos en su perfil de GitHub.
Cambiar tu imagen de perfil
Tu imagen de perfil ayuda a identificarte dentro de GitHub en solicitudes de cambios, comentarios, páginas de contribuciones y gráficos.
Cuando te registras para obtener una cuenta, GitHub te proporciona un "identicon" generado al azar. Tu identicon se genera a partir de un hash de tu identificador de usuario, por lo que no hay ninguna forma de controlar su color o patrón. Puedes reemplazar tu identicon con una imagen que te represente.
Note
- La imagen de perfil debe ser un archivo PNG, JPG o GIF, y debe tener menos de 1 MB de tamaño y ser inferior a 3000 × 3000 píxeles. Para mostrar la mejor calidad, recomendamos mantener la imagen en alrededor de 500 por 500 píxeles.
- Las fotos de perfil de Gravatar no son compatibles con Enterprise Managed Users.
Si usas Gravatar y la imagen de Gravatar está asociada al correo electrónico que utilizas para GitHub, la imagen se mostrará como imagen de perfil de GitHub de manera predeterminada (en lugar de un identicon). Para cambiar la imagen de perfil, puedes cargar una nueva imagen en Gravatar, o bien en GitHub, e invalidar la imagen de Gravatar.
Configurar una imagen de perfil
-
En la esquina superior derecha de cualquier página en GitHub, haga clic en la fotografía de perfil y luego en Configuración.
-
En "Imagen de perfil", selecciona Editar y, después, haz clic en Cargar una foto... .

-
Selecciona una imagen y, después, haz clic en Cargar.
-
Recorta tu imagen.
-
Haz clic en Establecer nueva imagen de perfil.

Restablecer tu imagen de perfil al identicon
-
En la esquina superior derecha de cualquier página en GitHub, haga clic en la fotografía de perfil y luego en Configuración.
-
En "Imagen de perfil", selecciona Editar y, después, haz clic en Quitar foto para revertir al identicon.
Si tu dirección de correo electrónico está asociada a un Gravatar, no puedes revertir a tu identicon. Haz clic en Revertir a Gravatar en su lugar.
Cambiar tu nombre de perfil
Puedes cambiar el nombre que se muestra en tu perfil. Este nombre también podría mostrarse junto a los comentarios que haces en los repositorios privados que pertenezcan a una organización. Para más información, consulta Administrar la visualización de los nombres de los miembros en tu organización.
Note
Si perteneces a una empresa con usuarios administrados, cualquier cambio en tu nombre de perfil debe hacerse a través de tu proveedor de identidades, en lugar de GitHub. Para más información, consulta Tipos de cuentas de GitHub.
- En la esquina superior derecha de cualquier página en GitHub, haga clic en la fotografía de perfil y luego en Configuración.
- En "Perfil público", en el campo "Nombre", escribe el nombre que quieras que se muestre en el perfil.
Agregar una biografía en tu perfil
Agrega una biografía a tu perfil para compartir información sobre ti con otros usuarios de GitHub. Con la ayuda de @mentions y un emoji, puedes incluir información sobre dónde trabajas actualmente o dónde trabajaste anteriormente, qué tipo de trabajo realizas o incluso qué tipo de café bebes.
Para encontrar un formato más largo y una forma más prominente de mostrar la información acerca de ti mismo, también puedes utilizar un README de perfil. Para más información, consulta Administrar el README de tu perfil.
Note
Si tienes habilitada la sección de resumen de la actividad para tu perfil y aplicas @mention a una organización de la que eres miembro en la biografía de tu perfil, entonces esa organización se presentará primero en tu resumen de actividad. Para más información, consulta Mostrar un resumen de tu actividad en tu perfil.
-
En la esquina superior derecha de cualquier página en GitHub, haga clic en la fotografía de perfil y luego en Configuración.
-
En "Perfil público", en el campo "Biografía", escribe el contenido que quieras que se muestre en el perfil. El campo biografía tiene un límite de 160 caracteres.
Tip
Cuando hace @mention a una organización, solo aquellas de las que es miembro se completarán automáticamente. También puedes hacer @mention a organizaciones de las que no eres miembro, como un antiguo empleador, pero el nombre de la organización no se completará automáticamente.
-
Haga clic en Update profile.
Adición de pronombres al perfil
Agrega pronombres al perfil de usuario público para compartir información sobre ti con otros usuarios de GitHub. Los pronombres solo serán visibles para los usuarios que han iniciado sesión en GitHub.
-
En la esquina superior derecha de cualquier página en GitHub, haga clic en la fotografía de perfil y luego en Configuración.
-
En Pronombres, agrega los pronombres que quieras mostrar en tu perfil. Puedes agregar pronombres personalizados.
-
Haga clic en Update profile.
Configuración de la ubicación y la zona horaria
Puedes establecer una ubicación y una zona horaria en el perfil para mostrar a otras personas tu hora local. Tu ubicación y zona horaria estarán visibles:
- En tu página de perfil
- Cuando alguien mantiene el puntero sobre tu nombre de usuario o avatar

Al visualizar el perfil, verás tu ubicación, la hora local y tu zona horaria en relación con la hora universal coordinada. Cuando otros usuarios visualicen tu perfil, verán tu ubicación, la hora local y la diferencia horaria en horas con respecto a su hora local.
- En la esquina superior derecha de cualquier página en GitHub, haga clic en la fotografía de perfil y luego en Configuración.
- En "Perfil público", en el campo "Ubicación", escribe la ubicación que quieras que se muestre en el perfil.
- Opcionalmente, muestra la hora local en el perfil.
- Selecciona Mostrar la hora local actual.
- Selecciona el menú desplegable Zona horaria y haz clic en la zona horaria local.
- Haga clic en Update profile.
Adición de vínculos a las cuentas de redes sociales
Puedes agregar hasta cuatro vínculos a cuentas de redes sociales en tu perfil. Estos son visibles para cualquiera que pueda ver tu perfil.
- En la esquina superior derecha de cualquier página en GitHub, haga clic en la fotografía de perfil y luego en Configuración.
- En "Cuentas sociales", en un campo "Vincular al perfil social" en blanco, escribe la dirección URL completa de la cuenta social. Por ejemplo, para la cuenta de Twitter
@GitHub, escribehttps://twitter.com/github. - Haga clic en Update profile.
Agregar un ORCID ID a su perfil
Si es investigador con un ORCID ID, puede identificarse agregando su ORCID ID a su perfil.
- En la esquina superior derecha de cualquier página en GitHub, haga clic en la fotografía de perfil y luego en Configuración.
- En “ORCID ID”, haga clic en Conectar su ORCID ID.
- Siga los pasos para iniciar sesión en la cuenta ORCID y, a continuación, volver a GitHub.
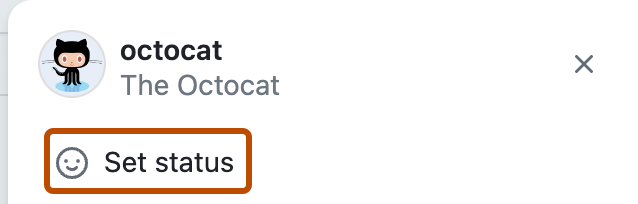
Configurar un estado
Puedes configurar un estado para mostrar información sobre tu disponibilidad actual. Tu estado se mostrará:
- En tu página de perfil
- Cuando alguien mantiene el puntero sobre tu nombre de usuario o avatar
- En una página de equipo en un equipo del cual eres un miembro. Para más información, consulta Acerca de los equipos.
- En el tablero de la organización en una organización de la cual eres miembro. Para más información, consulta Acerca del tablero de tu organización.
Cuando configuras tu estado, también puedes permitir que los demás sepan que tienes disponibilidad limitada.
Si seleccionas la opción "Ocupado", cuando los usuarios hagan @mention a tu nombre de usuario, te asignen una incidencia o solicitud de incorporación de cambios o te soliciten una revisión de ese tipo de solicitud, aparecerá una nota al lado de tu nombre de usuario que muestra que estás ocupado. También se te excluirá de la tarea de revisión automática para las solicitudes de cambio que se asignen a cualquier equipo al que pertenezcas. Para más información, consulta Administrar los ajustes de revisión de código para tu equipo.

-
En la esquina superior derecha de GitHub, seleccione la foto de su perfil y, después, haga clic en Establecer estado o, en caso de que ya haya configurado un estado, haga clic en su estado actual.
-
En el campo "Qué está sucediendo", escribe un mensaje de estado.
-
Opcionalmente, para establecer un estado de emoji, haz clic en y después en un emoji de la lista.
-
Como alternativa, si te gustaría compartir que tienes disponibilidad limitada, selecciona "Busy" (Ocupado).
-
Selecciona el menú desplegable Borrar estado y, después, haz clic en cuándo quieres que expire tu estado. Si no deseas seleccionar un vencimiento de estado, mantendrás tu estado hasta que lo borres o edites.
-
Selecciona el menú desplegable Visible para y, después, haz clic en quién quieres que vea el estado. Si no seleccionas una organización, tu estado será público.
-
Haz clic en Establecer estado.

Mostrar las insignias en tu perfil
Cuando participas en algunos programas, GitHub muestra automáticamente una insignia en tu perfil.
| Distintivo | Programa | Descripción |
|---|---|---|
| Miembro del programa de desarrolladores | Si eres un miembro registrado del Programa para desarrolladores de GitHub, al compilar una aplicación con la API de GitHub, obtendrás una insignia de Miembro del Programa para desarrolladores en tu perfil. Para obtener más información sobre el programa de desarrolladores de GitHub, consulta Desarrollador de GitHub. | |
| Pro | Si utilizas GitHub Pro obtendrás una insignia de PRO en tu perfil. Para más información sobre GitHub Pro, consulta Planes de GitHub. | |
| Cazador de recompensas por errores de seguridad | Si ayudaste a identificar vulnerabilidades de seguridad, obtendrás una insignia de Cazador de Recompensas por Errores de Seguridad en tu perfil. Para obtener más información sobre el programa de seguridad de GitHub, consulta Seguridad de GitHub. | |
| Experto del campus de GitHub | Si participas en el GitHub Campus Program, obtendrás una insignia de Experto del Campus de GitHub en tu perfil. Para obtener más información sobre el programa Expertos en campus, consulta Expertos en campus. | |
| Crédito de aviso de seguridad | Si se acepta un aviso de seguridad que has enviado a GitHub Advisory Database, obtendrás un distintivo de reconocimiento de aviso de seguridad en tu perfil. Para obtener más información sobre las asesorías de seguridad de GitHub, consulta "Asesorías de seguridad de GitHub". |
Obtención de logros
Los logros celebran eventos y acciones específicos que se producen en GitHub. Aparecerán como pequeños distintivos en la barra lateral de tu perfil. Al hacer clic o mantener el puntero sobre un logro, se mostrará una vista detallada que indica cómo se ha obtenido, con una breve descripción y vínculos a los eventos que contribuyeron a conseguirlo. Los vínculos de los eventos solo serán visibles para los usuarios que tengan acceso al repositorio u organización donde se produjo el evento. Los vínculos de los eventos serán inaccesibles para todos los usuarios sin acceso.
Para impedir que las contribuciones privadas cuenten para los logros, o bien para desactivar totalmente los logros, consulta Mostrar sus contribuciones privadas y logros en su perfil.
Note
Esta función está actualmente en versión preliminar pública y está sujeta a cambios.
Lista de repositorios aptos para el logro de colaborador de Helicóptero de Mars 2020
El logro de Mars 2020 Helicopter Contributor se dio a aquellos que habían creado una confirmación para uno de los repositorios enumerados a continuación. Este evento ya ha finalizado y la insignia ya no está disponible. Creamos la lista con base en la información que recibimos del Laboratorio de Propulsión a Chorro de la NASA.