Getting access to GitHub Copilot
There are different ways to get access to Copilot.
| Type of user | How to get access to Copilot |
|---|---|
| Individual |
|
| Organization |
|
About the GitHub Copilot extension in Azure Data Studio
Installing the GitHub Copilot extension in Azure Data Studio allows you to receive coding suggestions from Copilot as you type.
To see instructions for other popular coding environments, use the tool switcher at the top of the page.
Installing the GitHub Copilot extension in Azure Data Studio
-
Make sure you have access to GitHub Copilot. For information, see What is GitHub Copilot?.
-
Make sure you have a compatible version of Azure Data Studio. To use GitHub Copilot in Azure Data Studio, you must have Azure Data Studio version 1.44.0 or later installed. See the Azure Data Studio download page in the Azure Data Studio documentation.
-
Install the GitHub Copilot extension in Azure Data Studio. See Install the GitHub Copilot extension in the Microsoft documentation.
-
If a popup window in Azure Data Studio prompts you to sign in to use GitHub Copilot, click Sign in to GitHub and follow the instructions on screen.
- If you have previously authorized Azure Data Studio for your account on GitHub, GitHub Copilot will be automatically authorized.
- If you don't get the prompt to authorize, you can view notifications by clicking the bell icon in the bottom panel of the Azure Data Studio window.
-
If you are following the authorization steps, in your browser, GitHub will request the necessary permissions for GitHub Copilot. To approve these permissions, click Authorize Azure Data Studio.
About the GitHub Copilot extension in JetBrains IDEs
Installing the GitHub Copilot extension in JetBrains IDEs allows you to chat with Copilot in your IDE and receive coding suggestions from Copilot as you type.
To see instructions for other popular coding environments, use the tool switcher at the top of the page.
Version compatibility
For information about version compatibility of the GitHub Copilot extension in JetBrains IDEs, see GitHub Copilot Versions in the JetBrains Marketplace.
About the license for the GitHub Copilot plugin in JetBrains IDEs
GitHub, Inc. is the licensor of the JetBrains plugin. The end user license agreement for this plugin is the GitHub Terms for Additional Products and Features and use of this plugin is subject to those terms. JetBrains has no responsibility or liability in connection with the plugin or such agreement. By using the plugin, you agree to the foregoing terms.
Installing the GitHub Copilot plugin in your JetBrains IDE
The following procedure will guide you through installation of the GitHub Copilot plugin in IntelliJ IDEA. Steps to install the plugin in another supported IDE may differ.
-
Make sure you have access to GitHub Copilot. For information, see What is GitHub Copilot?.
-
Make sure you have a JetBrains IDE that is compatible with GitHub Copilot. GitHub Copilot is compatible with the following IDEs:
- IntelliJ IDEA (Ultimate, Community, Educational)
- Android Studio
- AppCode
- CLion
- Code With Me Guest
- DataGrip
- DataSpell
- GoLand
- JetBrains Client
- MPS
- PhpStorm
- PyCharm (Professional, Community, Educational)
- Rider
- RubyMine
- RustRover
- WebStorm
- Writerside
See the JetBrains IDEs tool finder to download.
-
Install the GitHub Copilot plugin for JetBrains. See GitHub Copilot plugin in the JetBrains Marketplace.
-
After GitHub Copilot is installed, click Restart IDE.
-
After your JetBrains IDE has restarted, click the Tools menu. Click GitHub Copilot, then click Login to GitHub.
Note
If you're using a Copilot subscription for a managed user account on GHE.com, you'll need to update some settings before you sign in. See Using GitHub Copilot with an account on GHE.com.

-
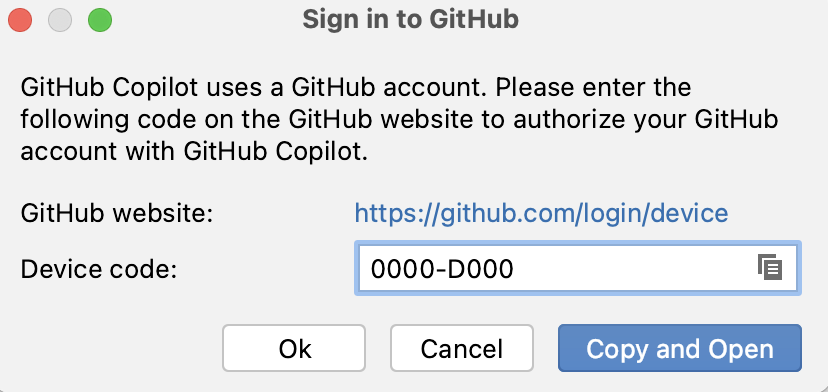
In the "Sign in to GitHub" dialog box, to copy the device code and open the device activation window, click Copy and Open.
-
A device activation window will open in your browser. Paste the device code, then click Continue.
-
GitHub will request the necessary permissions for GitHub Copilot. To approve these permissions, click Authorize GitHub Copilot Plugin.
-
After the permissions have been approved, your JetBrains IDE will show a confirmation. To begin using GitHub Copilot, click OK.


About the GitHub Copilot extension in Vim/Neovim
Installing the GitHub Copilot extension in Vim/Neovim allows you to receive coding suggestions from Copilot as you type.
To see instructions for other popular coding environments, use the tool switcher at the top of the page.
Installing the GitHub Copilot extension in Vim/Neovim
GitHub recommends that you install the GitHub Copilot plugin with Vim/Neovim's built-in plugin manager. Alternatively, you can use a plugin manager of your choice to install github/copilot.vim. For more information, see the copilot.vim repository.
-
Make sure you have access to GitHub Copilot. For information, see What is GitHub Copilot?.
-
Make sure you have a compatible version of Vim/Neovim installed. To use GitHub Copilot in Vim/Neovim you must have Vim version 9.0.0185 / Neovim version 0.6 or above and Node.js version 18 or above. See the Vim / Neovim documentation and the Node.js website.
-
Install GitHub Copilot using the built-in plugin manager:
-
For Neovim on macOS or Linux, run the following command in the terminal.
Shell git clone https://github.com/github/copilot.vim \ ~/.config/nvim/pack/github/start/copilot.vim
git clone https://github.com/github/copilot.vim \ ~/.config/nvim/pack/github/start/copilot.vim -
For Neovim on Windows, run the following command in Git Bash:
Shell git clone https://github.com/github/copilot.vim.git \ $HOME/AppData/Local/nvim/pack/github/start/copilot.vim
git clone https://github.com/github/copilot.vim.git \ $HOME/AppData/Local/nvim/pack/github/start/copilot.vim -
For Vim on macOS or Linux, run the following command in the terminal.
Shell git clone https://github.com/github/copilot.vim \ ~/.vim/pack/github/start/copilot.vim
git clone https://github.com/github/copilot.vim \ ~/.vim/pack/github/start/copilot.vim -
For Vim on Windows, run the following command in Git Bash:
Shell git clone https://github.com/github/copilot.vim.git \ $HOME/vimfiles/pack/github/start/copilot.vim
git clone https://github.com/github/copilot.vim.git \
$HOME/vimfiles/pack/github/start/copilot.vim
-
-
To configure GitHub Copilot, open Vim/Neovim and enter the following command.
Shell :Copilot setup
:Copilot setup -
Enable GitHub Copilot in your Vim/Neovim configuration, or with the Vim/Neovim command.
Shell :Copilot enable
:Copilot enable
About the GitHub Copilot extension in Visual Studio
Installing the GitHub Copilot extension in Visual Studio allows you to receive coding suggestions from Copilot as you type.
To see instructions for other popular coding environments, use the tool switcher at the top of the page.
Version compatibility
Starting from Visual Studio 2022 Version 17.10, the unified Copilot and GitHub Copilot Chat extension is included by default as a built-in component. For more information, see Install GitHub Copilot in Visual Studio in the Microsoft documentation.
Installing the GitHub Copilot extension in Visual Studio
-
Make sure you have access to GitHub Copilot. For information, see What is GitHub Copilot?.
-
Make sure you have a compatible version of Visual Studio installed. To use GitHub Copilot in Visual Studio, you must have version 2022 17.8 or later of Visual Studio for Windows installed. For more information, see Install Visual Studio in the Microsoft documentation.
-
Install the GitHub Copilot in Visual Studio See Install GitHub Copilot in Visual Studio in the Microsoft documentation.
-
After installing the GitHub Copilot extension, to enable GitHub Copilot, ensure you have added your GitHub account to Visual Studio. For more information, see Add your GitHub accounts to your Visual Studio keychain in the Microsoft documentation.
Note
If you're using a Copilot subscription for a managed user account on GHE.com, you'll need to update some settings before you sign in. See Using GitHub Copilot with an account on GHE.com.
About GitHub Copilot in Visual Studio Code
GitHub Copilot in Visual Studio Code allows you to receive coding suggestions from Copilot as you type. You also automatically get access to GitHub Copilot Chat, which allows you to chat with Copilot.
To see instructions for other popular coding environments, use the tool switcher at the top of the page.
Setting up GitHub Copilot in Visual Studio Code
When you set up GitHub Copilot in Visual Studio Code for the first time, the required extensions are installed automatically. You don't need to download or install them manually.
For detailed instructions, see Set up GitHub Copilot in Visual Studio Code in the Visual Studio Code documentation.
Note
If you're using a Copilot subscription for a managed user account on GHE.com, you'll need to update some settings before you sign in. See Using GitHub Copilot with an account on GHE.com.
About the GitHub Copilot extension for Xcode
Installing the GitHub Copilot extension for Xcode allows you to receive coding suggestions from Copilot as you type.
To see instructions for other popular coding environments, use the tool switcher at the top of the page.
Prerequisites
-
Access to Copilot. To use GitHub Copilot for Xcode, you need either an active Copilot subscription (such as Copilot Pro, Copilot Enterprise, or Copilot Business) or access through Copilot Free, which provides limited functionality. For information about how to get access to Copilot, see What is GitHub Copilot?.
-
Compatible versions of Xcode and macOS. To use GitHub Copilot for Xcode you must have Xcode version 8.0 or above and macOS Monterey (12.0) or above installed. See Xcode on the Apple Developer site.
Installing the GitHub Copilot extension for Xcode
- Make sure you have access to GitHub Copilot. For information, see About GitHub Copilot.
- Make sure you have a compatible version of Xcode installed. To use GitHub Copilot for Xcode you must have Xcode version 8.0 or above and macOS Monterey (12.0) or above. See Xcode on the Apple Developer site.
- Download the latest version of the GitHub Copilot for Xcode extension from the
github/CopilotForXcoderepository and install it. A background item will be added for the application to be able to start itself when Xcode starts.
Granting required permissions
Two permissions are required to be able to use the extension: "Accessibility" and "Xcode Source Editor Extension". You will be prompted to enable the "Accessibility" permission when you first start the extension.
The "Xcode Source Editor Extension" permission needs to be enabled manually.
- Open the GitHub Copilot extension application.
- Click Extension Permission and click Xcode Source Editor.
- Enable GitHub Copilot and click Done.
After granting the required permissions, restart Xcode. You will see a new item in the "Editor" menu called "GitHub Copilot".
Signing in to GitHub Copilot
Before you can use the GitHub Copilot extension for Xcode, you need to authorize the extension to access your GitHub account.
Note
If you're using a Copilot subscription for a managed user account on GHE.com, you'll need to update some settings before you sign in. See Using GitHub Copilot with an account on GHE.com.
- Open the GitHub Copilot extension application.
- Click Login to GitHub and follow the prompts to authorize the extension.
About GitHub Copilot in Eclipse
Installing GitHub Copilot in Eclipse allows you to receive coding suggestions from Copilot as you type. You also automatically get access to GitHub Copilot Chat, which allows you to chat with Copilot.
Note
GitHub Copilot Chat in Eclipse is in public preview and subject to change.
To see instructions for other popular coding environments, use the tool switcher at the top of the page.
Prerequisites
- Access to Copilot. To use GitHub Copilot in Eclipse, you must have an active GitHub Copilot subscription. For information about how to get access to Copilot, see What is GitHub Copilot?.
- Compatible version of Eclipse. To use the GitHub Copilot extension, you must have Eclipse version 2024-09 or above. See the Eclipse download page.
Installing GitHub Copilot in Eclipse
-
Download and install the latest version of GitHub Copilot in the Eclipse Marketplace.
-
After the extension is installed, restart Eclipse to apply the changes.
-
In the bottom right corner of the Eclipse workbench, click Copilot, then click Sign In to GitHub.
-
In the "Sign In to GitHub" dialog box, to copy the device code and open the device activation window, click Copy Code and Open.
-
A device activation window will open in your browser. Paste the device code, then click Continue.
-
GitHub will request the necessary permissions for GitHub Copilot. To approve these permissions, click Authorize GitHub Copilot Plugin.
-
After the permissions have been approved, Eclipse will show a confirmation. To begin using GitHub Copilot, click OK.
Next steps
- Get started with Copilot - Learn how to use Copilot in your preferred coding environment. See Getting code suggestions in your IDE with GitHub Copilot.