Note: Organization owners can restrict the publication of GitHub Pages sites from repositories owned by the organization. For more information, see "Managing the publication of GitHub Pages sites for your organization."
Creating a repository for your site
You can either create a repository or choose an existing repository for your site.
If you want to create a GitHub Pages site for a repository where not all of the files in the repository are related to the site, you will be able to configure a publishing source for your site. For example, you can have a dedicated branch and folder to hold your site source files, or you can use a custom GitHub Actions workflow to build and deploy your site source files. To use GitHub Actions as a publishing source for GitHub Pages, a site administrator must enable GitHub Actions for your GitHub Enterprise Server instance. For more information, see "Enabling GitHub Actions for GitHub Enterprise Server."
If you want to create a site in an existing repository, skip to the "Creating your site" section.
-
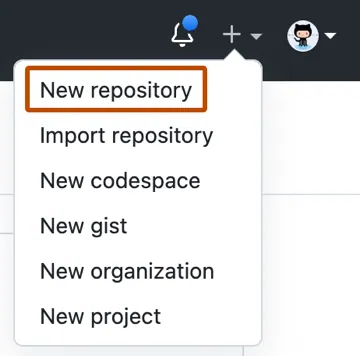
In the upper-right corner of any page, select , then click New repository.

-
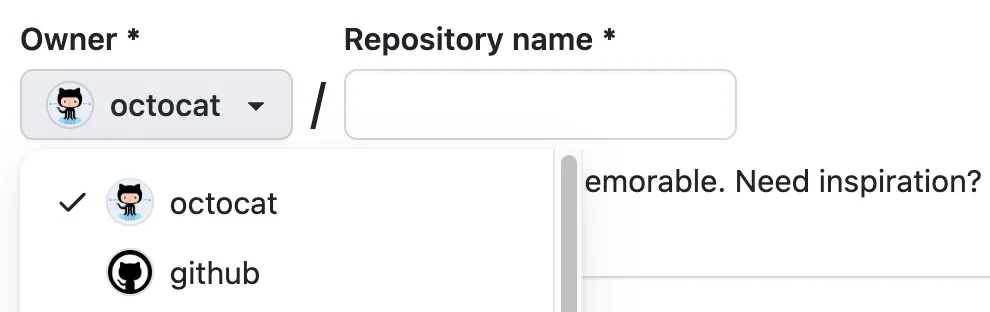
Use the Owner dropdown menu to select the account you want to own the repository.

-
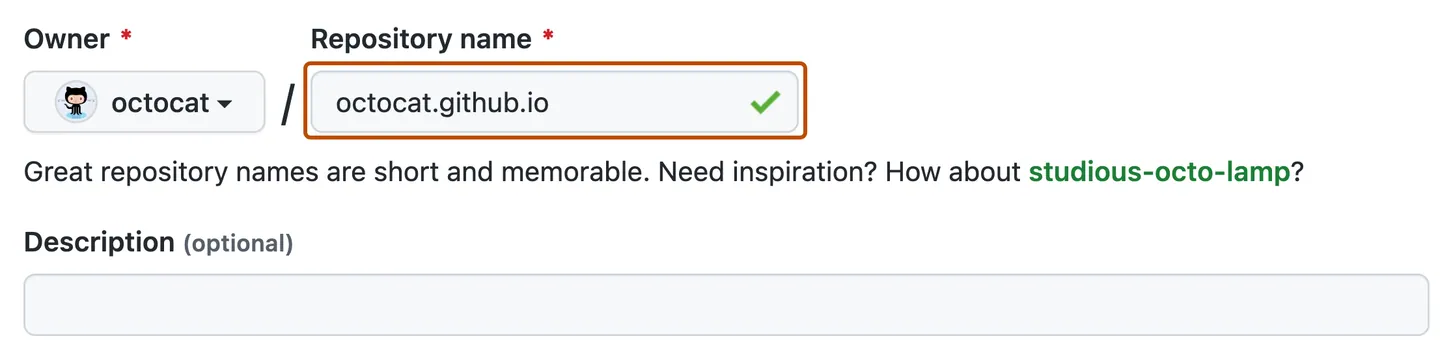
Type a name for your repository and an optional description. If you're creating a user or organization site, your repository must be named
<user>.github.ioor<organization>.github.io. If your user or organization name contains uppercase letters, you must lowercase the letters. For more information, see "About GitHub Pages."
-
Choose a repository visibility. For more information, see "About repositories."
-
Select Initialize this repository with a README.
-
Click Create repository.
Creating your site
Before you can create your site, you must have a repository for your site on GitHub Enterprise Server. If you're not creating your site in an existing repository, see "Creating a repository for your site."
Warning: If your site administrator has enabled Public Pages, GitHub Pages sites are publicly available on the internet, even if the repository for the site is private or internal. If you have sensitive data in your site's repository, you may want to remove the data before publishing. For more information, see "Configuring GitHub Pages for your enterprise" and "About repositories."
-
On GitHub Enterprise Server, navigate to your site's repository.
-
Decide which publishing source you want to use. For more information, see "Configuring a publishing source for your GitHub Pages site."
-
Create the entry file for your site. GitHub Pages will look for an
index.html,index.md, orREADME.mdfile as the entry file for your site.If your publishing source is a branch and folder, the entry file must be at the top level of the source folder on the source branch. For example, if your publishing source is the
/docsfolder on themainbranch, your entry file must be located in the/docsfolder on a branch calledmain.If your publishing source is a GitHub Actions workflow, the artifact that you deploy must include the entry file at the top level of the artifact. Instead of adding the entry file to your repository, you may choose to have your GitHub Actions workflow generate your entry file when the workflow runs.
-
Configure your publishing source. For more information, see "Configuring a publishing source for your GitHub Pages site."
-
Under your repository name, click Settings. If you cannot see the "Settings" tab, select the dropdown menu, then click Settings.

-
In the "Code and automation" section of the sidebar, click Pages.
-
To see your published site, under "GitHub Pages", click Visit site.

Note: It can take up to 10 minutes for changes to your site to publish after you push the changes to GitHub Enterprise Server. If you don't see your GitHub Pages site changes reflected in your browser after an hour, see "About Jekyll build errors for GitHub Pages sites."


Notes:
-
If you are publishing from a branch and your site has not published automatically, make sure someone with admin permissions and a verified email address has pushed to the publishing source.
-
Commits pushed by a GitHub Actions workflow that uses the
GITHUB_TOKENdo not trigger a GitHub Pages build.
Next steps
You can add more pages to your site by creating more new files. Each file will be available on your site in the same directory structure as your publishing source. For example, if the publishing source for your project site is the gh-pages branch, and you create a new file called /about/contact-us.md on the gh-pages branch, the file will be available at http(s)://<hostname>/pages/<username>/<repository>/about/contact-us.html.
You can also add a theme to customize your site’s look and feel. For more information, see "Adding a theme to your GitHub Pages site using Jekyll".
To customize your site even more, you can use Jekyll, a static site generator with built-in support for GitHub Pages. For more information, see "About GitHub Pages and Jekyll".