-
On GitHub Enterprise Server, navigate to your site's repository.
-
Navigate to the publishing source for your site. For more information, see "Configuring a publishing source for your GitHub Pages site."
-
Above the list of files, using the Add file drop-down, click Create new file.
-
In the file name field, type
404.htmlor404.md. -
If you named your file
404.md, add the following YAML front matter to the beginning of the file:--- permalink: /404.html --- -
Below the YAML front matter, if present, add the content you want to display on your 404 page.
-
In the "Commit message" field, type a short, meaningful commit message that describes the change you made to the file. You can attribute the commit to more than one author in the commit message. For more information, see "Creating a commit with multiple authors."
-
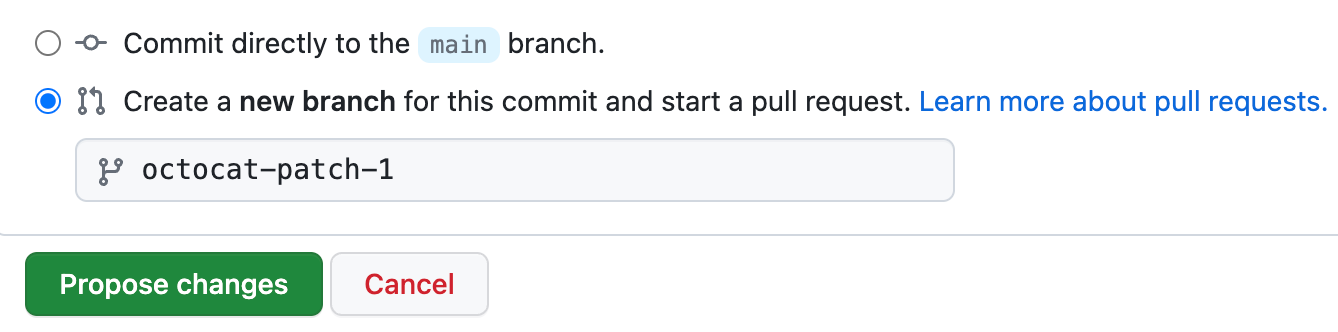
Below the commit message fields, decide whether to add your commit to the current branch or to a new branch. If your current branch is the default branch, you should choose to create a new branch for your commit and then create a pull request. For more information, see "Creating a pull request."
-
Click Commit changes or Propose changes.

Further reading
- Front matter in the Jekyll documentation