About push protection for repositories and organizations
So far, secret scanning checks for secrets after a push and alerts users to exposed secrets. When you enable push protection for your organization or repository, secret scanning also checks pushes for supported secrets. Secret scanning lists any secrets it detects so the author can review the secrets and remove them or, if permitted, allow those secrets to be pushed. Secret scanning can also check pushes for custom patterns. For more information, see "Defining custom patterns for secret scanning."
If a contributor bypasses a push protection block for a secret, GitHub:
- Creates an alert in the Security tab of the repository.
- Adds the bypass event to the audit log.
- Sends an email alert to organization or personal account owners, security managers, and repository administrators who are watching the repository, with a link to the secret and the reason why it was allowed.
This table shows the behavior of alerts for each way a user can bypass a push protection block.
| Bypass reason | Alert behavior |
|---|---|
| It's used in tests | GitHub creates a closed alert, resolved as "used in tests" |
| It's a false positive | GitHub creates a closed alert, resolved as "false positive" |
| I'll fix it later | GitHub creates an open alert |
By default, anyone with write access to the repository can choose to bypass push protection by specifying one of the bypass reasons outlined in the table. If you want greater control over which contributors can bypass push protection and which pushes containing secrets should be allowed, you can enable delegated bypass for push protection. Delegated bypass lets you configure a designated group of reviewers to oversee and manage requests to bypass push protection from contributors pushing to the repository. For more information, see "Enabling delegated bypass for push protection."
On the secret scanning alerts page for a repository or organization, you can apply the bypassed:true filter to easily see which alerts are the result of a user bypassing push protection. For more information on viewing these alerts, see "Managing alerts from secret scanning."
You can monitor security alerts to discover when users are bypassing push protections and creating alerts. For more information, see "Auditing security alerts."
If you are an organization owner or security manager, you can view metrics on how push protection is performing across your organization. For more information, see "Viewing metrics for secret scanning push protection in your organization."
Note: The github.dev web-based editor doesn't support push protection. For more information about the editor, see "The github.dev web-based editor."
For information on the secrets and service providers supported for push protection, see "Secret scanning patterns."
Enabling secret scanning as a push protection
For you to use secret scanning as a push protection in public repositories, the enterprise, organization, or repository needs to have secret scanning enabled. To use secret scanning as a push protection in private or internal repositories, or in user-owned repositories for Enterprise Managed Users, the enterprise or organization also needs to have GitHub Advanced Security enabled. For more information, see "Managing GitHub Advanced Security features for your enterprise," "Managing security and analysis settings for your organization," "Managing security and analysis settings for your repository," and "About GitHub Advanced Security."
Organization owners, security managers, and repository administrators can also enable push protection for secret scanning via the API. For more information, see "REST API endpoints for repositories" and expand the "Properties of the security_and_analysis object" section.
Organization owners can provide a custom link that will be displayed when a push is blocked. This custom link can contain organization-specific resources and advice, such as directions on using a recommended secrets vault or who to contact for questions relating to the blocked secret.
You can also enable push protection for all of your existing user-owned public repositories through your personal account settings. For any new public repositories you create, push protection will be enabled by default. For more information, see "Configuring secret scanning for your repositories."
Enterprise administrators can also enable or disable secret scanning as a push protection for the enterprise via the API. For more information, see "REST API endpoints for enterprise code security and analysis."
Note: When you fork a repository with secret scanning as a push protection enabled, this is not enabled by default on the fork. You can enable it on the fork the same way you enable it on a standalone repository.
Enabling secret scanning as a push protection for your enterprise
-
In the top-right corner of GitHub.com, click your profile photo, then click Your enterprises.
-
In the list of enterprises, click the enterprise you want to view.
-
In the enterprise account sidebar, click Settings.
-
In the left sidebar, click Code security and analysis.
-
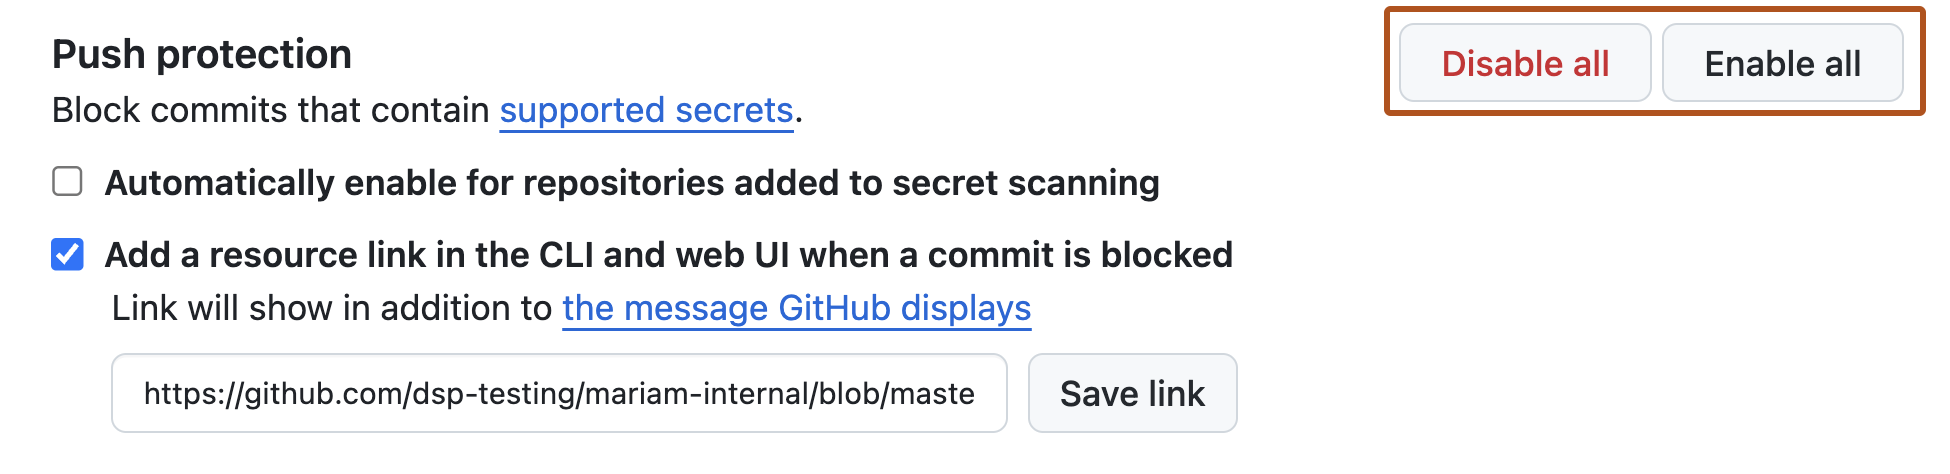
Under "Secret scanning", under "Push protection", click Enable all.
-
Optionally, click Automatically enable for repositories added to secret scanning.
-
Optionally, to include a custom link in the message that members will see when they attempt to push a secret, click Add a resource link in the CLI and web UI when a commit is blocked, then type a URL, and click Save link.


Enabling secret scanning as a push protection for an organization
You can use security overview to find a set of repositories and enable or disable secret scanning as a push protection for them all at the same time. For more information, see "Enabling security features for multiple repositories."
You can also use the organization settings page for "Code security and analysis" to enable or disable secret scanning as a push protection for all existing repositories in an organization.
-
On GitHub.com, navigate to the main page of the organization.
-
Under your organization name, click Settings. If you cannot see the "Settings" tab, select the dropdown menu, then click Settings.

-
In the "Security" section of the sidebar, click Code security and analysis.
Note
If your organization is enrolled in the security configurations and global settings public beta, instead of "Code security and analysis", you will see a "Code security" dropdown menu. Select Code security, then click Configurations. For next steps on enabling push protection and other security features at scale with security configurations, see "Applying the GitHub-recommended security configuration in your organization."
-
Under "Code security and analysis", find "GitHub Advanced Security."
-
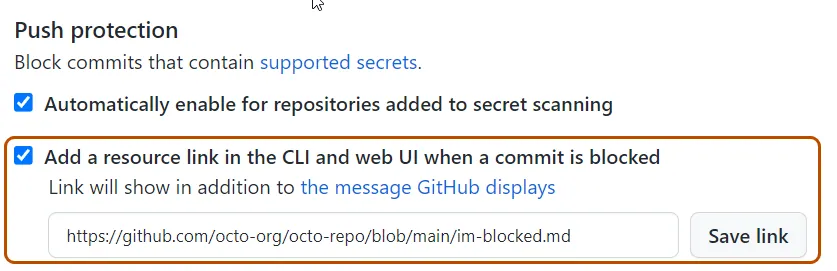
Under "Secret scanning", under "Push protection", click Enable all.
-
Optionally, click Automatically enable for repositories added to secret scanning.
-
Optionally, to include a custom link in the message that members will see when they attempt to push a secret, select Add a resource link in the CLI and web UI when a commit is blocked, then type a URL, and click Save link.

For more information about enabling security features across an organization, see "Quickstart for securing your organization."
Enabling secret scanning as a push protection for a repository
-
On GitHub.com, navigate to the main page of the repository.
-
Under your repository name, click Settings. If you cannot see the "Settings" tab, select the dropdown menu, then click Settings.

-
In the "Security" section of the sidebar, click Code security and analysis.
-
Under "Code security and analysis", find "GitHub Advanced Security."
-
Under "Secret scanning", under "Push protection", click Enable.

Enabling push protection for a custom pattern
You can enable secret scanning as a push protection for custom patterns stored at the enterprise, organization, or repository level.
Enabling push protection for a custom pattern stored in an enterprise
Notes:
- To enable push protection for custom patterns, secret scanning as push protection needs to be enabled at the enterprise level. For more information, see "Push protection for repositories and organizations."
- Enabling push protection for commonly found custom patterns can be disruptive to contributors.
Before enabling push protection for a custom pattern at enterprise level, you must also test your custom patterns using dry runs. You can only perform a dry run on repositories that you have administration access to. If an enterprise owner wants access to perform dry runs on any repository in an organization, they must be assigned the organization owner role. For more information, see "Managing your role in an organization owned by your enterprise."
-
In the top-right corner of GitHub.com, click your profile photo, then click Your enterprises.
-
In the list of enterprises, click the enterprise you want to view.
-
In the enterprise account sidebar, click Policies.
-
Under "Policies", click Code security and analysis.
-
Under "Code security and analysis", click Security features.
-
Under "Secret scanning", under "Custom patterns", click for the pattern of interest.
Note
At the enterprise level, you can only edit and enable push protection for custom patterns that you created.
-
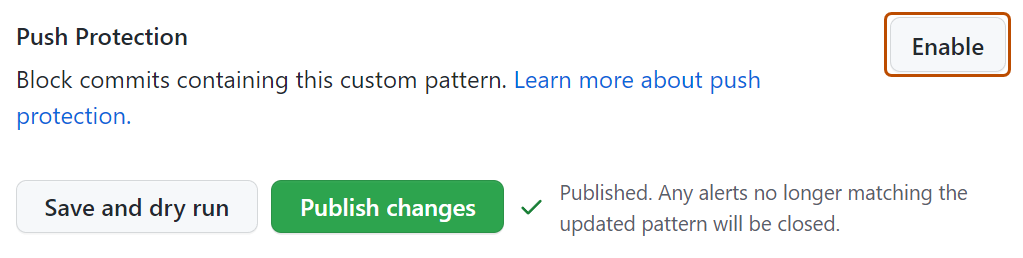
To enable push protection for your custom pattern, scroll down to "Push Protection", and click Enable.
Note
The option to enable push protection is visible for published patterns only.

Enabling secret scanning as a push protection in an organization for a custom pattern
Before enabling push protection for a custom pattern at organization level, you must ensure that you enable secret scanning for the repositories that you want to scan in your organization. To enable secret scanning on all repositories in your organization, see "Managing security and analysis settings for your organization."
-
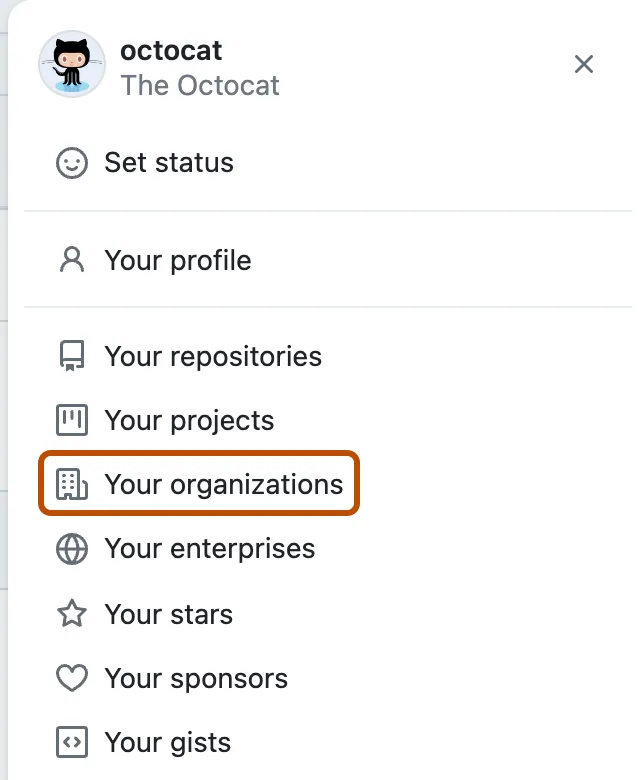
In the upper-right corner of GitHub.com, select your profile photo, then click Your organizations.

-
Next to the organization, click Settings.
-
In the "Security" section of the sidebar, click Code security and analysis.
Note
If your organization is enrolled in the security configurations and global settings public beta, instead of "Code security and analysis", you will see a "Code security" dropdown menu. Select Code security, then click Global settings. For next steps on managing custom patterns for your organization with global settings, see "Configuring global security settings for your organization." For information on enabling push protection for specific custom patterns, reference the following steps.
-
Under "Code security and analysis", find "GitHub Advanced Security."
-
Under "Secret scanning", under "Custom patterns", click for the pattern of interest.
-
To enable push protection for your custom pattern, scroll down to "Push Protection", and click Enable.
Notes:
- The option to enable push protection is visible for published patterns only.
- Push protection for custom patterns will only apply to repositories in your organization that have secret scanning as push protection enabled. For more information, see "Push protection for repositories and organizations."
- Enabling push protection for commonly found custom patterns can be disruptive to contributors.
Enabling secret scanning as a push protection in a repository for a custom pattern
Before enabling push protection for a custom pattern at repository level, you must define the custom pattern for the repository, and test it in the repository. For more information, see "Defining custom patterns for secret scanning."
-
On GitHub.com, navigate to the main page of the repository.
-
Under your repository name, click Settings. If you cannot see the "Settings" tab, select the dropdown menu, then click Settings.
-
In the "Security" section of the sidebar, click Code security and analysis.
-
Under "Code security and analysis", find "GitHub Advanced Security."
-
Under "Secret scanning", under "Custom patterns", click for the pattern of interest.
-
To enable push protection for your custom pattern, scroll down to "Push Protection", and click Enable.
Note
The option to enable push protection is visible for published patterns only.
Enabling delegated bypass for push protection
Note
Delegated bypass for push protection is currently in beta and subject to change.
Delegated bypass for push protection lets you control who can bypass push protection and which blocked pushes should be allowed.
When you enable push protection, by default, anyone with write access to the repository can choose to bypass the protection by specifying a reason for allowing the push containing a secret. With delegated bypass, contributors to a repository are instead obligated to request "bypass privileges." The request is sent to a designated group of reviewers, who either approve or deny the request to bypass push protection.
If the request to bypass push protection is approved, the contributor can push the commit containing the secret. If the request is denied, the contributor must remove the secret from the commit (or commits) containing the secret before pushing again.
To configure delegated bypass, organization owners or repository administrators first create a "bypass list". The bypass list comprises specific roles and teams, such as the security team or repository administrators, who oversee requests from non-members to bypass push protection. For more information, see "Configuring delegated bypass for an organization" and "Configuring delegated bypass for a repository."
Members of the bypass list view and manage requests through the "Push protection bypass" page in the Security tab of the repository. For more information, see "Managing requests to bypass push protection."
Members of the bypass list are still protected from accidentally pushing secrets to a repository. When a member of the bypass list attempts to push a commit containing a secret, their push is still blocked, but they can choose to bypass the block by specifying a reason for allowing the push. Members of the bypass list do not have to request bypass privileges from other members in order to override the block.
Configuring delegated bypass for an organization
-
On GitHub.com, navigate to the main page of the organization.
-
Under your organization name, click Settings. If you cannot see the "Settings" tab, select the dropdown menu, then click Settings.
-
In the "Security" section of the sidebar, click Code security and analysis.
Note
If your organization is enrolled in the security configurations and global settings public beta, instead of "Code security and analysis", you will see a "Code security" dropdown menu. Select Code security, then click Global settings.
-
Under "Code security and analysis", find "GitHub Advanced Security."
-
Under "Push protection", to the right of "Who can bypass push protection for secret scanning", select the dropdown menu, then click Specific roles or teams.
-
Under "Bypass list", click Add role or team.
-
In the dialog box, select the roles and teams that you want to add to the bypass list, then click Add selected.
Configuring delegated bypass for a repository
Note
If an organization owner configures delegated bypass at the organization-level, the repository-level settings are disabled.
-
On GitHub.com, navigate to the main page of the repository.
-
Under your repository name, click Settings. If you cannot see the "Settings" tab, select the dropdown menu, then click Settings.
-
In the "Security" section of the sidebar, click Code security and analysis.
-
Under "Code security and analysis", find "GitHub Advanced Security."
-
Under "Push protection", to the right of "Who can bypass push protection for secret scanning", select the dropdown menu, then click Specific roles or teams.
-
Under "Bypass list", click Add role or team.
-
In the dialog box, select the roles and teams that you want to add to the bypass list, then click Add selected.
Managing requests to bypass push protection
You can view and manage all requests for bypass privileges on the "Push protection bypass" page, located under the Security tab of the repository.
You can filter requests by approver (member of the bypass list), requester (contributor making the request), timeframe, and status. The following statuses are assigned to a request:
| Status | Description |
|---|---|
Cancelled | The request has been cancelled by the contributor. |
Completed | The request has been approved and the commit(s) have been pushed to the repository. |
Denied | The request has been reviewed and denied. |
Expired | The request has expired. Requests are valid for 7 days. |
Open | The request has either not yet been reviewed, or has been approved but the commit(s) have not been pushed to the repository. |
When a contributor requests bypass privileges to push a commit containing a secret, members of the bypass list all receive an email notification containing a link to the request. Members of the bypass list then have 7 days to review and either approve or deny the request before the request expires.
The contributor is notified of the decision by email and must take the required action. If the request is approved, the contributor can push the commit containing the secret to the repository. If the request is denied, the contributor must remove the secret from the commit in order to successfully push the commit to the repository.
Managing requests to bypass push protection at the repository-level
- On GitHub.com, navigate to the main page of the repository.
- Under the repository name, click Security. If you cannot see the "Security" tab, select the dropdown menu, and then click Security.

- In the left sidebar, under "Requests," click Push protection bypass.
- Select the All statuses dropdown menu, then click Open to view requests that are awaiting review.
- Click the request that you want to review.
- Review the details of the request.
- To allow the contributor to push the commit containing the secret, click Approve bypass request. Or, to require the contributor to remove the secret from the commit, click Deny bypass request.
