Generating a regular expression for a repository with Copilot secret scanning
Note
You do not need a subscription to GitHub Copilot to use Copilot secret scanning's regular expression generator. Copilot secret scanning features are available to private repositories in GitHub Enterprise Cloud enterprises with GitHub Advanced Security enabled.
-
On GitHub, navigate to the main page of the repository.
-
Under your repository name, click Settings. If you cannot see the "Settings" tab, select the dropdown menu, then click Settings.

-
In the "Security" section of the sidebar, click Code security.
-
Under "Code security", find "GitHub Advanced Security."
-
Under "Secret scanning", under "Custom patterns", click New pattern.
-
In the "Pattern name" field, type a name for your pattern.
-
On the top right, click Generate with AI.
Note
You can enter a regular expression manually instead of using the generator, by typing a regular expression for the format of your secret pattern in the "Secret format" field. For more information, see Defining a custom pattern for a repository or Defining a custom pattern for an organization.
-
In the sliding panel that is displayed:
-
Complete the "I want a regular expression that" field, describing, ideally in plain English, what patterns you want your regular expression to capture. You can use other natural languages, but the performance may not be as good as with English.
-
Complete the "Examples of what I'm looking for" field, giving an example of a pattern you want to scan for.
-
Click Generate suggestions.
-
Optionally, click on a suggestion to view a description of the regular expression.
-
Click Use results in the Results section that appears, for the result you want to use.

-
-
You can click More options to provide other surrounding content or additional match requirements for the secret format. GitHub will add the examples you typed in the sliding panel to the Test string field.
-
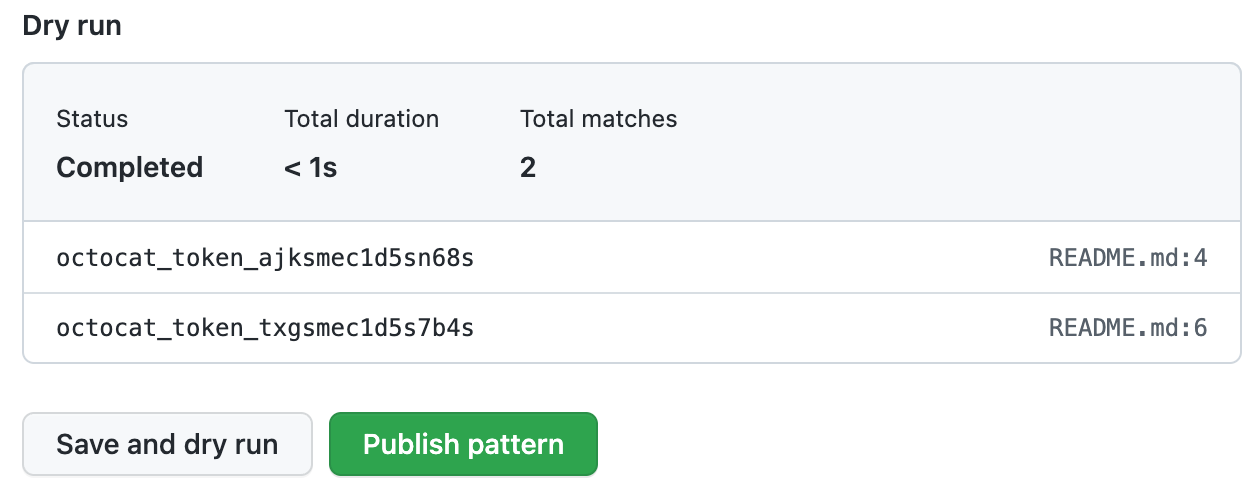
When you're ready to test your new custom pattern, to identify matches in the repository without creating alerts, click Save and dry run.
-
When the dry run finishes, you'll see a sample of results (up to 1000). Review the results and identify any false positive results.

-
Edit the new custom pattern to fix any problems with the results, then, to test your changes, click Save and dry run.
-
When you're satisfied with your new custom pattern, click Publish pattern.
You can configure secret scanning to check pushes for custom patterns before commits are merged into the default branch. For more information, see Enabling push protection for a custom pattern.
Generating a regular expression for an organization with Copilot secret scanning
-
In the upper-right corner of GitHub, select your profile photo, then click Your organizations.
-
Next to the organization, click Settings.
-
In the "Security" section of the sidebar, click Code security then Global settings.
-
Under "Custom patterns", click New pattern.
-
In the "Pattern name" field, type a name for your pattern.
-
On the top right, click Generate with AI.
Note
You can enter a regular expression manually instead of using the generator, by typing a regular expression for the format of your secret pattern in the "Secret format" field. For more information, see Defining a custom pattern for a repository or Defining a custom pattern for an organization.
-
In the sliding panel that is displayed:
-
Complete the "I want a regular expression that" field, describing, ideally in plain English, what patterns you want your regular expression to capture. You can use other natural languages, but the performance may not be as good as with English.
-
Complete the "Examples of what I'm looking for" field, giving an example of a pattern you want to scan for.
-
Click Generate suggestions.
-
Optionally, click on a suggestion to view a description of the regular expression.
-
Click Use results in the Results section that appears, for the result you want to use.

-
-
You can click More options to provide other surrounding content or additional match requirements for the secret format. GitHub will add the examples you typed in the sliding panel to the Test string field.
-
When you're ready to test your new custom pattern, to identify matches in selected repositories without creating alerts, click Save and dry run.
-
Select the repositories where you want to perform the dry run.
- To perform the dry run across the entire organization, select All repositories in the organization.
- To specify the repositories where you want to perform the dry run, select Selected repositories, then search for and select up to 10 repositories.
-
When you're ready to test your new custom pattern, click Run.
-
When the dry run finishes, you'll see a sample of results (up to 1000). Review the results and identify any false positive results.

-
Edit the new custom pattern to fix any problems with the results, then, to test your changes, click Save and dry run.
-
When you're satisfied with your new custom pattern, click Publish pattern.
You can configure secret scanning to check pushes for custom patterns before commits are merged into the default branch. For more information, see Enabling push protection for a custom pattern.