About custom patterns for secret scanning
You can define custom patterns to identify secrets that are not detected by the default patterns supported by secret scanning. For example, you might have a secret pattern that is internal to your organization. For details of the supported secrets and service providers, see Supported secret scanning patterns.
You can define custom patterns for your enterprise, organization, or repository. Secret scanning supports up to 500 custom patterns for each organization or enterprise account, and up to 100 custom patterns per repository.
You can also enable push protection for custom patterns. For more information about push protection, see About push protection.
About using regular expressions for custom patterns
You can specify custom patterns for secret scanning as one or more regular expressions.
Secret scanning uses the Hyperscan library and only supports Hyperscan regex constructs, which are a subset of PCRE syntax. Hyperscan option modifiers are not supported. For more information on Hyperscan pattern constructs, see Pattern support in the Hyperscan documentation.
Regular expressions can be entered manually or generated using Copilot secret scanning's regular expression generator.
Regular expression syntax for manually defining custom patterns
The More options section in the UI helps you write regular expressions manually.
- Secret format: an expression that describes the format of the secret itself.
- Before secret: an expression that describes the characters that come before the secret. By default, this is set to
\A|[^0-9A-Za-z]which means that the secret must be at the start of a line or be preceded by a non-alphanumeric character. - After secret: an expression that describes the characters that come after the secret. By default, this is set to
\z|[^0-9A-Za-z]which means that the secret must be followed by a new line or a non-alphanumeric character. - Additional match requirements: one or more optional expressions that the secret itself must or must not match.
For simple tokens you will usually only need to specify a secret format. The other fields provide flexibility so that you can specify more complex secrets without creating complex regular expressions. For an example of a custom pattern, see Example of a custom pattern specified using additional requirements below.
Using Copilot secret scanning's regular expression generator
Copilot secret scanning's regular expression generator uses a generative AI model where you input a text description of the type of pattern you would like to detect, including optional example strings that should be detected. The model returns up to three regular expressions for you to review. For more information, see Responsible generation of regular expressions with Copilot secret scanning and Generating regular expressions for custom patterns with Copilot secret scanning.
Defining a custom pattern for a repository
Before defining a custom pattern, you must ensure that Secret Protection is enabled on your repository. For more information, see Enabling secret scanning for your repository.
-
On GitHub, navigate to the main page of the repository.
-
Under your repository name, click Settings. If you cannot see the "Settings" tab, select the dropdown menu, then click Settings.

-
In the "Security" section of the sidebar, click Advanced Security.
-
Under "Secret Protection", to the right of "Custom patterns", click New pattern.
-
Enter the details for your new custom pattern. You must at least provide the name for your pattern, and a regular expression for the format of your secret pattern.
- In the "Pattern name" field, type a name for your pattern.
- In the "Secret format" field, type a regular expression for the format of your secret pattern. Alternatively, you can use the generator to generate a regular expression for you. For more information, see Generating regular expressions for custom patterns with Copilot secret scanning.
- You can click More options to provide other surrounding content or additional match requirements for the secret format.
- Provide a sample test string to make sure your configuration is matching the patterns you expect.

-
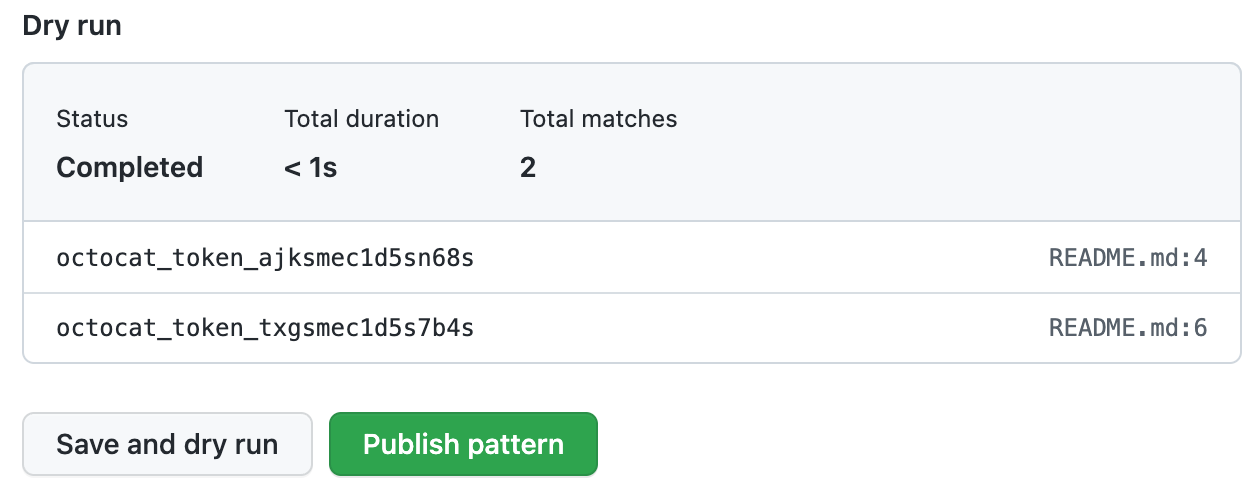
When you're ready to test your new custom pattern, to identify matches in the repository without creating alerts, click Save and dry run.
-
When the dry run finishes, you'll see a sample of results (up to 1000). Review the results and identify any false positive results.
-
Edit the new custom pattern to fix any problems with the results, then, to test your changes, click Save and dry run.
-
When you're satisfied with your new custom pattern, click Publish pattern.
-
Optionally, to enable push protection for your custom pattern, click Enable.
Note
The "Enable" button isn't available until after the dry run succeeds and you publish the pattern.
For more information about push protection, see About push protection.


After your pattern is created, secret scanning scans for any secrets in your entire Git history on all branches present in your GitHub repository. For more information on viewing secret scanning alerts, see Managing alerts from secret scanning.
Example of a custom pattern specified using additional requirements
A company has an internal token with five characteristics. They use the different fields to specify how to identify tokens as follows:
| Characteristic | Field and regular expression |
|---|---|
| Length between 5 and 10 characters | Secret format: [$#%@AA-Za-z0-9]{5,10} |
Does not end in a . | After secret: [^\.] |
| Contains numbers and uppercase letters | Additional requirements: secret must match [A-Z] and [0-9] |
| Does not include more than one lowercase letter in a row | Additional requirements: secret must not match [a-z]{2,} |
Contains one of $%@! | Additional requirements: secret must match [$%@!] |
These tokens would match the custom pattern described above:
a9@AAfT!         # Secret string match: a9@AAfT
ee95GG@ZA942@aa  # Secret string match: @ZA942@a
a9@AA!ee9        # Secret string match: a9@AA
These strings would not match the custom pattern described above:
a9@AA.!
a@AAAAA
aa9@AA!ee9
aAAAe9
Defining a custom pattern for an organization
Before defining a custom pattern, you must ensure that you enable secret scanning for the repositories that you want to scan in your organization. You can use security configurations to enable secret scanning on all repositories in your organization. For more information, see About enabling security features at scale.
-
In the upper-right corner of GitHub, select your profile photo, then click Your organizations.
-
Next to the organization, click Settings.
-
In the "Security" section of the sidebar, select the Advanced Security dropdown menu, then click Global settings.
-
Under "Custom patterns", click New pattern.
-
Enter the details for your new custom pattern. You must at least provide the name for your pattern, and a regular expression for the format of your secret pattern.
- In the "Pattern name" field, type a name for your pattern.
- In the "Secret format" field, type a regular expression for the format of your secret pattern. Alternatively, you can use the generator to generate a regular expression for you. For more information, see Generating regular expressions for custom patterns with Copilot secret scanning.
- You can click More options to provide other surrounding content or additional match requirements for the secret format.
- Provide a sample test string to make sure your configuration is matching the patterns you expect.
-
When you're ready to test your new custom pattern, to identify matches in select repositories without creating alerts, click Save and dry run.
-
Select the repositories where you want to perform the dry run.
- To perform the dry run across the entire organization, select All repositories in the organization.
- To specify the repositories where you want to perform the dry run, select Selected repositories, then search for and select up to 10 repositories.
-
When you're ready to test your new custom pattern, click Run.
-
When the dry run finishes, you'll see a sample of results (up to 1000). Review the results and identify any false positive results.
-
Edit the new custom pattern to fix any problems with the results, then, to test your changes, click Save and dry run.
-
When you're satisfied with your new custom pattern, click Publish pattern.
-
Optionally, to enable push protection for your custom pattern, click Enable. For more information, see About push protection.
Note
- The option to enable push protection is visible for published patterns only.
- Push protection for custom patterns will only apply to repositories in your organization that have secret scanning as push protection enabled. For more information, see About push protection.
- Enabling push protection for commonly found custom patterns can be disruptive to contributors.
After your pattern is created, secret scanning scans for any secrets in repositories in your organization, including their entire Git history on all branches. Organization owners and repository administrators will be alerted to any secrets found and can review the alert in the repository where the secret is found. For more information on viewing secret scanning alerts, see Managing alerts from secret scanning.
Defining a custom pattern for an enterprise account
Note
- At the enterprise level, only the creator of a custom pattern can edit the pattern, and use it in a dry run.
- You can only perform a dry run on repositories that you have administration access to. If an enterprise owner wants access to perform dry runs on any repository in an organization, they must be assigned the organization owner role. For more information, see Managing your role in an organization owned by your enterprise.
-
In the top-right corner of GitHub, click your profile photo.
-
Depending on your environment, click Your enterprise, or click Your enterprises then click the enterprise you want to view.
-
At the top of the page, click Policies.
-
Under "Policies", click Advanced Security.
-
Under "Advanced Security", click Security features.
-
Under "Secret scanning custom patterns", click New pattern.
-
Enter the details for your new custom pattern. You must at least provide the name for your pattern, and a regular expression for the format of your secret pattern.
- In the "Pattern name" field, type a name for your pattern.
- In the "Secret format" field, type a regular expression for the format of your secret pattern. Alternatively, you can use the generator to generate a regular expression for you. For more information, see Generating regular expressions for custom patterns with Copilot secret scanning.
- You can click More options to provide other surrounding content or additional match requirements for the secret format.
- Provide a sample test string to make sure your configuration is matching the patterns you expect.
-
When you're ready to test your new custom pattern, to identify matches in the enterprise without creating alerts, click Save and dry run.
-
Search for and select up to 10 repositories where you want to perform the dry run.
-
When you're ready to test your new custom pattern, click Run.
-
When the dry run finishes, you'll see a sample of results (up to 1000). Review the results and identify any false positive results.
-
Edit the new custom pattern to fix any problems with the results, then, to test your changes, click Save and dry run.
-
When you're satisfied with your new custom pattern, click Publish pattern.
-
Optionally, to enable push protection for your custom pattern, click Enable. For more information, see About push protection.
Note
- To enable push protection for custom patterns, secret scanning as push protection needs to be enabled at the enterprise level. For more information, see About push protection.
- Enabling push protection for commonly found custom patterns can be disruptive to contributors.
After your pattern is created, secret scanning scans for any secrets in repositories within your organizations with GitHub Secret Protection enabled, including their entire Git history on all branches. Organization owners and repository administrators will be alerted to any secrets found, and can review the alert in the repository where the secret is found. For more information on viewing secret scanning alerts, see Managing alerts from secret scanning.