Creating a branch
You can create a branch in different ways on GitHub Enterprise Server.
Note: You can only create a branch in a repository to which you have push access.
Creating a branch via the branches overview
-
On your GitHub Enterprise Server instance, navigate to the main page of the repository.
-
Above the list of files, click Branches.

-
Click New branch.

-
Under "Branch name", type a name for the branch.
-
Under "Branch source", choose a source for your branch.
- If your repository is a fork, select the repository dropdown menu and click your fork or the upstream repository.
- Select the branch dropdown menu and click a branch.
-
Click Create branch.


Creating a branch using the branch dropdown
-
On your GitHub Enterprise Server instance, navigate to the main page of the repository.
-
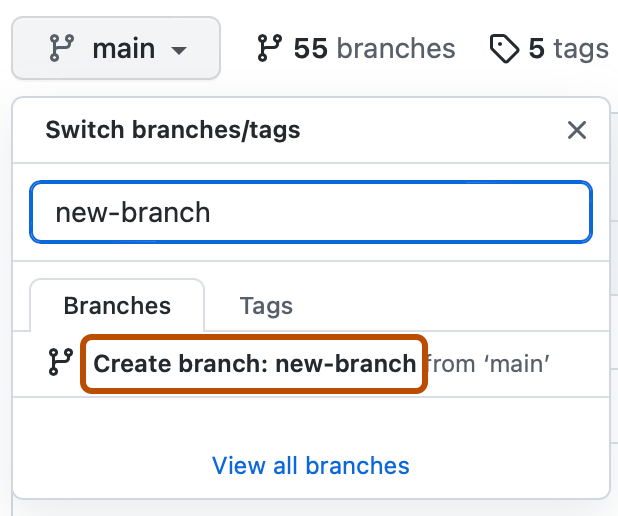
Select the branch selector dropdown menu.

-
Optionally, if you want to create the new branch from a branch other than the default branch of the repository, click another branch, then select the branch dropdown menu again.
-
In the "Find or create a branch..." text field, type a unique name for your new branch, then click Create branch.


Creating a branch for an issue
You can create a branch to work on an issue directly from the issue page and get started right away. For more information, see "Creating a branch to work on an issue".
Deleting a branch
You can have head branches automatically deleted after pull requests are merged in your repository. For more information, see "Managing the automatic deletion of branches."
Note: If the branch you want to delete is the repository's default branch, you must choose a new default branch before deleting the branch. For more information, see "Changing the default branch."
If the branch you want to delete is associated with an open pull request, you must merge or close the pull request before deleting the branch. For more information, see "Merging a pull request" or "Closing a pull request."
-
On your GitHub Enterprise Server instance, navigate to the main page of the repository.
-
Above the list of files, click Branches.
-
Next to the branch that you want to delete, click .

-
If the branch is associated with at least one open pull request, deleting the branch will close the pull requests. Read the warning, then click Delete.

If you delete a head branch after its pull request has been merged, GitHub checks for any open pull requests in the same repository that specify the deleted branch as their base branch. GitHub automatically updates any such pull requests, changing their base branch to the merged pull request's base branch. For more information, see "About branches."