About creating webhooks
You can create webhooks to subscribe to specific events on GitHub that occur in a repository, organization, GitHub Enterprise, or GitHub App.
For more information about the different types of webhooks, see "Types of webhooks."
For a complete list of webhook events, see "Webhook events and payloads."
Creating a repository webhook
You can create a webhook to subscribe to events that occur in a specific repository. You must be a repository owner or have admin access in the repository to create webhooks in that repository.
You can use the GitHub web interface or the REST API to create a repository webhook. For more information about using the REST API to create a repository webhook, see "Repository webhooks."
-
On your GitHub Enterprise Server instance, navigate to the main page of the repository.
-
Under your repository name, click Settings. If you cannot see the "Settings" tab, select the dropdown menu, then click Settings.

-
In the left sidebar, click Webhooks.
-
Click Add webhook.
-
Under "Payload URL", type the URL where you'd like to receive payloads.
-
Optionally, select the Content type drop-down menu, and click a data format to receive the webhook payload in.
- application/json will deliver the JSON payload directly as the body of the
POSTrequest. - application/x-www-form-urlencoded will send the JSON payload as a form parameter called
payload.
- application/json will deliver the JSON payload directly as the body of the
-
Optionally, under "Secret", type a string to use as a
secretkey. You should choose a random string of text with high entropy. You can use the webhook secret to limit incoming requests to only those originating from GitHub. For more information, see "Validating webhook deliveries." -
Under "Which events would you like to trigger this webhook?", select the webhook events that you want to receive. You should only subscribe to the webhook events that you need.
-
If you chose Let me select individual events, select the events that you want to trigger the webhook.
-
To make the webhook active immediately after adding the configuration, select Active.
-
Click Add webhook.

After you create a new webhook, GitHub will send you a simple ping event to let you know you've set up the webhook correctly. For more information, see "Webhook events and payloads."
Creating an organization webhook
You can create a webhook to subscribe to events that occur in a specific organization. You must be an organization owner to create webhooks in that organization.
You can use the GitHub web interface or the REST API to create an organization webhook. For more information about using the REST API to create an organization webhook, see "Organization webhooks."
- In the upper-right corner of any page on your GitHub Enterprise Server instance, click your profile photo.
- Click Your organizations.
- To the right of the organization, click Settings.
- In the left sidebar, click Webhooks.
- Click Add webhook.
- Under "Payload URL", type the URL where you'd like to receive payloads.
- Optionally, select the Content type drop-down menu, and click a data format to receive the webhook payload in.
- application/json will deliver the JSON payload directly as the body of the
POSTrequest. - application/x-www-form-urlencoded will send the JSON payload as a form parameter called
payload.
- application/json will deliver the JSON payload directly as the body of the
- Optionally, under "Secret", type a string to use as a
secretkey. You should choose a random string of text with high entropy. You can use the webhook secret to limit incoming requests to only those originating from GitHub. For more information, see "Validating webhook deliveries." - Under "Which events would you like to trigger this webhook?", select the types of webhooks you'd like to receive. You should only subscribe to the webhook events that you need.
- If you chose Let me select individual events, select the events that will trigger the webhook.
- To make the webhook active immediately after adding the configuration, select Active.
- Click Add webhook.
After you create a new webhook, GitHub will send you a simple ping event to let you know you've set up the webhook correctly. For more information, see "Webhook events and payloads."
Creating a global webhook for a GitHub Enterprise
Enterprise owners can create a global webhook to subscribe to events that occur within their enterprise.
You can use the GitHub web interface or the REST API to create a global webhook. For more information about using the REST API to create a global webhook, see "Global Webhooks."
-
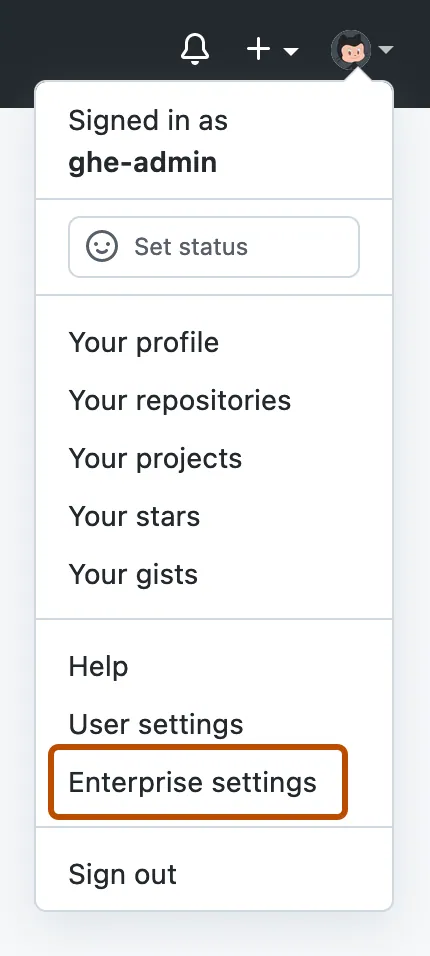
In the top-right corner of GitHub Enterprise Server, click your profile photo, then click Enterprise settings.

-
In the enterprise account sidebar, click Settings.
-
Under " Settings", click Hooks.
-
Click Add webhook.
-
In the "Payload URL" field, type the URL where you'd like to receive payloads.
-
Optionally, select the Content type drop-down menu, and click a data format to receive the webhook payload in.
- application/json will deliver the JSON payload directly as the body of the
POSTrequest. - application/x-www-form-urlencoded will send the JSON payload as a form parameter called
payload.
- application/json will deliver the JSON payload directly as the body of the
-
Optionally, under "Secret", type a string to use as a
secretkey. You should choose a random string of text with high entropy. You can use the webhook secret to limit incoming requests to only those originating from GitHub. For more information, see "Validating webhook deliveries." -
Optionally, if your payload URL is HTTPS and you would not like GitHub Enterprise Server to verify SSL certificates when delivering payloads, under "SSL verification", select Disable. Read the information about SSL verification, then click Disable, I understand my webhooks may not be secure.
Warning: SSL verification helps ensure that hook payloads are delivered securely. We do not recommend disabling SSL verification.
-
Under "Which events would you like to trigger this webhook?", select the types of webhooks you'd like to receive. You should only subscribe to the webhook events that you need.
-
If you chose Let me select individual events, select the events that will trigger the webhook.
-
To make the webhook active immediately after adding the configuration, select Active.
-
Click Add webhook.
Creating webhooks for a GitHub App
The owner of a GitHub App can subscribe the app to webhook events to receive notifications whenever certain events occur. If an organization has designated any app managers for a GitHub App owned by the organization, the app managers can also subscribe the app to webhook events. For more information, see "Using webhooks with GitHub Apps."
Each GitHub App has one webhook. You can configure the webhook when you register a GitHub App, or you can edit the webhook configuration for an existing GitHub App registration.
For more information about configuring a webhook when you register a GitHub App, see "Registering a GitHub App."
To configure a webhook for an existing GitHub App registration:
-
In the upper-right corner of any page on GitHub, click your profile photo.
-
Navigate to your account settings.
- For a GitHub App owned by a personal account, click Settings.
- For a GitHub App owned by an organization:
- Click Your organizations.
- To the right of the organization, click Settings.
-
In the left sidebar, click Developer settings.
-
In the left sidebar, click GitHub Apps.
-
Next to the GitHub App that you want to configure the webhook for, click Edit.
-
Under "Webhook," select Active.
-
Under "Webhook URL", type the URL where you'd like to receive payloads.
-
Optionally, under "Webhook secret", type a string to use as a
secretkey. You should choose a random string of text with high entropy. You can use the webhook secret to limit incoming requests to only those originating from GitHub. For more information, see "Validating webhook deliveries." -
Click Save changes.
-
In the sidebar, click Permissions & events.
-
The specific webhook events that you can select for your GitHub App registration are determined by the type of permissions you selected for your app. You will first need to select the permissions you would like your app to have, and then you can subscribe your app to webhook events that are related to that set of permissions.
Under the sections "Repository permissions," "Organization permissions," and "Account permissions," select the permissions that are required for the events your app will subscribe to. For more information, see "Choosing permissions for a GitHub App." For more information about things to consider when changing the permissions, see "Modifying a GitHub App registration."
-
Under "Subscribe to Events," select the webhook events you would like your GitHub App to receive.
-
Click Save changes.
You can also use the REST API to create a webhook for a GitHub App. For more information, see "GitHub App webhooks."