About caching workflow dependencies
Workflow runs often reuse the same outputs or downloaded dependencies from one run to another. For example, package and dependency management tools such as Maven, Gradle, npm, and Yarn keep a local cache of downloaded dependencies.
Jobs on GitHub-hosted runners start in a clean runner image and must download dependencies each time, causing increased network utilization, longer runtime, and increased cost. To help speed up the time it takes to recreate files like dependencies, GitHub can cache files you frequently use in workflows.
To cache dependencies for a job, you can use GitHub's cache action. The action creates and restores a cache identified by a unique key. Alternatively, if you are caching the package managers listed below, using their respective setup-* actions requires minimal configuration and will create and restore dependency caches for you.
| Package managers | setup-* action for caching |
|---|---|
| npm, Yarn, pnpm | setup-node |
| pip, pipenv, Poetry | setup-python |
| Gradle, Maven | setup-java |
| RubyGems | setup-ruby |
Go go.sum | setup-go |
| .NET NuGet | setup-dotnet |
Warning
Be mindful of the following when using caching with GitHub Actions:
- We recommend that you don't store any sensitive information in the cache. For example, sensitive information can include access tokens or login credentials stored in a file in the cache path. Also, command line interface (CLI) programs like
docker logincan save access credentials in a configuration file. Anyone with read access can create a pull request on a repository and access the contents of a cache. Forks of a repository can also create pull requests on the base branch and access caches on the base branch. - When using self-hosted runners, caches from workflow runs are stored on GitHub-owned cloud storage. A customer-owned storage solution is only available with GitHub Enterprise Server.
Comparing artifacts and dependency caching
Artifacts and caching are similar because they provide the ability to store files on GitHub, but each feature offers different use cases and cannot be used interchangeably.
- Use caching when you want to reuse files that don't change often between jobs or workflow runs, such as build dependencies from a package management system.
- Use artifacts when you want to save files produced by a job to view after a workflow run has ended, such as built binaries or build logs.
For more information on workflow run artifacts, see Storing and sharing data from a workflow.
Restrictions for accessing a cache
Access restrictions provide cache isolation and security by creating a logical boundary between different branches or tags.
Workflow runs can restore caches created in either the current branch or the default branch (usually main). If a workflow run is triggered for a pull request, it can also restore caches created in the base branch, including base branches of forked repositories. For example, if the branch feature-b has the base branch feature-a, a workflow run triggered on a pull request would have access to caches created in the default main branch, the base feature-a branch, and the current feature-b branch.
Workflow runs cannot restore caches created for child branches or sibling branches. For example, a cache created for the child feature-b branch would not be accessible to a workflow run triggered on the parent main branch. Similarly, a cache created for the feature-a branch with the base main would not be accessible to its sibling feature-c branch with the base main. Workflow runs also cannot restore caches created for different tag names. For example, a cache created for the tag release-a with the base main would not be accessible to a workflow run triggered for the tag release-b with the base main.
When a cache is created by a workflow run triggered on a pull request, the cache is created for the merge ref (refs/pull/.../merge). Because of this, the cache will have a limited scope and can only be restored by re-runs of the pull request. It cannot be restored by the base branch or other pull requests targeting that base branch.
Multiple workflow runs in a repository can share caches. A cache created for a branch in a workflow run can be accessed and restored from another workflow run for the same repository and branch.
Using the cache action
The cache action will attempt to restore a cache based on the key you provide. When the action finds a cache that exactly matches the key, the action restores the cached files to the path you configure.
You can optionally provide a list of restore-keys to use in case the key doesn't match an existing cache. A list of restore-keys is useful when you are restoring a cache from another branch because restore-keys can partially match cache keys. For more information about matching restore-keys, see Matching a cache key.
If there is an exact match to the provided key, this is considered a cache hit. If no cache exactly matches the provided key, this is considered a cache miss. On a cache miss, the action automatically creates a new cache if the job completes successfully. The new cache will use the key you provided and contains the files you specify in path. For more information about how this is handled, see Cache hits and misses.
You cannot change the contents of an existing cache. Instead, you can create a new cache with a new key.
Input parameters for the cache action
-
key: Required The key created when saving a cache and the key used to search for a cache. It can be any combination of variables, context values, static strings, and functions. Keys have a maximum length of 512 characters, and keys longer than the maximum length will cause the action to fail. -
path: Required The path(s) on the runner to cache or restore.-
You can specify a single path, or you can add multiple paths on separate lines. For example:
- name: Cache Gradle packages uses: actions/cache@v4 with: path: | ~/.gradle/caches ~/.gradle/wrapper -
You can specify either directories or single files, and glob patterns are supported.
-
You can specify absolute paths, or paths relative to the workspace directory.
-
-
restore-keys: Optional A string containing alternative restore keys, with each restore key placed on a new line. If no cache hit occurs forkey, these restore keys are used sequentially in the order provided to find and restore a cache. For example:restore-keys: | npm-feature-${{ hashFiles('package-lock.json') }} npm-feature- npm- -
enableCrossOsArchive: Optional A boolean value that when enabled, allows Windows runners to save or restore caches independent of the operating system the cache was created on. If this parameter is not set, it defaults tofalse. For more information, see Cross OS cache in the Actions Cache documentation.
Output parameters for the cache action
cache-hit: A boolean value to indicate an exact match was found for the key.
Cache hits and misses
When key exactly matches an existing cache, it's called a cache hit, and the action restores the cached files to the path directory.
When key doesn't match an existing cache, it's called a cache miss, and a new cache is automatically created if the job completes successfully.
When a cache miss occurs, the action also searches your specified restore-keys for any matches:
- If you provide
restore-keys, thecacheaction sequentially searches for any caches that match the list ofrestore-keys.- When there is an exact match, the action restores the files in the cache to the
pathdirectory. - If there are no exact matches, the action searches for partial matches of the restore keys. When the action finds a partial match, the most recent cache is restored to the
pathdirectory.
- When there is an exact match, the action restores the files in the cache to the
- The
cacheaction completes and the next step in the job runs. - If the job completes successfully, the action automatically creates a new cache with the contents of the
pathdirectory.
For a more detailed explanation of the cache matching process, see Matching a cache key.
Example using the cache action
This example creates a new cache when the packages in package-lock.json file change, or when the runner's operating system changes. The cache key uses contexts and expressions to generate a key that includes the runner's operating system and a SHA-256 hash of the package-lock.json file.
name: Caching with npm
on: push
jobs:
build:
runs-on: ubuntu-latest
steps:
- uses: actions/checkout@v4
- name: Cache node modules
id: cache-npm
uses: actions/cache@v4
env:
cache-name: cache-node-modules
with:
# npm cache files are stored in `~/.npm` on Linux/macOS
path: ~/.npm
key: ${{ runner.os }}-build-${{ env.cache-name }}-${{ hashFiles('**/package-lock.json') }}
restore-keys: |
${{ runner.os }}-build-${{ env.cache-name }}-
${{ runner.os }}-build-
${{ runner.os }}-
- if: ${{ steps.cache-npm.outputs.cache-hit != 'true' }}
name: List the state of node modules
continue-on-error: true
run: npm list
- name: Install dependencies
run: npm install
- name: Build
run: npm run build
- name: Test
run: npm test
Using contexts to create cache keys
A cache key can include any of the contexts, functions, literals, and operators supported by GitHub Actions. For more information, see Accessing contextual information about workflow runs and Evaluate expressions in workflows and actions.
Using expressions to create a key allows you to automatically create a new cache when dependencies change.
For example, you can create a key using an expression that calculates the hash of an npm package-lock.json file. So, when the dependencies that make up the package-lock.json file change, the cache key changes and a new cache is automatically created.
npm-${{ hashFiles('package-lock.json') }}
GitHub evaluates the expression hash "package-lock.json" to derive the final key.
npm-d5ea0750
Using the output of the cache action
You can use the output of the cache action to do something based on whether a cache hit or miss occurred. When an exact match is found for a cache for the specified key, the cache-hit output is set to true.
In the example workflow above, there is a step that lists the state of the Node modules if a cache miss occurred:
- if: ${{ steps.cache-npm.outputs.cache-hit != 'true' }}
name: List the state of node modules
continue-on-error: true
run: npm list
Matching a cache key
The cache action first searches for cache hits for key and the cache version in the branch containing the workflow run. If there is no hit, it searches for restore-keys and the version. If there are still no hits in the current branch, the cache action retries same steps on the default branch. Please note that the scope restrictions apply during the search. For more information, see Restrictions for accessing a cache.
Cache version is a way to stamp a cache with metadata of the path and the compression tool used while creating the cache. This ensures that the consuming workflow run uniquely matches a cache it can actually decompress and use. For more information, see Cache Version in the Actions Cache documentation.
restore-keys allows you to specify a list of alternate restore keys to use when there is a cache miss on key. You can create multiple restore keys ordered from the most specific to least specific. The cache action searches the restore-keys in sequential order. When a key doesn't match directly, the action searches for keys prefixed with the restore key. If there are multiple partial matches for a restore key, the action returns the most recently created cache.
Example using multiple restore keys
restore-keys: |
  npm-feature-${{ hashFiles('package-lock.json') }}
  npm-feature-
  npm-
The runner evaluates the expressions, which resolve to these restore-keys:
restore-keys: |
  npm-feature-d5ea0750
  npm-feature-
  npm-
The restore key npm-feature- matches any key that starts with the string npm-feature-. For example, both of the keys npm-feature-fd3052de and npm-feature-a9b253ff match the restore key. The cache with the most recent creation date would be used. The keys in this example are searched in the following order:
npm-feature-d5ea0750matches a specific hash.npm-feature-matches cache keys prefixed withnpm-feature-.npm-matches any keys prefixed withnpm-.
Example of search priority
key:
  npm-feature-d5ea0750
restore-keys: |
  npm-feature-
  npm-
For example, if a pull request contains a feature branch and targets the default branch (main), the action searches for key and restore-keys in the following order:
- Key
npm-feature-d5ea0750in thefeaturebranch - Key
npm-feature-in thefeaturebranch - Key
npm-in thefeaturebranch - Key
npm-feature-d5ea0750in themainbranch - Key
npm-feature-in themainbranch - Key
npm-in themainbranch
Usage limits and eviction policy
GitHub will remove any cache entries that have not been accessed in over 7 days. There is no limit on the number of caches you can store, but the total size of all caches in a repository is limited to 10 GB. Once a repository has reached its maximum cache storage, the cache eviction policy will create space by deleting the oldest caches in the repository.
If you exceed the limit, GitHub will save the new cache but will begin evicting caches until the total size is less than the repository limit. The cache eviction process may cause cache thrashing, where caches are created and deleted at a high frequency. To reduce this, you can review the caches for a repository and take corrective steps, such as removing caching from specific workflows. For more information, see Managing caches.
Managing caches
To manage caches created from your workflows, you can:
- View a list of all cache entries for a repository.
- Filter and sort the list of caches using specific metadata such as cache size, creation time, or last accessed time.
- Delete cache entries from a repository.
- Monitor aggregate cache usage for repositories and organizations.
There are multiple ways to manage caches for your repositories:
-
Using the GitHub web interface, as shown below.
-
Using the REST API. For more information, see REST API endpoints for GitHub Actions cache.
-
Installing the
gh cachesubcommand to manage your caches from the command line. For more information, see the GitHub CLI documentation.Note
If you are doing this manually, ensure you have version 2.32.0 or higher of the CLI installed.
Viewing cache entries
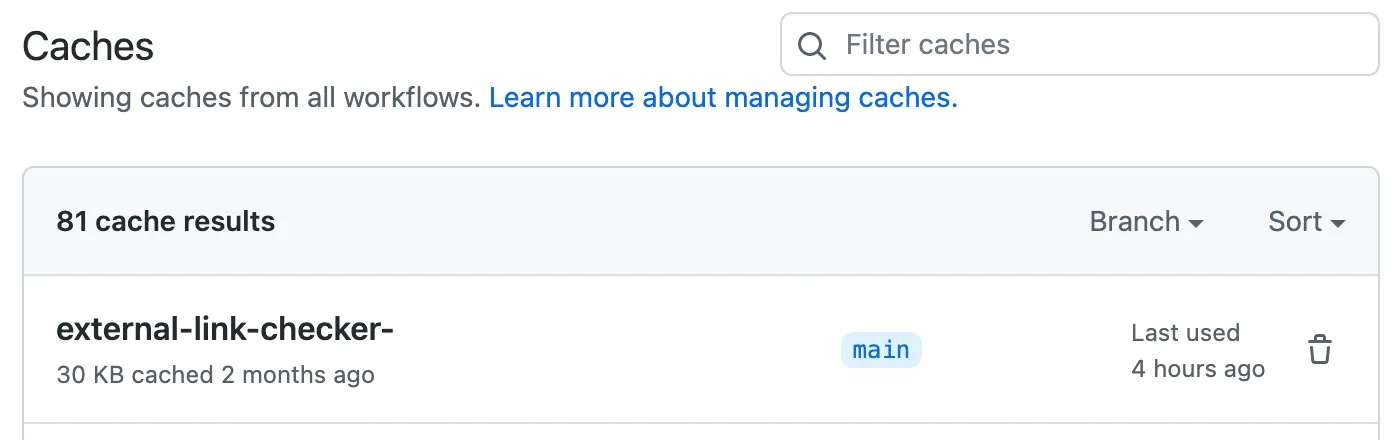
You can use the web interface to view a list of cache entries for a repository. In the cache list, you can see how much disk space each cache is using, when the cache was created, and when the cache was last used.
-
On GitHub, navigate to the main page of the repository.
-
Under your repository name, click Actions.

-
In the left sidebar, under the "Management" section, click Caches.
-
Review the list of cache entries for the repository.
- To search for cache entries used for a specific branch, click the Branch dropdown menu and select a branch. The cache list will display all of the caches used for the selected branch.
- To search for cache entries with a specific cache key, use the syntax
key: key-namein the Filter caches field. The cache list will display caches from all branches where the key was used.


Deleting cache entries
Users with write access to a repository can use the GitHub web interface to delete cache entries.
-
On GitHub, navigate to the main page of the repository.
-
Under your repository name, click Actions.
-
In the left sidebar, under the "Management" section, click Caches.
-
To the right of the cache entry you want to delete, click .


Force deleting cache entries
Caches have branch scope restrictions in place, which means some caches have limited usage options. For more information on cache scope restrictions, see Restrictions for accessing a cache, earlier in this article. If caches limited to a specific branch are using a lot of storage quota, it may cause caches from the default branch to be created and deleted at a high frequency.
For example, a repository could have many new pull requests opened, each with their own caches that are restricted to that branch. These caches could take up the majority of the cache storage for that repository. Once a repository has reached its maximum cache storage, the cache eviction policy will create space by deleting the oldest caches in the repository. In order to prevent cache thrashing when this happens, you can set up workflows to delete caches on a faster cadence than the cache eviction policy will. You can use the GitHub CLI to delete caches for specific branches.
The following example workflow uses gh cache to delete up to 100 caches created by a branch once a pull request is closed.
To run the following example on cross-repository pull requests or pull requests from forks, you can trigger the workflow with the pull_request_target event. If you do use pull_request_target to trigger the workflow, there are security considerations to keep in mind. For more information, see Events that trigger workflows.
name: cleanup caches by a branch
on:
  pull_request:
    types:
      - closed

jobs:
  cleanup:
    runs-on: ubuntu-latest
    steps:
      - name: Cleanup
        run: |
          echo "Fetching list of cache key"
          cacheKeysForPR=$(gh cache list --ref $BRANCH --limit 100 --json id --jq '.[].id')

          ## Setting this to not fail the workflow while deleting cache keys.
          set +e
          echo "Deleting caches..."
          for cacheKey in $cacheKeysForPR
          do
              gh cache delete $cacheKey
          done
          echo "Done"
        env:
          GH_TOKEN: ${{ secrets.GITHUB_TOKEN }}
          GH_REPO: ${{ github.repository }}
          BRANCH: refs/pull/${{ github.event.pull_request.number }}/merge
Alternatively, you can use the API to automatically list or delete all caches on your own cadence. For more information, see REST API endpoints for GitHub Actions cache.