Observação: no momento, não há suporte para os executores hospedados no GitHub no GitHub Enterprise Server. Você pode ver mais informações sobre o suporte futuro planejado no GitHub public roadmap.
About runner groups
Runner groups are used to control access to runners at the organization and enterprise level. Enterprise owners can configure access policies that control which organizations in an enterprise have access to the runner group. Organization owners can configure access policies that control which repositories in an organization have access to the runner group.
When an enterprise owner grants access to a runner group, organization owners can see the runner group listed in the organization's runner settings. The organization owners can then assign additional granular repository access policies to the enterprise runner group.
When new runners are created, they are automatically assigned to the default group. Runners can only be in one group at a time. You can move runners from the default group to another group. For more information, see "Moving a runner to a group."
Creating a self-hosted runner group for an organization
Warning: Recomendamos que você use apenas executores auto-hospedados com repositórios privados. Isso acontece porque as bifurcações do seu repositório podem potencialmente executar código perigoso na sua máquina de executor auto-hospedada criando um pull request que executa o código em um fluxo de trabalho.
For more information, see "About self-hosted runners."
All organizations have a single default runner group. Organizations within an enterprise account can create additional groups. Organization admins can allow individual repositories access to a runner group. For information about how to create a runner group with the REST API, see "Self-hosted runner groups."
Runners are automatically assigned to the default group when created, and can only be members of one group at a time. You can move a runner from the default group to any group you create.
When creating a group, you must choose a policy that defines which repositories have access to the runner group.
-
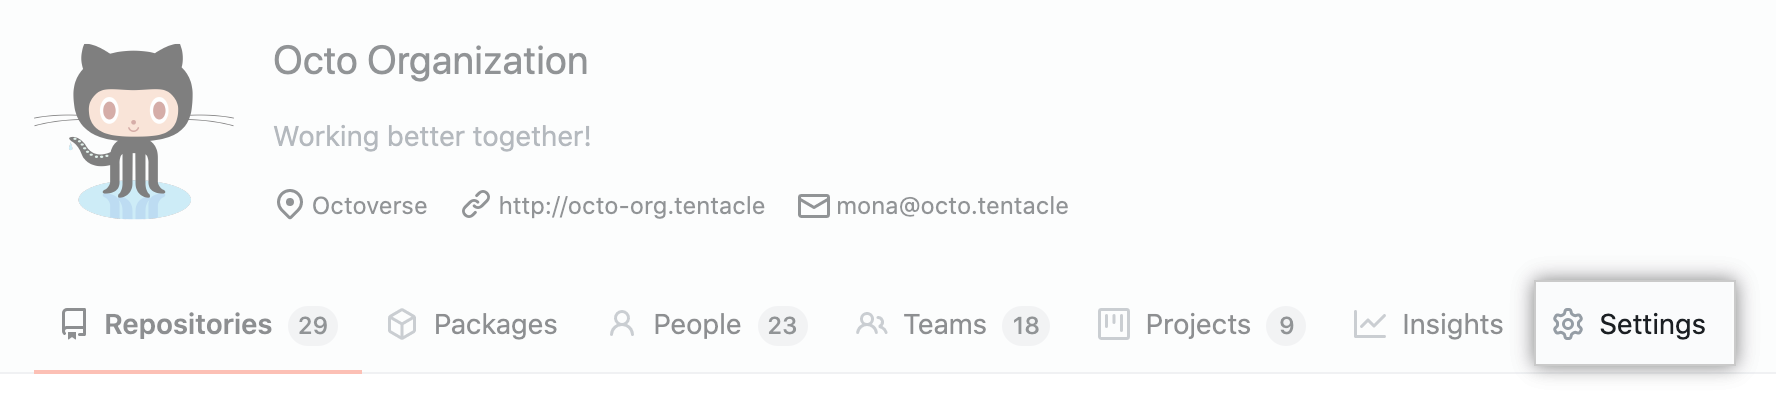
On your GitHub Enterprise Server instance, navigate to the main page of the organization.
-
No nome da sua organização, clique em Configurações.
-
In the left sidebar, click Actions.
-
In the left sidebar, under "Actions", click Runners.
-
Under "Runners", click Add new, and then New group.
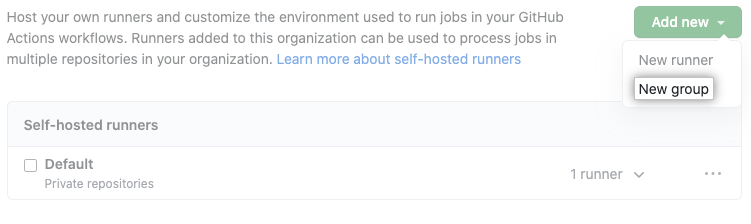
-
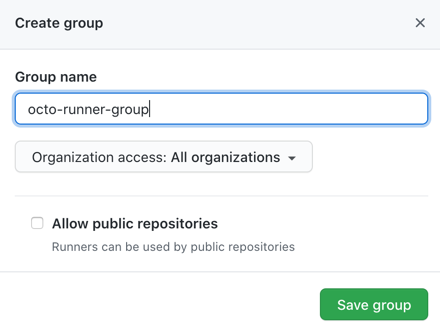
Enter a name for your runner group, and assign a policy for repository access.
You can configure a runner group to be accessible to a specific list of repositories, or to all repositories in the organization. By default, only private repositories can access runners in a runner group, but you can override this. This setting can't be overridden if configuring an organization's runner group that was shared by an enterprise.
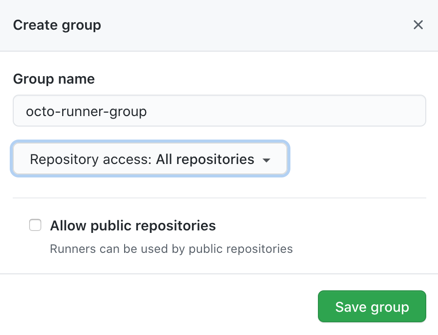
-
Click Save group to create the group and apply the policy.
Creating a self-hosted runner group for an enterprise
Warning: Recomendamos que você use apenas executores auto-hospedados com repositórios privados. Isso acontece porque as bifurcações do seu repositório podem potencialmente executar código perigoso na sua máquina de executor auto-hospedada criando um pull request que executa o código em um fluxo de trabalho.
For more information, see "About self-hosted runners."
Enterprises can add their runners to groups for access management. Enterprises can create groups of runners that are accessible to specific organizations in the enterprise account. Organization owners can then assign additional granular repository access policies to the enterprise runner groups. For information about how to create a runner group with the REST API, see the enterprise endpoints in the GitHub Actions REST API.
Runners are automatically assigned to the default group when created, and can only be members of one group at a time. You can assign the runner to a specific group during the registration process, or you can later move the runner from the default group to a custom group.
When creating a group, you must choose a policy that defines which organizations have access to the runner group.
-
No canto superior � direita de GitHub Enterprise Server, clique na foto do perfil e clique em Configurações da empresa.

-
Na barra lateral da empresa, clique em Políticas.
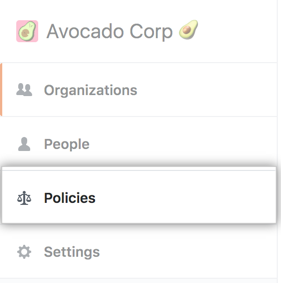
-
Em " Políticas", clique em Actions.
-
Clique na guia Executores.
-
Use the Add new drop-down, and select New group.
-
Under "Group name", type a name for your runner group.
-
To choose a policy for organization access, select the Organization access drop-down, and click a policy. You can configure a runner group to be accessible to a specific list of organizations, or all organizations in the enterprise. By default, only private repositories can access runners in a runner group, but you can override this.
-
Click Save group to create the group and apply the policy.
Changing the access policy of a self-hosted runner group
Warning: Recomendamos que você use apenas executores auto-hospedados com repositórios privados. Isso acontece porque as bifurcações do seu repositório podem potencialmente executar código perigoso na sua máquina de executor auto-hospedada criando um pull request que executa o código em um fluxo de trabalho.
For more information, see "About self-hosted runners."
For runner groups in an enterprise, you can change what organizations in the enterprise can access a runner group. For runner groups in an organization, you can change what repositories in the organization can access a runner group.
Changing what organizations or repositories can access a runner group
-
Na seção "Executores" da página de configurações, ao lado do grupo de executores que você deseja configurar, clique em e clique em Editar nome e acesso de [organização|repositório] .

-
Modify your policy options.
Warning
Recomendamos que você use apenas executores auto-hospedados com repositórios privados. Isso acontece porque as bifurcações do seu repositório podem potencialmente executar código perigoso na sua máquina de executor auto-hospedada criando um pull request que executa o código em um fluxo de trabalho.
For more information, see "About self-hosted runners."
Changing the name of a runner group
- Na seção "Executores" da página de configurações, ao lado do grupo de executores que você deseja configurar, clique em e clique em Editar nome e acesso de [organização|repositório] .
- Change the runner group name.
Automatically adding a self-hosted runner to a group
You can use the configuration script to automatically add a new runner to a group. For example, this command registers a new runner and uses the --runnergroup parameter to add it to a group named rg-runnergroup.
./config.sh --url $org_or_enterprise_url --token $token --runnergroup rg-runnergroup
The command will fail if the runner group doesn't exist:
Could not find any self-hosted runner group named "rg-runnergroup".
Moving a self-hosted runner to a group
If you don't specify a runner group during the registration process, your new runners are automatically assigned to the default group, and can then be moved to another group.
-
Navegue por onde seu runner auto-hospedado está registrado:
-
Em uma organização: navegue até a página principal e clique em Configurações.
-
Se estiver usando um executor de classe empresarial:
- No canto superior � direita de GitHub Enterprise Server, clique na foto do perfil e clique em Configurações da empresa.
- No canto superior � direita de GitHub Enterprise Server, clique na foto do perfil e clique em Configurações da empresa.
-
-
Navegue até as configurações GitHub Actions:
-
Em uma organização:
- In the left sidebar, click Actions.
- In the left sidebar, under "Actions", click Runners.
-
Se estiver usando um executor de classe empresarial:
- Na barra lateral da empresa, clique em Políticas.
1. Em " Políticas", clique em Actions. 1. Clique na guia Executores.
- Na barra lateral da empresa, clique em Políticas.
-
-
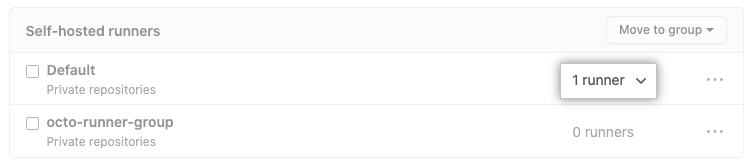
In the "Runner groups" section of the settings page, locate the current group of the runner you want to move and expand the list of group members.
-
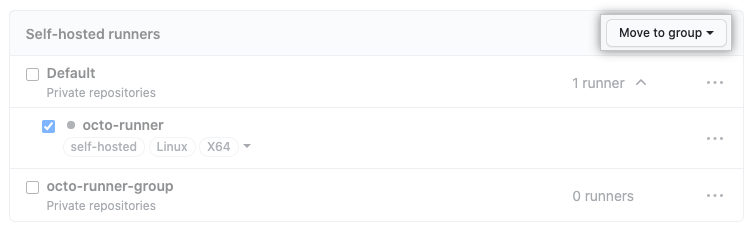
Select the checkbox next to the self-hosted runner, and then click Move to group to see the available destinations.
-
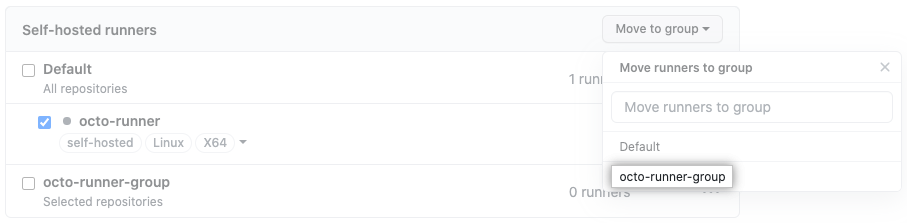
To move the runner, click on the destination group.
Removing a self-hosted runner group
Runners are automatically returned to the default group when their group is removed.
-
Navigate to where your runner groups are located:
-
In an organization: navigate to the main page and click Settings.
-
If using an enterprise-level group:
- No canto superior � direita de GitHub Enterprise Server, clique na foto do perfil e clique em Configurações da empresa.
- No canto superior � direita de GitHub Enterprise Server, clique na foto do perfil e clique em Configurações da empresa.
-
-
Navigate to the "Runner groups" settings:
-
In an organization:
- In the left sidebar, click Actions.
- In the left sidebar, under "Actions", click Runners.
-
If using an enterprise-level group:
- Na barra lateral da empresa, clique em Políticas.
- Em " Políticas", clique em Actions.
- Clique na guia Grupos de executores.
- Na barra lateral da empresa, clique em Políticas.
-
-
In the list of groups, to the right of the group you want to delete, click .
-
To remove the group, click Remove group.
-
Review the confirmation prompts, and click Remove this runner group. Any runners still in this group will be automatically moved to the default group, where they will inherit the access permissions assigned to that group.