Nota: Hay un máximo de 8 réplicas de disponibilidad alta (tanto pasivas como activas/geo replicas) que se permiten para GitHub Enterprise Server.
Creating a high availability replica
-
Set up a new GitHub Enterprise Server appliance on your desired platform. The replica appliance should mirror the primary appliance's CPU, RAM, and storage settings. We recommend that you install the replica appliance in an independent environment. The underlying hardware, software, and network components should be isolated from those of the primary appliance. If you are a using a cloud provider, use a separate region or zone. For more information, see "Setting up a GitHub Enterprise Server instance".
-
Ensure that both the primary appliance and the new replica appliance can communicate with each other over ports 122/TCP and 1194/UDP. For more information, see "Network ports."
-
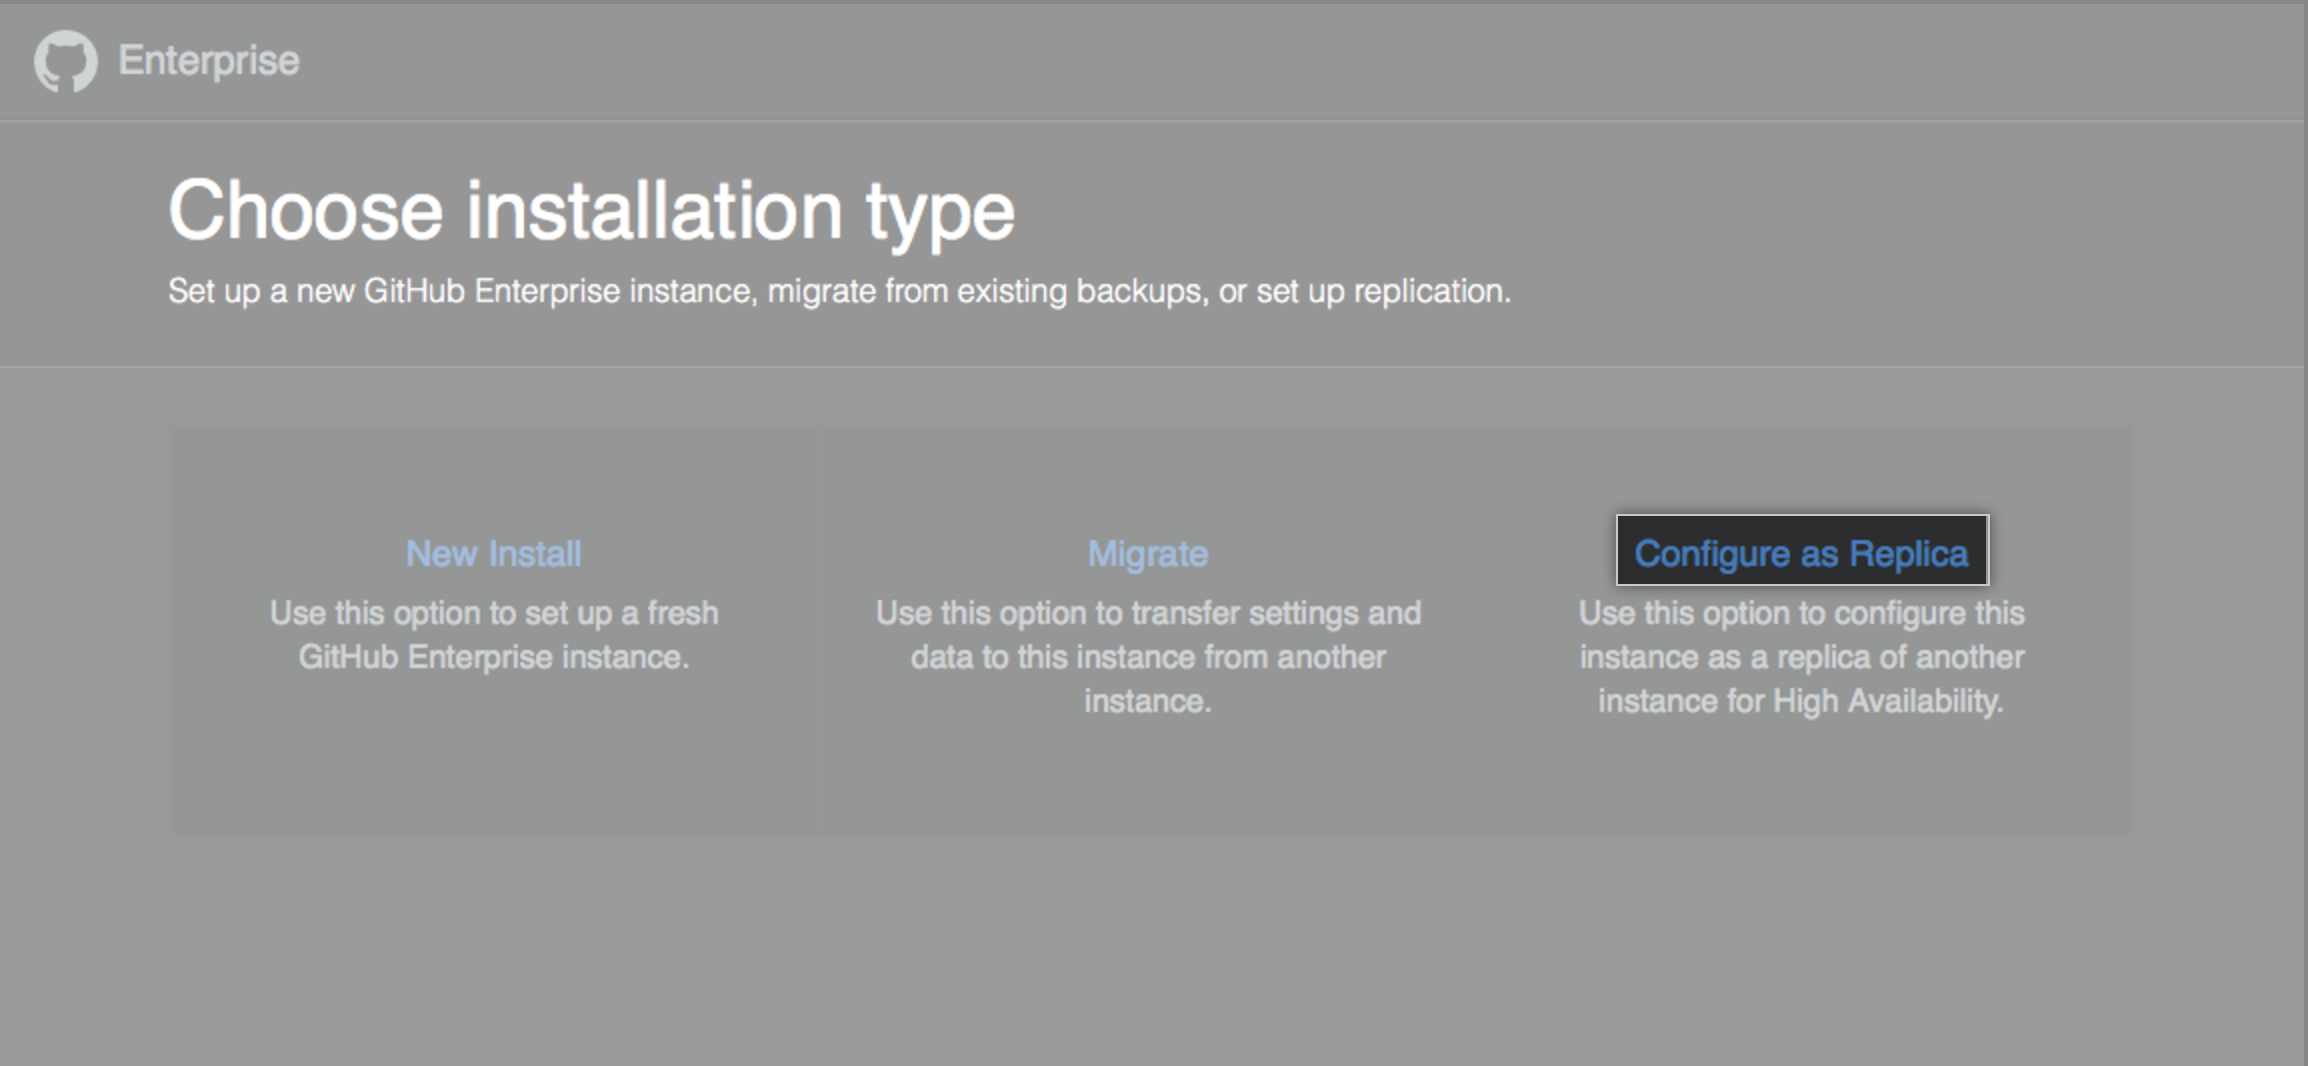
In a browser, navigate to the new replica appliance's IP address and upload your GitHub Enterprise license.
-
Establece una contraseña de administrador que coincida con la contraseña del aparato principal y continúa.
-
Haz clic en Configure as Replica (Configurar como réplica).
-
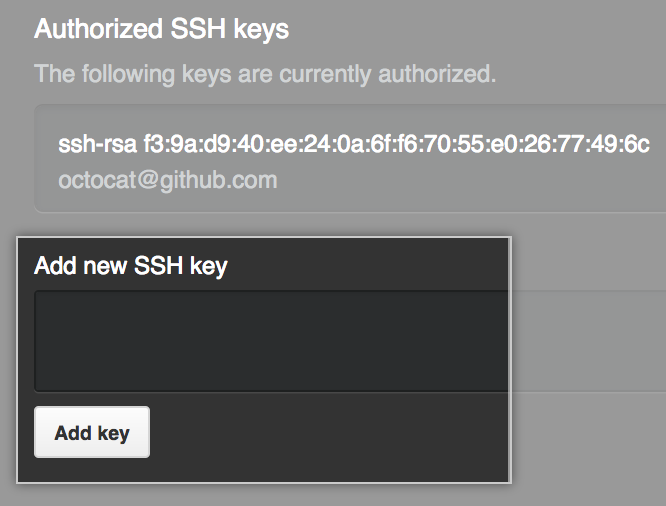
En "Agregar nueva clave SSH", escribe tu clave SSH.
-
Da clic en Agregar llave.
-
Connect to the replica appliance's IP address using SSH.
$ ssh -p 122 admin@REPLICA IP -
Para generar un par de claves para la replicación, usa el comando
ghe-repl-setupcon la dirección IP del aparato principal y copia la clave pública que este devuelve.$ ghe-repl-setup PRIMARY IP -
Para agregar una llave pública a la lista de llaves autorizadas en el aparato principal, ingresa a
https://PRIMARY-HOSTNAME/setup/settingsy agrega a la lista la llave que copiaste de la réplica. -
To verify the connection to the primary and enable replica mode for the new replica, run
ghe-repl-setupagain.$ ghe-repl-setup PRIMARY IP -
Para comenzar la replicación de las bases de datos, utiliza el comando
ghe-repl-start.$ ghe-repl-startAdvertencia:
ghe-repl-startcausa una breve interrupción en el servidor principal, durante la cual los usuarios pueden ver errores internos del servidor. Para proporcionar un mensaje más amigable, ejecutaghe-maintenance -sen el nodo principal antes de ejecutarghe-repl-starten el nodo réplica para poner la aplicación en modo de mantenimiento. Una vez que se inicie la replicación, deshabilita el modo de mantenimiento conghe-maintenance -u. La replicación de Git no progresará mientras el nodo primario esté en modo de mantenimiento. -
Para verificar el estado de cada canal de replicación del almacén de datos, utiliza el comando
ghe-repl-status.$ ghe-repl-status
Creating geo-replication replicas
This example configuration uses a primary and two replicas, which are located in three different geographic regions. While the three nodes can be in different networks, all nodes are required to be reachable from all the other nodes. At the minimum, the required administrative ports should be open to all the other nodes. For more information about the port requirements, see "Network Ports."
-
Create the first replica the same way you would for a standard two node configuration by running
ghe-repl-setupon the first replica.(replica1)$ ghe-repl-setup PRIMARY IP (replica1)$ ghe-repl-start -
Create a second replica and use the
ghe-repl-setup --addcommand. The--addflag prevents it from overwriting the existing replication configuration and adds the new replica to the configuration.(replica2)$ ghe-repl-setup --add PRIMARY IP (replica2)$ ghe-repl-start -
By default, replicas are configured to the same datacenter, and will now attempt to seed from an existing node in the same datacenter. Configure the replicas for different datacenters by setting a different value for the datacenter option. The specific values can be anything you would like as long as they are different from each other. Run the
ghe-repl-nodecommand on each node and specify the datacenter.On the primary:
(primary)$ ghe-repl-node --datacenter [PRIMARY DC NAME]On the first replica:
(replica1)$ ghe-repl-node --datacenter [FIRST REPLICA DC NAME]On the second replica:
(replica2)$ ghe-repl-node --datacenter [SECOND REPLICA DC NAME]Tip: You can set the
--datacenterand--activeoptions at the same time. -
An active replica node will store copies of the appliance data and service end user requests. An inactive node will store copies of the appliance data but will be unable to service end user requests. Enable active mode using the
--activeflag or inactive mode using the--inactiveflag.On the first replica:
(replica1)$ ghe-repl-node --activeOn the second replica:
(replica2)$ ghe-repl-node --active -
To apply the configuration, use the
ghe-config-applycommand on the primary.(primary)$ ghe-config-apply
Configuring DNS for geo-replication
Configure Geo DNS using the IP addresses of the primary and replica nodes. You can also create a DNS CNAME for the primary node (e.g. primary.github.example.com) to access the primary node via SSH or to back it up via backup-utils.
For testing, you can add entries to the local workstation's hosts file (for example, /etc/hosts). These example entries will resolve requests for HOSTNAME to replica2. You can target specific hosts by commenting out different lines.
# <primary IP>     <em>HOSTNAME</em>
# <replica1 IP>    <em>HOSTNAME</em>
<replica2 IP>    <em>HOSTNAME</em>