Acerca de la creación de un codespace para un repositorio
Puedes crear un codespace en GitHub.com, en Visual Studio Code o utilizando el GitHub CLI. Usa las pestañas de este artículo a fin de mostrar instrucciones para cada una de estas formas de crear un codespace.
Puedes usar GitHub Codespaces en tu cuenta personal del GitHub.com, con la cuota de uso gratuito incluido cada mes para las cuentas de los planes Gratis y Pro. Para seguir usando GitHub Codespaces más allá del almacenamiento y del uso de proceso mensuales incluidos, proporciona la información de pago y establece un límite de gasto. Para obtener más información, vea «Acerca de la facturación de GitHub Codespaces».
Las organizaciones pueden permitir que los miembros y colaboradores externos creen y usen codespaces a costa de la organización. Para obtener más información, vea «Selección de quién posee y paga los codespaces de una organización».
La capacidad de crear codespaces a partir de repositorios que posea la organización depende de varios factores, como la visibilidad del repositorio y la configuración de la organización o su empresa principal. Para obtener más información, vea «Solucionar problemas de creación y borrado de codespaces».
Nota: Si tienes un cuenta de usuario administrada, no puedes crear codespaces para los repositorios personales, a menos que el repositorio sea una bifurcación de un repositorio propiedad de la organización y tengas permiso para usar GitHub Codespaces a costa de la organización. Para obtener más información, vea «Acerca de Enterprise Managed Users».
Si vas a iniciar un nuevo proyecto, es posible que desees crear un codespace a partir de una plantilla y publicar en un repositorio en GitHub Enterprise Cloud más tarde. Para más información, consulta "Creación de un codespace a partir de una plantilla".
Nota: Si usas un IDE de JetBrains, puedes usar la GitHub CLI para crear un codespace. Después, puedes usar la aplicación de Puerta de enlace de JetBrains para abrir el codespace en un IDE de JetBrains. Para obtener más información, vea «Uso de GitHub Codespaces en el IDE de JetBrains».
Si creas un codespace desde un repositorio, este se asociará a una rama específica, que no puede estar vacía. Puedes crear más de un codespace por repositorio o incluso por rama.
Puedes ver todos los codespaces disponibles que has creado en la página “Tus codespaces”. Para mostrar esta página, en la esquina superior izquierda de GitHub.com, selecciona y haz clic en Codespaces . Esto te lleva a github.com/codespaces.
Proceso de creación de codespace
Cuando creas un codespace, se suscitan varios pasos para crear y conectarte a tu ambiente de desarrollo:
- Paso 1: se le asignan una MV y almacenamiento a tu codespace.
- Paso 2: Se crea el contenedor y se clona tu repositorio.
- Paso 3: Puedes conectarte al codespace.
- Paso 4: El codespace sigue con la configuración post-creación.
Para más información sobre lo que sucede al crear un codespace, consulta "Análisis en profundidad de GitHub Codespaces".
Para más información sobre el ciclo de vida de un codespace, consulta "Ciclo de vida de un codespace".
Si quieres usar enlaces de Git para el codespace, debes configurarlos mediante los scripts de ciclo de vida devcontainer.json, como postCreateCommand. Estos se ejecutan durante el paso 4 anterior. Para obtener más información sobre los scripts de ciclo de vida, consulta la especificación de los contenedores de desarrollo en el sitio web de los contenedores de desarrollo. Como el contenedor de desarrollador de codespace se crea después de clonar el repositorio, cualquier directorio de plantilla de Git configurado en la imagen de contenedor no se aplicará al codespace. En su lugar, deben instalarse los ganchos después de que se crea el codespace.
Puedes editar código, depurar y utilizar comandos de Git mientras desarrollas en un codespace con VS Code. Para más información, consulta la documentación de VS Code.
Para acelerar la creación de codespaces, los administradores de repositorios pueden habilitar precompilaciones de GitHub Codespaces para un repositorio. Para obtener más información, vea «Acerca de las precompilaciones de GitHub Codespaces».
Creación de un codespace para un repositorio
-
En GitHub.com, navega a la página principal del repositorio.
-
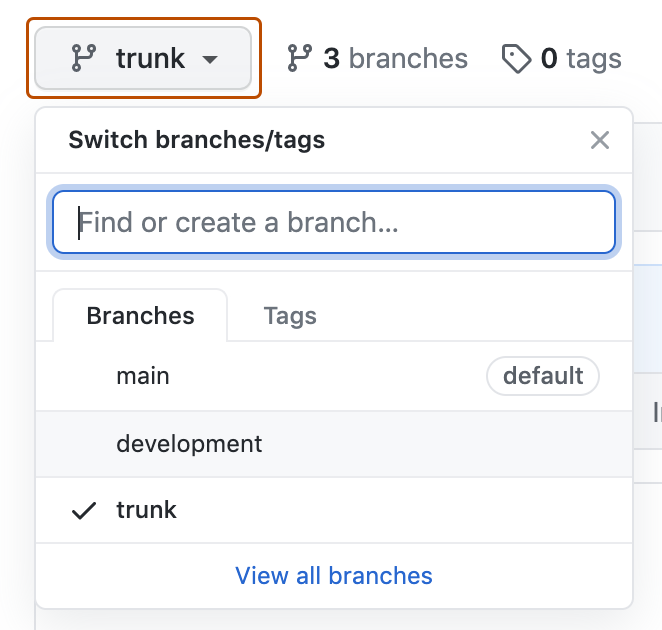
En el nombre del repositorio, seleccione el menú desplegable de la rama, que se etiqueta con el nombre de la rama actual y, a continuación, haga clic en la rama para la que desea crear un espacio de código.
-
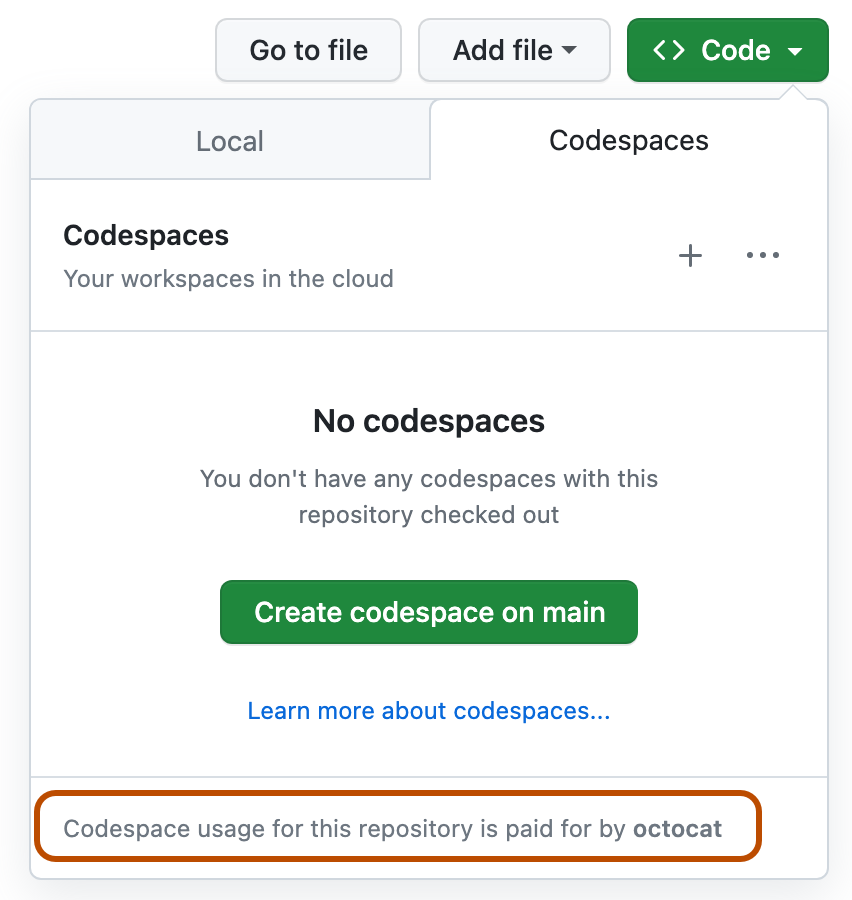
Haz clic en el botón Código y, a continuación, haz clic en la pestaña Codespaces.
Se muestra un mensaje en la parte inferior del cuadro de diálogo que le indica quién pagará por el codespace.
-
Crea el codespace, ya sea con las opciones predeterminadas o después de configurar las opciones avanzadas:
-
Uso de las opciones predeterminadas
Para crear un codespace con las opciones predeterminadas, haz clic en .
-
Configurar opciones avanzadas
Para configurar opciones avanzadas para el codespace, como un tipo de máquina diferente o un archivo determinado
devcontainer.json:-
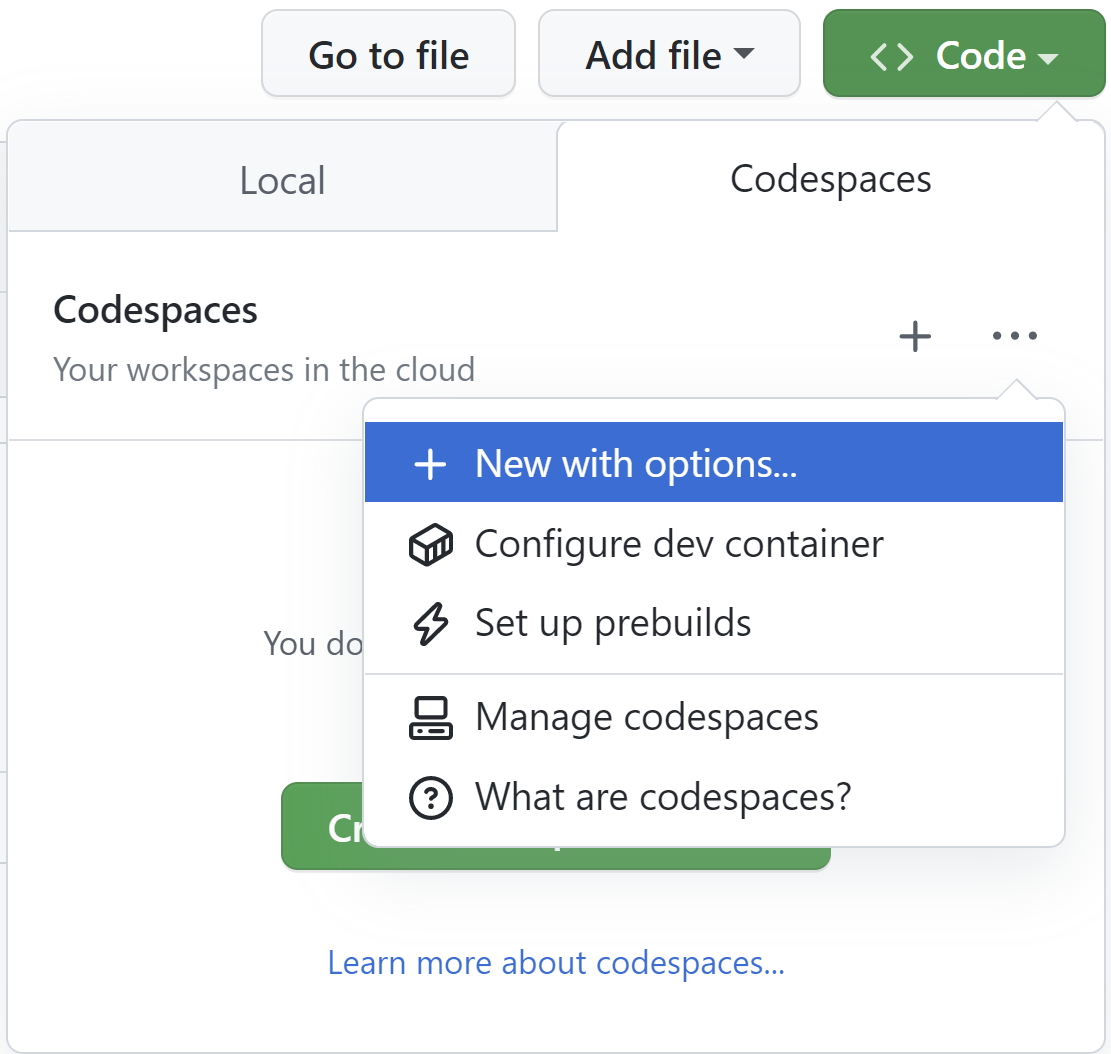
En la parte superior derecha de la pestaña Codespaces, selecciona y haz clic en Nuevo con opciones.
-
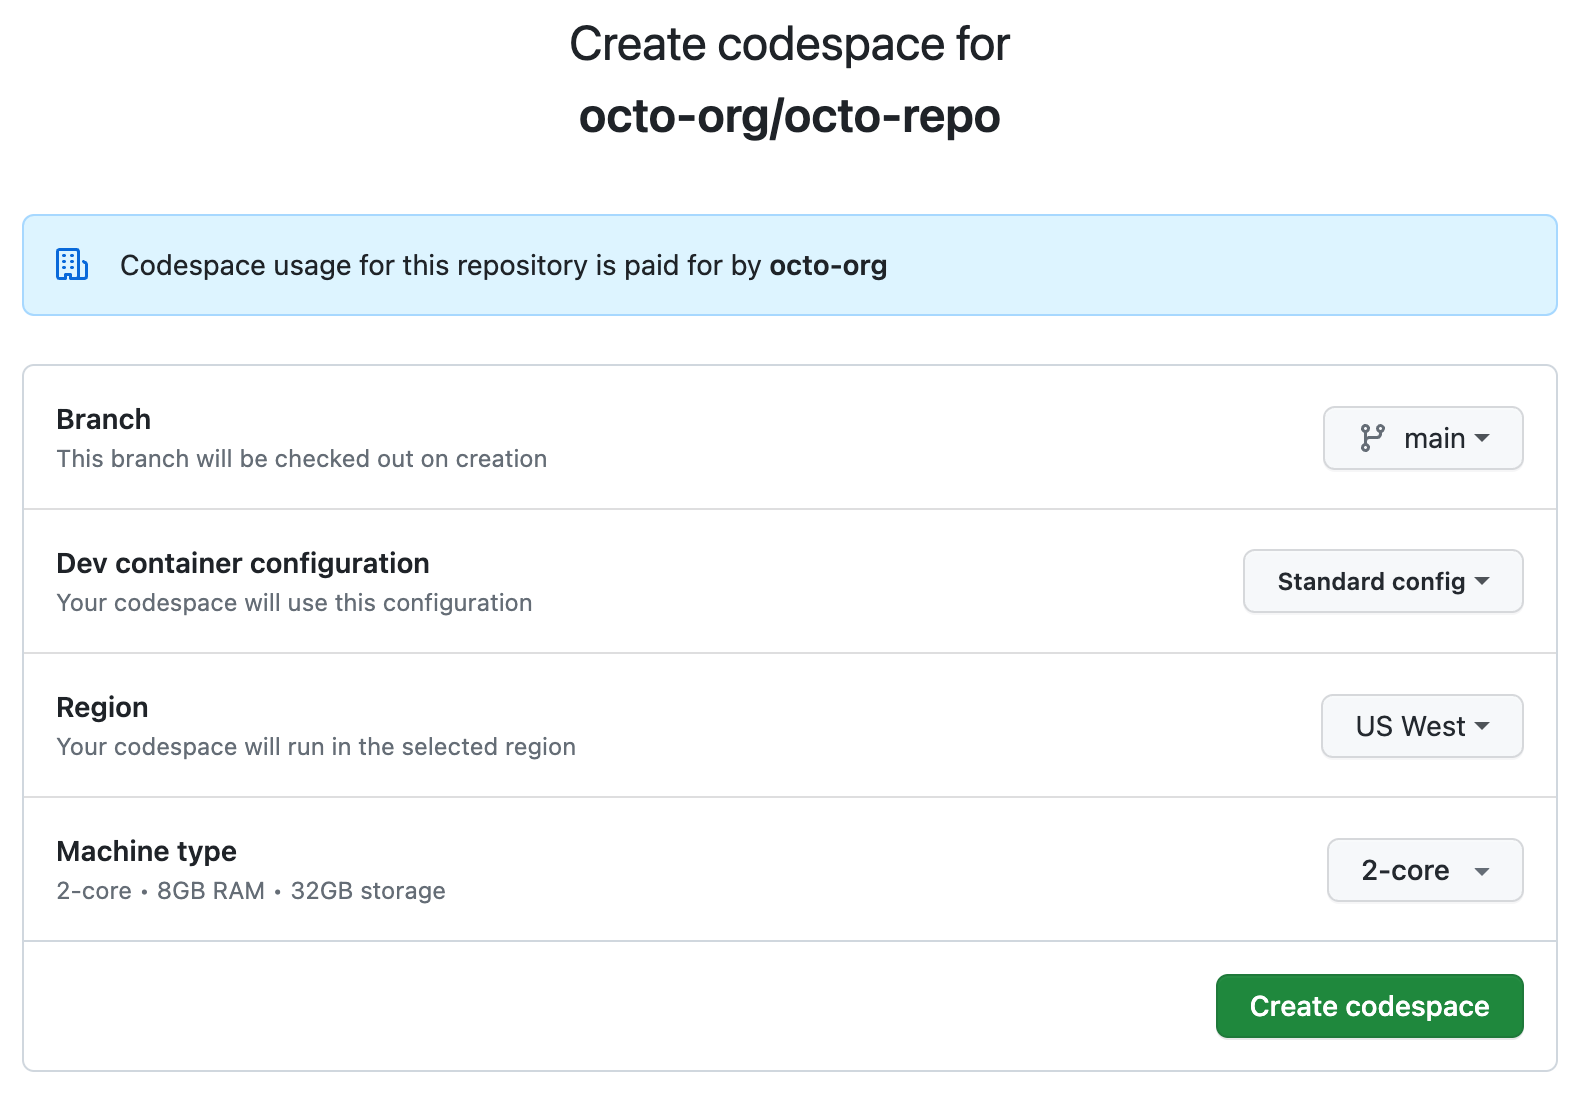
En la página de opciones del codespace, elige tus opciones preferidas en los menús desplegables.
La página de opciones también puede mostrar los nombres de uno o varios secretos que se recomienda crear en la configuración de Codespaces. Para obtener más información, consulta "Secretos recomendados."
Notas
- Puedes marcar la página de opciones para poder crear rápidamente un codespace para este repositorio y esta rama.
- La página https://github.com/codespaces/new proporciona una manera rápida de crear un codespace para cualquier repositorio y rama. Puedes acceder a esta página rápidamente escribiendo
codespace.newen la barra de direcciones del explorador. - Para obtener más información sobre el archivo de configuración de contenedores de desarrollo, consulta "Introducción a los contenedores dev".
- Para más información sobre los tipos de máquina, consulta "Cambiar el tipo de máquina de tu codespace".
- La elección de los tipos de máquina disponibles puede estar limitada por varios factores. Estos pueden incluir una directiva configurada para la organización o una especificación mínima del tipo de máquina para el repositorio. Para obtener más información, vea «Restringir el acceso a los tipos de máquina» y «Configurar una especificación mínima para las máquinas de los codespaces».
-
Haga clic en Crear codespace.
-
-


Secretos recomendados
Los nombres de los secretos definidos por el usuario se pueden mostrar en la página de opciones avanzadas al crear un codespace. Esto ocurrirá si se han especificado secretos recomendados en la configuración del contenedor de desarrollo que has seleccionado. Para obtener más información, vea «Especificación de secretos recomendados para un repositorio».

Se recomienda escribir valores para estos secretos de entorno de desarrollo, cuando se te pida que lo hagas, ya que es probable que el proyecto necesite valores para ellos. Sin embargo, no es necesario proporcionar valores para crear un codespace. Puedes establecer estos secretos en el codespace si lo prefieres.
Si escribes un valor para un secreto recomendado, el secreto estará disponible en el nuevo codespace. Al hacer clic en Crear codespace, el secreto también se agrega a la configuración personal para Codespaces, por lo que no tendrás que escribir un valor para el secreto en el futuro al crear un codespace para este repositorio.
Si el nombre de un secreto se muestra con una casilla que no está disponible para seleccionarla y no hay ningún cuadro de entrada, se debe a que ya tienes un secreto de este nombre configurado en la configuración personal para Codespaces y lo has asociado a este repositorio. Si has creado un secreto de este nombre pero no lo has asociado a este repositorio, la casilla estará disponible para seleccionar y, al hacerlo, puedes actualizar la configuración para agregar la asociación.
Si deseas cambiar el valor de un secreto preseleccionado, puedes hacerlo desde la configuración personal de Codespaces en github.com/settings/codespaces. Para obtener más información, vea «Administración de secretos específicos de la cuenta para GitHub Codespaces».
Después de conectar tu cuenta de GitHub.com a la extensión de GitHub Codespaces, puedes crear un codespace. Para obtener más información sobre la extensión de GitHub Codespaces, consulta el VS Code Marketplace.
-
En VS Code, en la barra de actividad, haz clic en el icono de Explorador remoto.
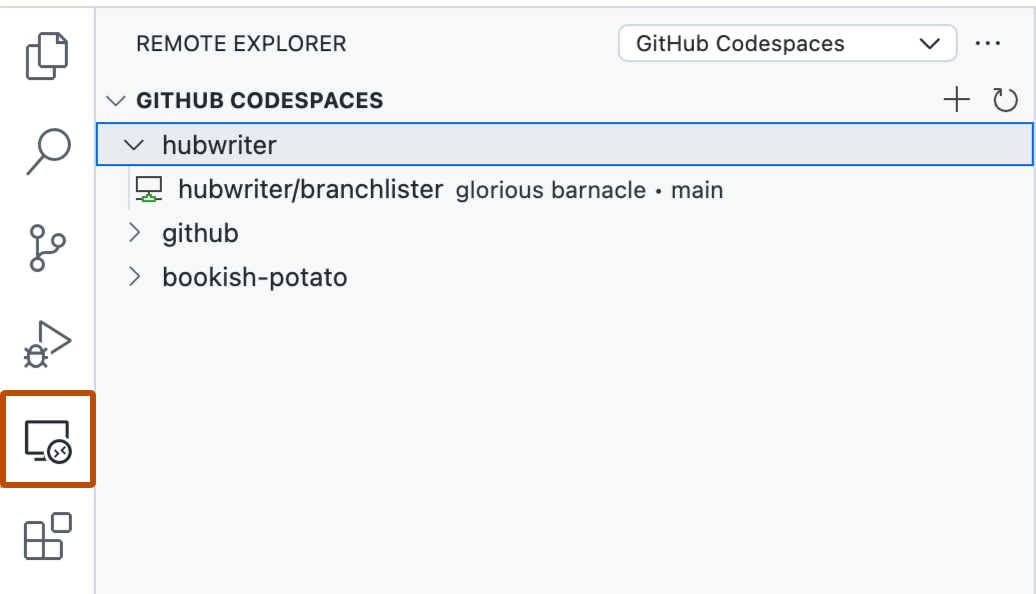
Nota: Si el Explorador remoto no se muestra en la barra de actividad:
- Abra la paleta de comandos. Por ejemplo, presionando el Comando+Shift+P (Mac) / Ctrl+Shift+P (Windows/Linux).
- Escriba:
details. - Haz clic en Codespaces: Detalles.
-
Mantén el puntero sobre la barra lateral "Explorador remoto" y haz clic en .

-
En el cuadro de texto, escribe el nombre del repositorio en el que quieres desarrollar y selecciónalo.
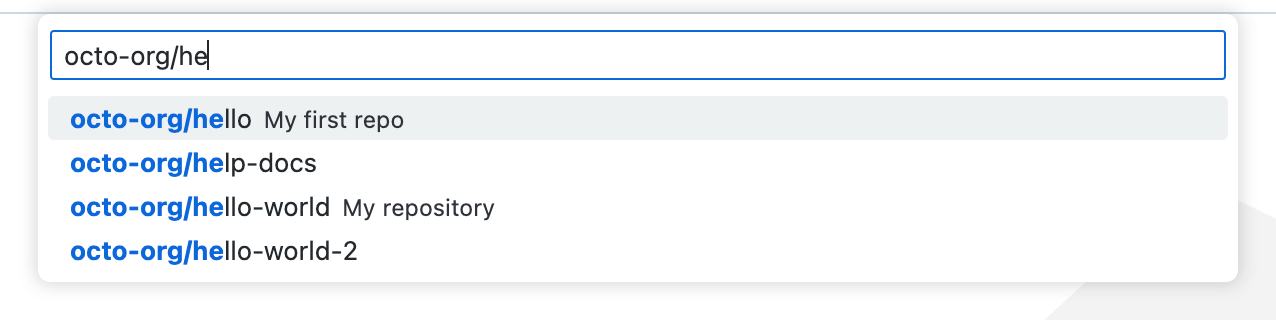
Se muestra un mensaje en el lado derecho de las solicitudes posteriores que te indican quién pagará por el codespace.

-
Da clic en la rama en la que quieras desarrollar.
-
Si se te pide que elijas un archivo de configuración de contenedor de desarrollo, selecciona un archivo en la lista.
-
Elige el tipo de máquina que quieres utilizar.
Nota: La elección de los tipos de máquina disponibles puede estar limitada por varios factores. Estos pueden incluir una directiva configurada para la organización o una especificación mínima del tipo de máquina para el repositorio. Para obtener más información, vea «Restringir el acceso a los tipos de máquina» y «Configurar una especificación mínima para las máquinas de los codespaces».


Para más información sobre GitHub CLI, consulta "Acerca del CLI de GitHub".
Para crear un codespace, use el subcomando gh codespace create.
gh codespace create
Se te pedirá que elijas un repositorio. Se muestra un mensaje que le indica quién pagará por el codespace. Luego, se te pedirá que elijas una rama, un archivo de configuración de contenedor de desarrollo (si hay más de uno disponible) y un tipo de máquina (si hay más de uno disponible).
Como alternativa, puedes utilizar marcadores para especificar algunas o todas las opciones:
gh codespace create -r OWNER/REPO -b BRANCH --devcontainer-path PATH -m MACHINE-TYPE
En este ejemplo, reemplaza owner/repo por el identificador del repositorio. Reemplace a branch por el nombre de la rama o el hash SHA completo de la confirmación que quiera que se extraiga inicialmente en el codespace. Si usa la marca -r sin la marca b, el codespace se crea a partir de la rama predeterminada.
Reemplaza path por la ruta de acceso al archivo de configuración de contenedor de desarrollo que desees usar para el nuevo codespace. Si omites este marcador y hay más de un tipo de archivo de contenedor de desarrollo disponible, se te pedirá que lo elijas en una lista. Para más información sobre el archivo de configuración de contenedores de desarrollo, consulta "Introducción a los contenedores dev".
Reemplace machine-type por un identificador válido para un tipo de máquina disponible. Los identificadores son cadenas como: basicLinux32gb y standardLinux32gb. El tipo de máquinas que están disponibles depende del repositorio, la cuenta personal y la ubicación. Si ingresas un tipo de máquina no disponible o inválido, los tipos disponibles se mostrarán en el mensaje de error. Si omites este marcador y hay más de un tipo de máquina disponible, se te pedirá elegirlo de una lista.
Para obtener los detalles completos de las opciones de este comando, consulta el manual de GitHub CLI.