To install GitHub Enterprise on XenServer, you must deploy the GitHub Enterprise disk image to a XenServer host.
Requirements
Before installing GitHub Enterprise on XenServer, ensure you meet these software and hardware requirements.
Software
- GitHub Enterprise XenServer disk image (VHD) and license files - The appliance and license required to run GitHub Enterprise are available from the GitHub Enterprise download page.
- XenServer Hypervisor - This must be installed on the machine that runs your GitHub Enterprise VM. We support versions 6.0 through 6.2.
- XenCenter Windows Management Console - This simplifies the management of multiple XenServer hosts.
Hardware
- For your storage device, we recommend a high-performance SSD, either directly attached or from a storage area network (SAN).
Based on your seat count, we recommend this hardware configuration:
| Seats | vCPUs | Memory | Attached Storage | Root Storage |
|---|---|---|---|---|
| 10-500 | 2 | 16 GB | 100 GB | 200 GB |
| 500-3000 | 4 | 32 GB | 250 GB | 200 GB |
| 3000-5000 | 8 | 64 GB | 500 GB | 200 GB |
| 5000-8000 | 12 | 72 GB | 750 GB | 200 GB |
| 8000-10000+ | 16 | 128 GB | 1000 GB | 200 GB |
These are minimum recommendations. More resources may be required depending on your usage, such as user activity and selected integrations.
Note: The root disk cannot be resized without building a new appliance. For more information, see "Increasing the root partition size."
Warning: We recommend you use webhooks to fetch repository changes for continuous integration (CI) or similar systems. Regular automatic checks, or polling, will significantly reduce the scalability of your instance.
Download the GitHub Enterprise VM
Navigate to the GitHub Enterprise download page.
To download your license file, click Download license.
Click Get the latest release.
Select GitHub On-premises, then click XenServer (VHD).
- To download your license file, click Download license.
Import the GitHub Enterprise VM
Depending on your network configuration, the import process should take about five to ten minutes to complete.
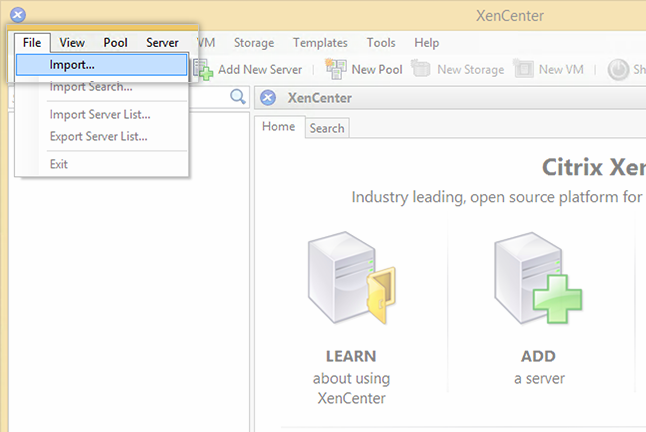
- Start the XenCenter Client.
- Click File > Import.
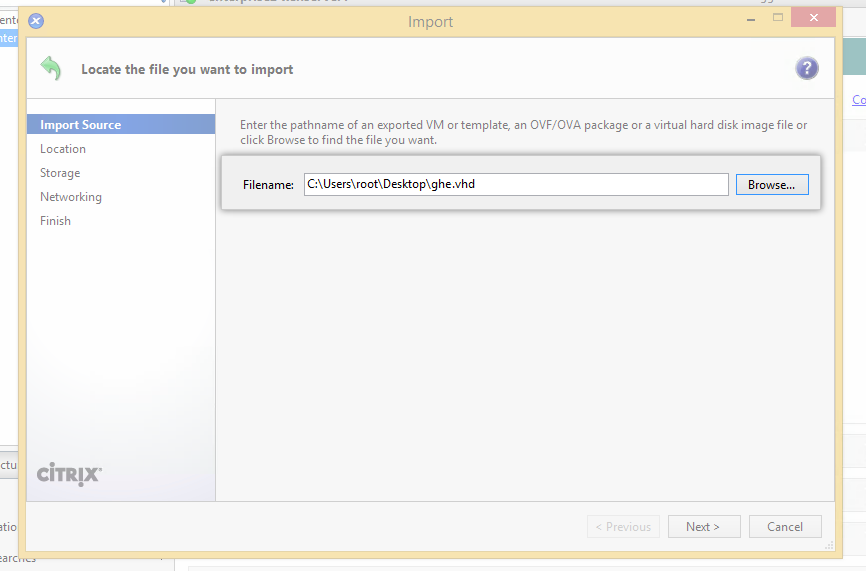
- Next to the Filename field, click Browse. On your computer, locate the XenServer VHD.
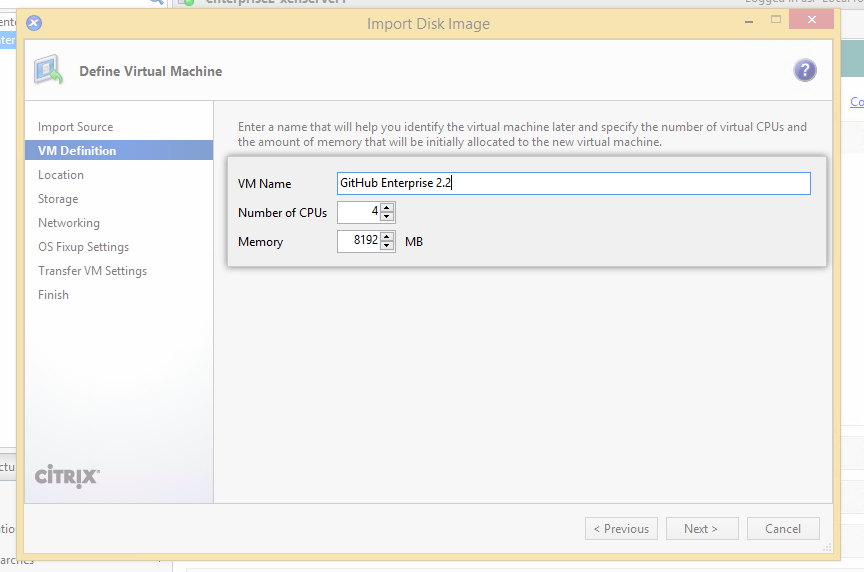
- Configure the VM's CPU and memory storage based on your seat count. For more information, see the hardware requirements.
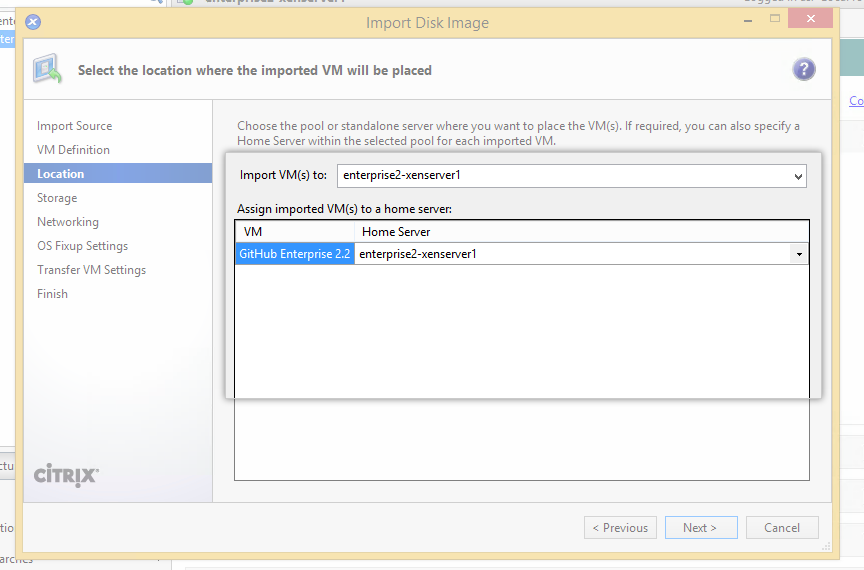
- If you only have one XenServer host, click Next. If you have multiple XenServer hosts, see XenServer's documentation for more information about configuring the virtual machine when using XenServer Resource Pools.
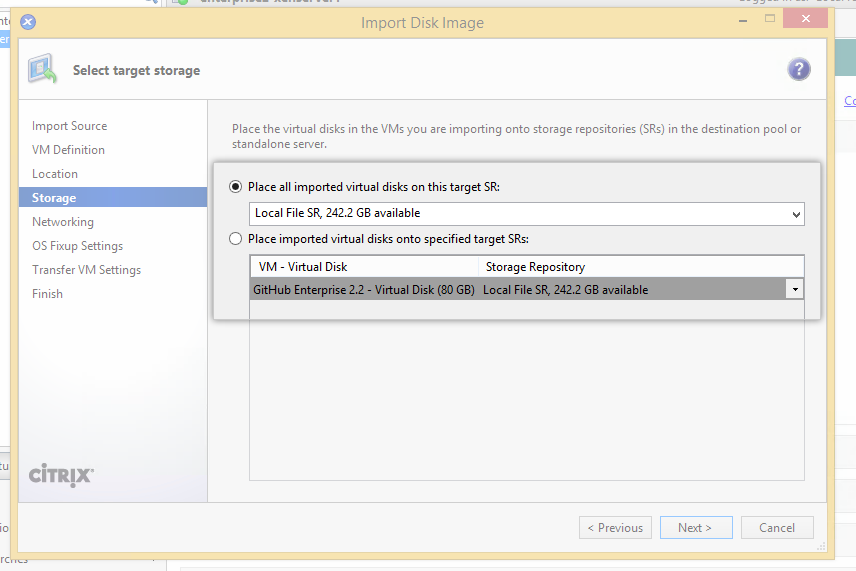
- To assign a storage system for the VM, click Place all imported virtual disks on this target SR. We recommend using a high-performance data storage method, such as a SAN or a local SSD.
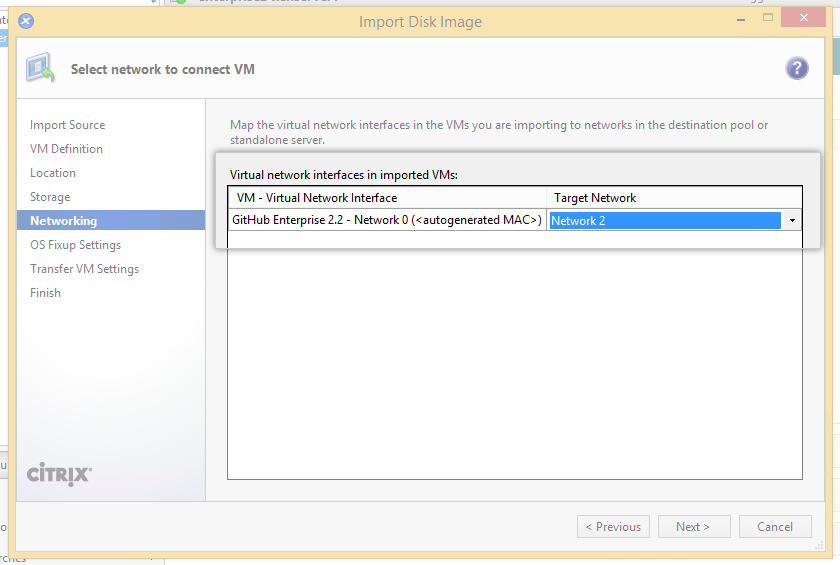
- In the Target Network field, specify an available network on your XenServer host to map to the virtual network interface in the VM.
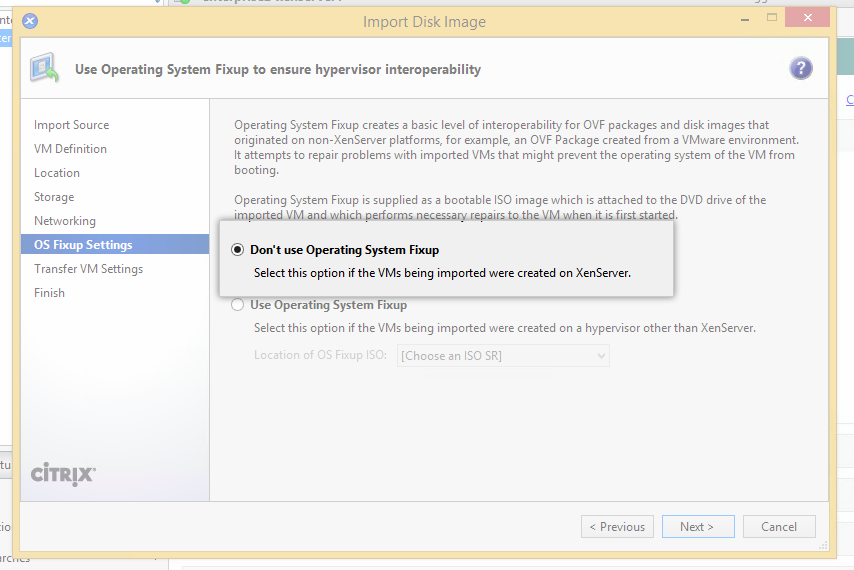
- Select Don't use Operating System Fixup.
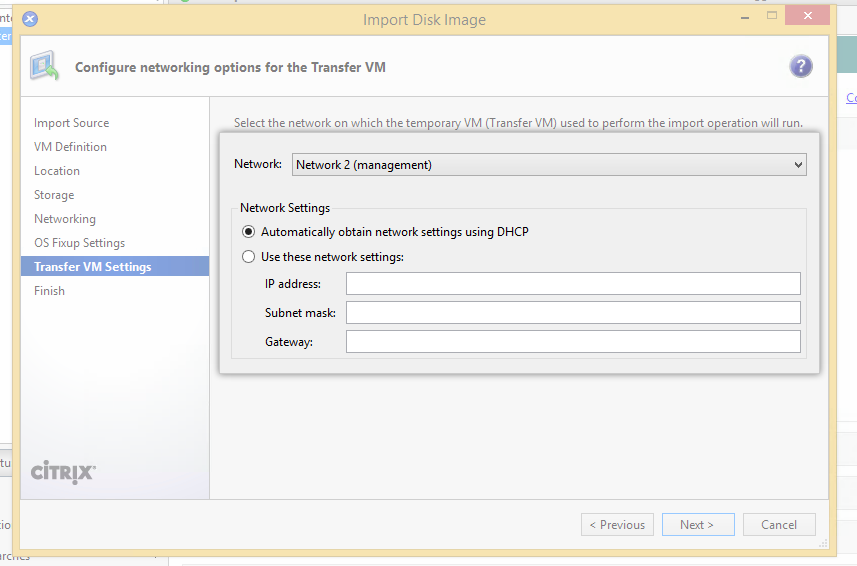
- To transfer the GitHub Enterprise VM to XenServer, select the appropriate network configuration available to your environment.
- To start the import, click Finish. Leave the VM powered off.

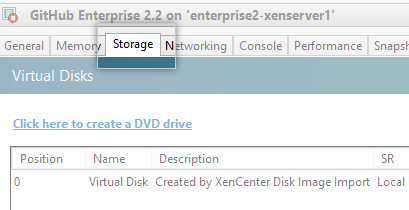
Configure additional block storage
- In the left pane, select your GitHub Enterprise VM.

- To configure a block storage device, click the Storage tab.
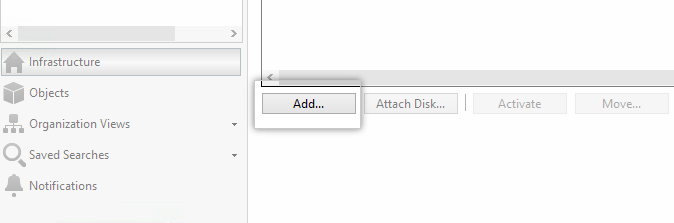
- Click Add....
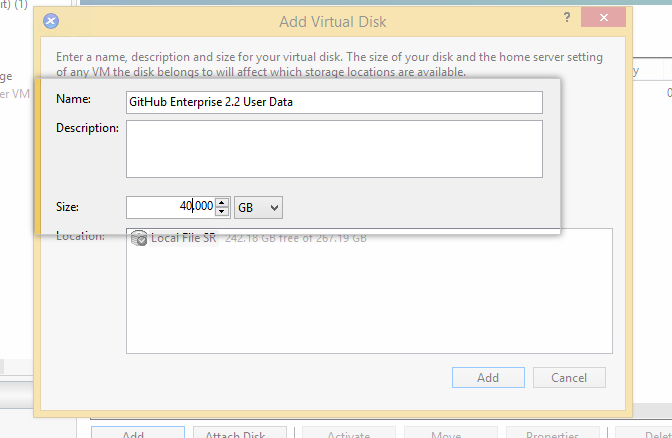
- Create a new virtual disk and configure the size based on your seat count. For more information, see the hardware requirements.
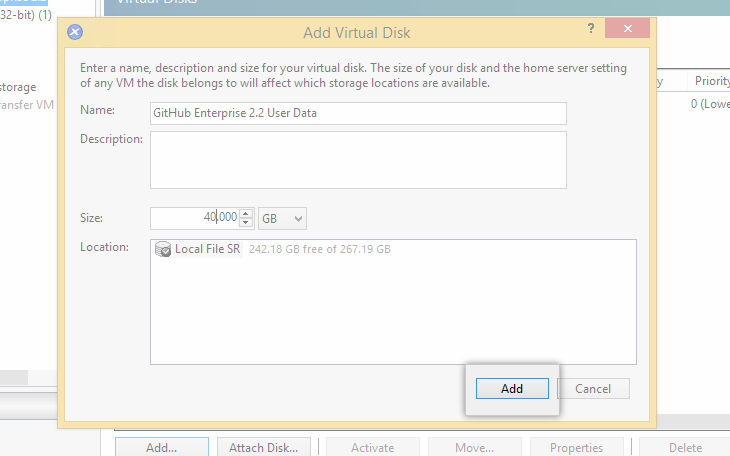
- Click Add.
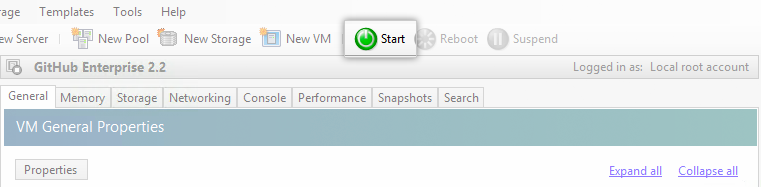
Start the VM
- To start the VM, click Start.
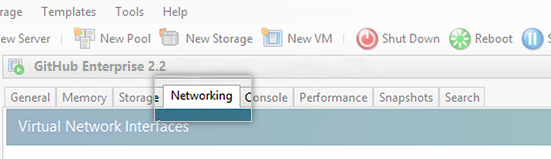
- When your VM is running, click the Networking tab.
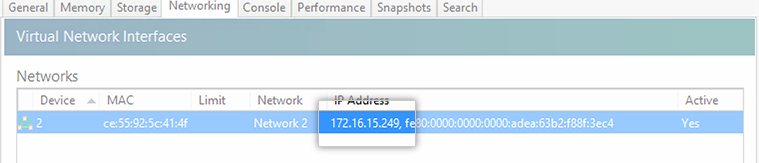
- Copy the VM's IP address and paste it into a web browser.
- Configure the GitHub Enterprise appliance.