You can create a personal access token and use it in place of a password when performing Git operations over HTTPS with Git on the command line or the API.
A personal access token is required to authenticate to GitHub Enterprise when 2FA is enabled on your account.
Creating a token
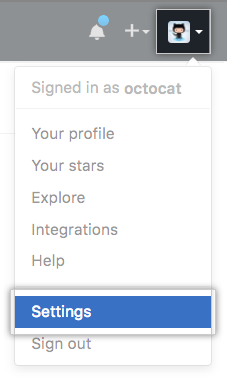
- In the upper-right corner of any page, click your profile photo, then click Settings.
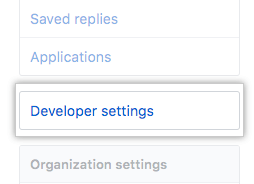
- In the left sidebar, click Developer settings.
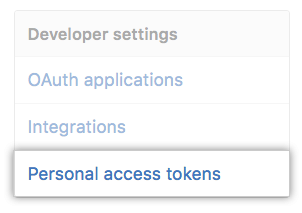
- In the left sidebar, click Personal access tokens.
- Click Generate new token.

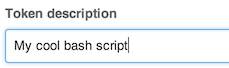
- Give your token a descriptive name.
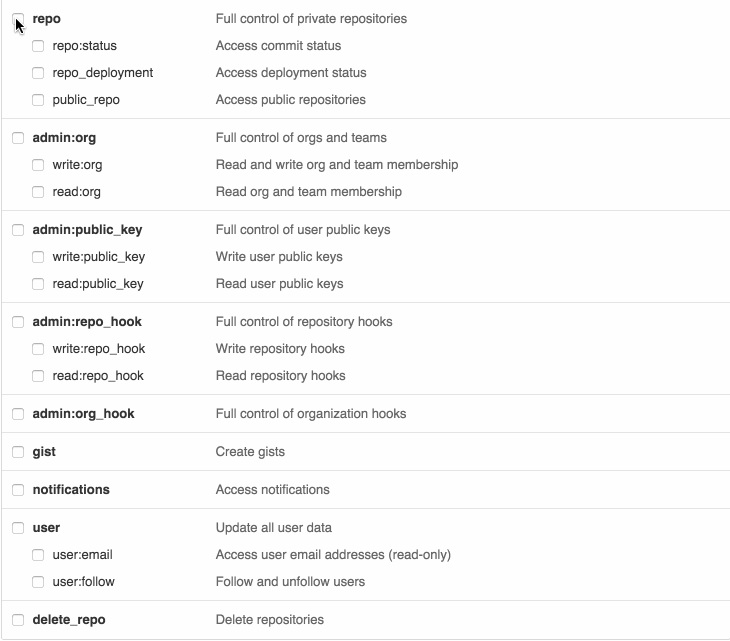
- Select the scopes, or permissions, you'd like to grant this token. To use your token to access repositories from the command line, select repo.
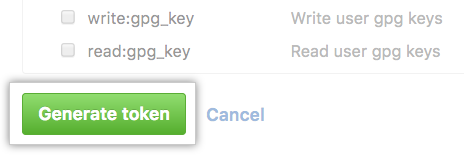
- Click Generate token.
-
Click to copy the token to your clipboard. For security reasons, after you navigate off the page, you will not be able to see the token again.

Warning: Treat your tokens like passwords and keep them secret. When working with the API, use tokens as environment variables instead of hardcoding them into your programs.
Using a token on the command line
Once you have a token, you can enter it instead of your password when performing Git operations over HTTPS.
For example, on the command line you would enter the following:
git clone https://hostname/username/repo.git
Username: your_username
Password: your_token
Personal access tokens can only be used for HTTPS Git operations. If your repository uses an SSH remote URL, you will need to switch the remote from SSH to HTTPS.
If you are not prompted for your username and password, your credentials may be cached on your computer. You can update your credentials in the Keychain to replace your old password with the token.