You can add notes to a project board to serve as task reminders or to add information related to the project board.
Tips:
- You can format your note using Markdown syntax. For example, you can use headings, links, or emoji. For more information, see "Basic writing and formatting syntax."
- You can drag and drop to reorder notes and move them between columns.
- Your project board must have at least one column before you can add notes. For more information, see "Creating a project board."
Adding notes to a repository project board
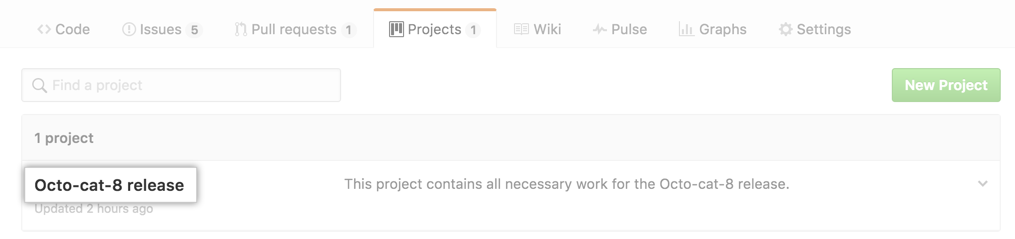
On GitHub Enterprise, navigate to the main page of the repository.
Under your repository name, click Projects.

In the list of projects, click the project board you want to add notes to.
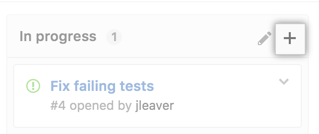
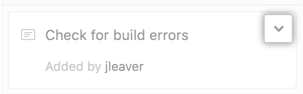
In the column you want to add a note to, click .
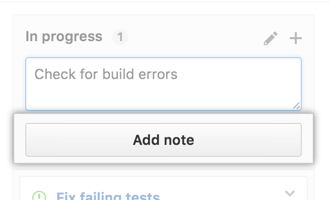
Type your note and click Add note.
Adding notes to an organization-wide project board
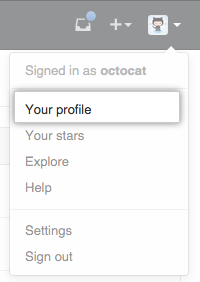
In the top right corner of GitHub Enterprise, click your profile photo, then click Your profile.
On the left side of your profile page, under "Organizations", click the icon for your organization.

Under your organization name, click Projects.

In the list of projects, click the project board you want to add notes to.
In the column you want to add a note to, click .
Type your note and click Add note.
Converting a note to an issue
If you've created a note and find that it isn't sufficient for your needs, you can convert it to an issue.
When you convert a note to an issue, the issue is automatically created using the content from the note. The first line of the note will be the issue title and any additional content from the note will be added to the issue description.
Tip: You can add content in the body of your note to @mention someone, link to another issue or pull request, and add emoji. These GitHub Flavored Markdown features aren't supported within project board notes, but once your note is converted to an issue, they'll appear correctly. For more information on using these features, see "About writing and formatting on GitHub."
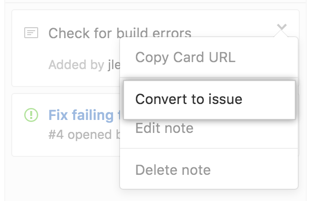
Navigate to the note that you want to convert to an issue.
Click .
Click Convert to issue.
Pick the repository you want to add the issue to.
Confirm that you want to convert the note to an issue by clicking OK.
The note is automatically converted to an issue. In the project board, the new issue card will be in the same location as the previous note.
Editing and removing a note
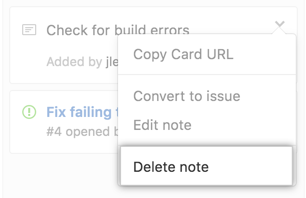
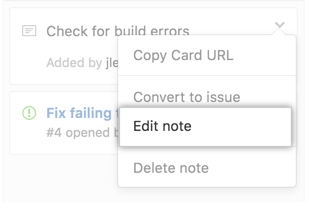
Navigate to the note that you want to edit or remove.
Click .
To edit the contents of the note, click Edit note.
- To delete the contents of the notes, click Delete note.