Putting your existing work on GitHub Enterprise can let you share and collaborate in lots of great ways.
Tip: If you're most comfortable with a point-and-click user interface, try adding your project with GitHub Desktop. For more information, see "Adding a repository from your local computer to GitHub Desktop" in the GitHub Desktop Help.
Warning: Never git add, commit, or push sensitive information to a remote repository. Sensitive information can include, but is not limited to:
- Passwords
- SSH keys
- AWS access keys
- API keys
- Credit card numbers
- PIN numbers
For more information, see "Remove sensitive data."
-
Create a new repository on your GitHub Enterprise instance. To avoid errors, do not initialize the new repository with README, license, or
gitignorefiles. You can add these files after your project has been pushed to GitHub Enterprise.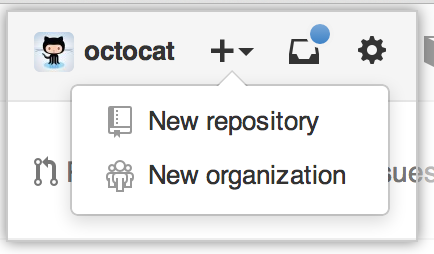
Open Terminal (for Mac and Linux users) or the command prompt (for Windows users).
Change the current working directory to your local project.
-
Initialize the local directory as a Git repository.
git init -
Add the files in your new local repository. This stages them for the first commit.
git add .
# Adds the files in the local repository and stages them for commit. To unstage a file, use 'git reset HEAD YOUR-FILE'.
-
Commit the files that you've staged in your local repository.
git commit -m "First commit"
# Commits the tracked changes and prepares them to be pushed to a remote repository. To remove this commit and modify the file, use 'git reset --soft HEAD~1' and commit and add the file again.
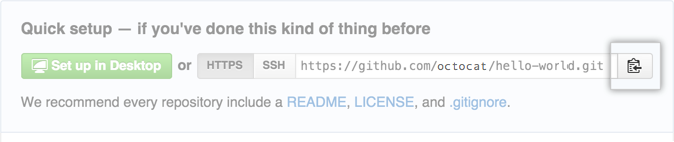
At the top of your GitHub Enterprise repository's Quick Setup page, click to copy the remote repository URL.
-
In Terminal, add the URL for the remote repository where your local repository will be pushed.
git remote add origin remote repository URL
# Sets the new remote
git remote -v
# Verifies the new remote URL
-
Push the changes in your local repository to your GitHub Enterprise instance.
git push origin master
# Pushes the changes in your local repository up to the remote repository you specified as the origin
-
Create a new repository on your GitHub Enterprise instance. To avoid errors, do not initialize the new repository with README, license, or
gitignorefiles. You can add these files after your project has been pushed to GitHub Enterprise.
Open Terminal (for Mac and Linux users) or the command prompt (for Windows users).
Change the current working directory to your local project.
-
Initialize the local directory as a Git repository.
git init -
Add the files in your new local repository. This stages them for the first commit.
git add .
# Adds the files in the local repository and stages them for commit. To unstage a file, use 'git reset HEAD YOUR-FILE'.
-
Commit the files that you've staged in your local repository.
git commit -m "First commit"
# Commits the tracked changes and prepares them to be pushed to a remote repository. To remove this commit and modify the file, use 'git reset --soft HEAD~1' and commit and add the file again.
At the top of your GitHub Enterprise repository's Quick Setup page, click to copy the remote repository URL.
-
In the Command prompt, add the URL for the remote repository where your local repository will be pushed.
git remote add origin remote repository URL
# Sets the new remote
git remote -v
# Verifies the new remote URL
-
Push the changes in your local repository to your GitHub Enterprise instance.
git push origin master
# Pushes the changes in your local repository up to the remote repository you specified as the origin
-
Create a new repository on your GitHub Enterprise instance. To avoid errors, do not initialize the new repository with README, license, or
gitignorefiles. You can add these files after your project has been pushed to GitHub Enterprise.
Open Terminal (for Mac and Linux users) or the command prompt (for Windows users).
Change the current working directory to your local project.
-
Initialize the local directory as a Git repository.
git init -
Add the files in your new local repository. This stages them for the first commit.
git add .
# Adds the files in the local repository and stages them for commit. To unstage a file, use 'git reset HEAD YOUR-FILE'.
-
Commit the files that you've staged in your local repository.
git commit -m "First commit"
# Commits the tracked changes and prepares them to be pushed to a remote repository. To remove this commit and modify the file, use 'git reset --soft HEAD~1' and commit and add the file again.
At the top of your GitHub Enterprise repository's Quick Setup page, click to copy the remote repository URL.
-
In Terminal, add the URL for the remote repository where your local repository will be pushed.
git remote add origin remote repository URL
# Sets the new remote
git remote -v
# Verifies the new remote URL
-
Push the changes in your local repository to your GitHub Enterprise instance.
git push origin master
# Pushes the changes in your local repository up to the remote repository you specified as the origin