GitHub Enterprise allows you to set your appliance's hostname and nameservers, as well as enable SSL. For added security, you can also set up separate subdomains for services such as Gist and GitHub Pages.
Setting DNS nameservers
GitHub Enterprise automatically configures DNS settings on AWS and other DHCP environments, using nameservers provided in DHCP leases. To configure a static IP, you must enter a nameserver at the beginning of your DHCP configuration process.
If your company has internal nameservers that aren't advertised over DHCP, you can apply a custom nameserver. These custom nameservers must be able to resolve your GitHub Enterprise hostname.
Manually configuring nameservers
If your DHCP server does not include nameservers, or if you need to use custom nameservers that are different than your DHCP server's leases, you can configure an alternate DNS manually:
-
As a site admin, SSH into your GitHub Enterprise instance:
ssh -p 122 admin@hostname To edit your nameservers, enter
sudo vim /etc/resolvconf/resolv.conf.d/head.Append any
nameserverentries, then save the file.After verifying your changes, save the file.
To have GitHub Enterprise incorporate the new additions, enter
sudo restart resolvconf.
Hostname
We recommend setting a hostname for your appliance instead of using a hard-coded IP address. This lets you change the physical hardware that GitHub Enterprise runs on without affecting users or the client software. With a hostname set, you can also enable subdomain isolation.
Setting your hostname
Note: Your hostname should include a period (.) and be made up of only lowercase letters. This complies with Section 4.3.2 of the HTTP RFC. Otherwise, some browsers may not properly resolve your hostname.
 At the top of the Management Console, click Settings.
 In the left sidebar, click Hostname.
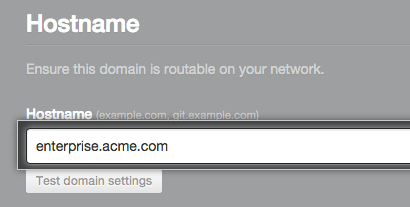 In the hostname field, type the hostname of your GitHub Enterprise instance.
Subdomain Isolation
Subdomain isolation securely separates user-supplied content from other portions of your GitHub Enterprise appliance. This mitigates cross-site scripting and other related vulnerabilities.
We highly recommend that you enable subdomain isolation.
Warning: If subdomain isolation is disabled, we recommend disabling GitHub Enterprise Pages on your appliance. There will be no way to isolate user-supplied GitHub Enterprise Pages content from the rest of your appliance's data.
When subdomain isolation is enabled, GitHub Enterprise replaces several paths with subdomains:
| Original Path | With subdomain isolation |
|---|---|
http(s)://hostname/assets/ |
http(s)://assets.hostname/ |
http(s)://hostname/codeload/ |
http(s)://codeload.hostname/ |
http(s)://hostname/gist/ |
http(s)://gist.hostname/ |
http(s)://hostname/gist-assets/ |
http(s)://gist-assets.hostname/ |
http(s)://hostname/gist-raw/ |
http(s)://gist-raw.hostname/ |
http(s)://hostname/pages/ |
http(s)://pages.hostname/ |
http(s)://hostname/raw/ |
http(s)://raw.hostname/ |
http(s)://hostname/render/ |
http(s)://render.hostname/ |
http(s)://hostname/reply/ |
http(s)://reply.hostname/ |
http(s)://hostname/uploads/ |
http(s)://uploads.hostname/ |
If you decide to enable subdomain isolation, you will also need to:
- Specify a valid domain name as your hostname (instead of an IP address).
- Set up a wildcard DNS record or individual DNS records for the subdomains listed above. We recommend creating an A record for
*.[hostname]that points to your server's IP address so you don't have to create multiple records for each subdomain. - Get a wildcard SSL certificate or an SSL certificate with Subject Alternative Names (SAN) configured for the subdomains listed above.
- Enable SSL on your appliance.
Enabling subdomain isolation
- At the top of the Management Console, click Settings.
- In the left sidebar, click Hostname.
 Select Subdomain isolation (recommended).
SSL
SSL is enabled and configured with a self-signed certificate when GitHub Enterprise is started for the first time. As self-signed certificates are not trusted by web browsers and Git clients, these clients will report certificate warnings until you disable SSL or upload a certificate signed by a trusted authority.
Tip: To use SSL in production, you must have a certificate in an unencrypted PEM format signed by a trusted certificate authority. Your certificate will also need Subject Alternative Names (SANs) configured for the subdomains listed above and will need to include the full certificate chain if it has been signed by an intermediate certificate authority.
Enabling SSL
- At the top of the Management Console, click Settings.
 In the left sidebar, click Privacy.
 Select SSL only (recommended).
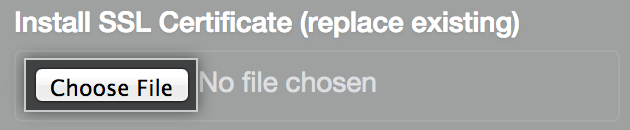 Under Install SSL Certificate (replace existing), click Choose File.
Choose an SSL certificate or certificate chain (in PEM format) to install. This file will usually have a .pem, .crt, or .cer extension.
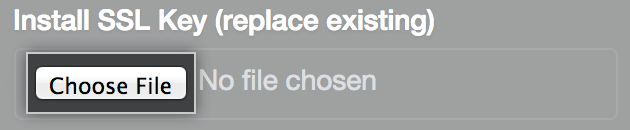 Under Install SSL Key (replace existing), click Choose File.
-
Choose an SSL key (in PEM format) to install. This file will usually have a
.keyextension.Warning: Your SSL key must not have a passphrase! For more information, see "Removing the passphrase from your key file".