Once you've made a new branch and completed work on your latest idea, you'll want to merge the changes into master (or perhaps another branch), so that they become part of the main body of work.
If you're working as part of a team, it's a good practice to have your teammates review your branch (perhaps by making a pull request on GitHub.com) before merging it.
To merge a branch in GitHub for Mac:
- Click the "Merge View" button on the Branches tab.
- Click and drag the handle of the branch you want to merge changes from (your new branch), and drop it in the left box. The drag handle can be found on the left side of the branch's row.
- Drag the branch you want to merge changes into (e.g.,
master), and drop it in the right box. - Click "Merge Branches."
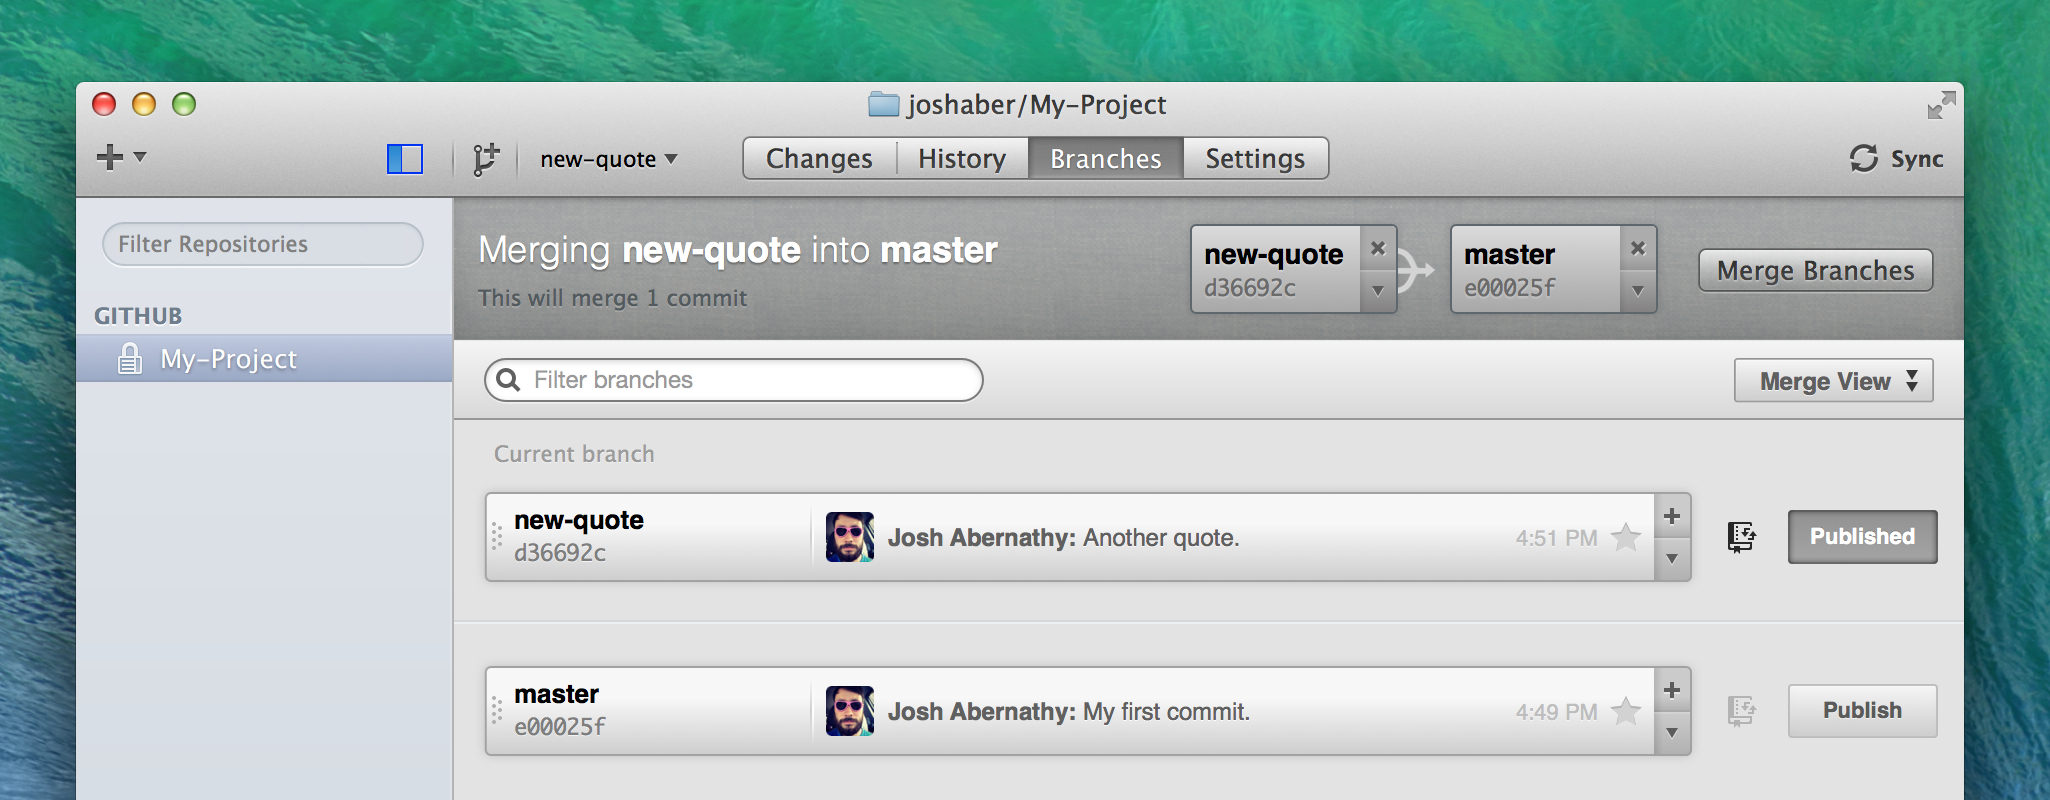
Once you've merged, you may no longer need the branch you merged from. You can delete it from the local and remote repositories by clicking on the small arrow in the branch's row, and selecting "Delete" from the menu that appears.
Warning: If you merge two branches together that have conflicting changes on particular lines, GitHub for Mac will show this "Conflict" in the Changes view. You'll need to use the text editor of your choice to manually resolve the conflicts and then commit the changes.
Celebrate
Congratulations! That covers the basics of getting started with GitHub for Mac! You should now be comfortable with using GitHub for Mac to harness the power of Git and GitHub in your own projects.
Next, you might like to consider learning a little more about Git, or, take the Bootcamp on GitHub.com.