Note: Using GitHub Codespaces with JetBrains IDEs is currently in public beta and is subject to change.
About source control in GitHub Codespaces
You can perform all the Git actions you need directly within your codespace. For example, you can fetch changes from a remote repository, switch branches, create a new branch, commit and push changes, and create a pull request. You can use the integrated terminal within your codespace to enter Git commands, or you can click icons and menu options to complete all the most common Git tasks. This guide explains how to use the graphical user interface for source control.
For more information about Git support in Visual Studio Code, see "Using Version Control in VS Code" in the Visual Studio Code documentation.
Source control in the Visual Studio Code web client uses the same workflow as the Visual Studio Code desktop application. For more information, see "Using Version Control in VS Code" in the Visual Studio Code documentation.
A typical workflow for updating a file using GitHub Codespaces would be:
- From the default branch of your repository on GitHub, create a codespace. See "Creating a codespace for a repository."
- In your codespace, create a new branch to work on.
- Make your changes and save them.
- Commit the change.
- Raise a pull request.
Note: By default, GitHub Codespaces uses the HTTPS protocol to transfer data to and from a remote repository, and authenticates with a GITHUB_TOKEN configured with read and write access to the repository from which you create the codespace. If you're having issues with authentication, see "Troubleshooting authentication to a repository."
About automatic forking
To create a codespace for a repository for which you only have read access, you must have permission to fork the repository.
You do not need to fork the repository before you create the codespace. For example, you can create a codespace from the repository to look at the project and make experimental changes, then delete the codespace if you no longer need it.
If you make a commit from the codespace, or push a new branch, GitHub Codespaces either creates a fork of the repository under your account and links it to your codespace, or it links your codespace to an existing fork if you already have one for the repository. You can then push your changes to the fork and create a pull request to propose the changes to the upstream repository.
If you make a commit from the command line, you will see a prompt asking if you would like to proceed with linking your codespace to a new or existing fork. Enter y to proceed. If you commit changes from the Source Control view in VS Code, or from the navigation bar in a JetBrains IDE, your codespace is automatically linked to a fork without you being prompted.
Notes:
- If you delete your fork repository, then any codespaces linked to the fork are deleted, even if you originally created them from the upstream repository.
- If you make a commit from the command line and refuse the new fork by entering
n, you should push your changes from the command line rather than from VS Code's Source Control view. If you use the Source Control view, VS Code will still try to create a fork for you on push.
When GitHub Codespaces creates a fork, or links your codespace to an existing fork, the following things happen.
- The access token associated with your codespace is updated to include
readandwritepermission to your fork, in addition toreadpermission to the upstream repository. - In your Git settings, the upstream repository is reassigned to the name
upstream, and the fork is added as a new remote repository under the nameorigin.
By default, source control commands that you access from your editor's user interface, such as the Sync Changes button in VS Code, target your fork. If you're working from the command line, you can use origin to refer to your fork and upstream to refer to the upstream repository. For example, you can fetch changes from the upstream repository to ensure your codespace is up to date with the latest changes to the project.
git fetch upstream
When you have made some changes, you can push them to a feature branch of your fork.
git push origin my-feature-branch
For more information, see "About forks."
Publishing a codespace created from a template
When you create a codespace from a template repository or a template on the "Your codespaces" page, the work you do won't be stored in a repository on GitHub until you publish your codespace. For more information, see "Creating a codespace from a template."
If you're working in a codespace, you can publish it from the VS Code web client or desktop application.
-
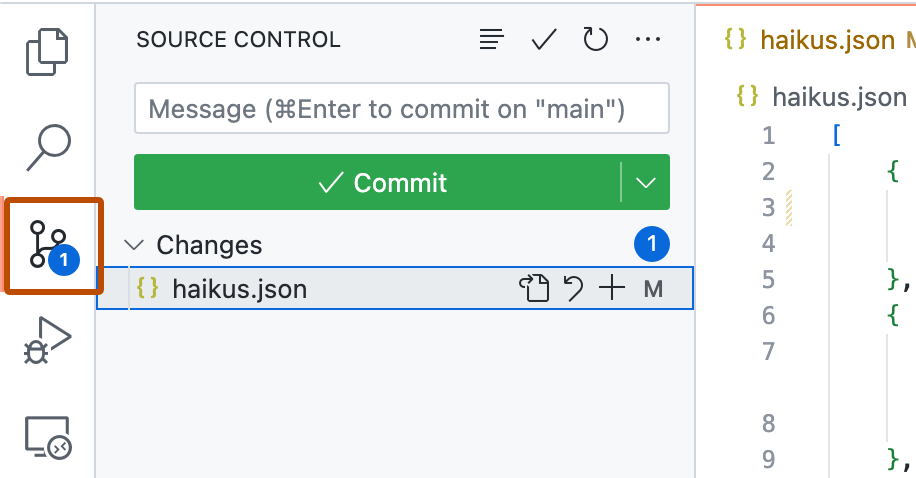
In the Activity Bar, click the Source Control view.
-
To stage your changes, click + next to the file you've added or changed, or next to Changes if you've changed multiple files and you want to stage them all.

Note: If you start from GitHub's blank template, you will not see a list of changes unless you have already initialized your directory as a Git repository. To publish codespaces created from the blank template, click Publish to GitHub in the "Source Control" view, then skip to step 5.
-
To commit your staged changes, type a commit message describing the change you've made, then click Commit.

-
Click Publish Branch.

-
In the "Repository Name" dropdown, type a name for your new repository, then select Publish to GitHub private repository or Publish to GitHub public repository.

The owner of the new repository will be the GitHub account with which you created the codespace.
-
Optionally, in the pop-up that appears in the lower right corner of the editor, click Open on GitHub to view the new repository on GitHub.com.


Creating or switching branches
-
If the current branch is not shown in the status bar, at the bottom of your codespace, right-click the status bar and select Source control.
-
Click the branch name in the status bar.

-
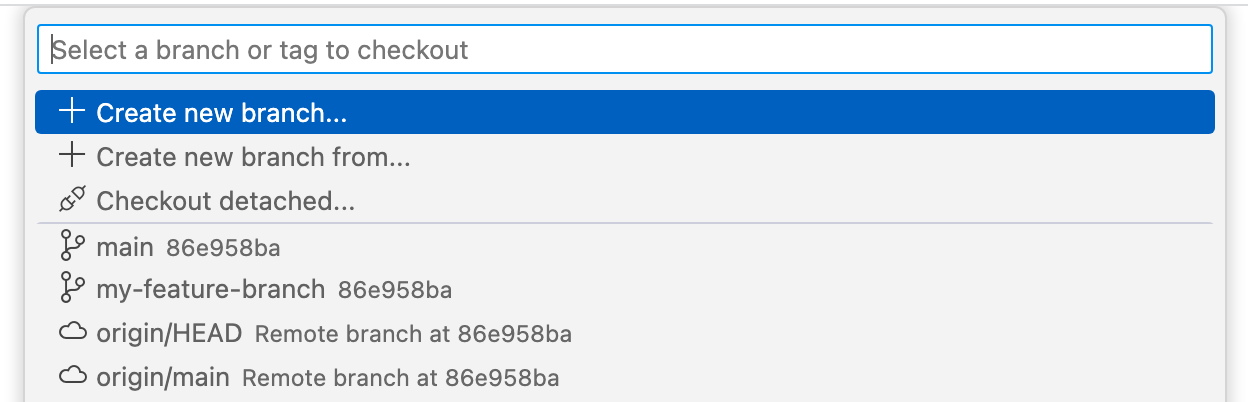
In the dropdown, either click the branch you want to switch to, or enter the name for a new branch and click Create new branch.


Tip: If someone has recently changed a file on the remote repository, in the branch you switched to, you may not see those changes until you pull the changes into your codespace.
Committing your changes
-
In the Activity Bar, click the Source Control view.
-
To stage your changes, click next to the file you've changed, or next to Changes if you've changed multiple files and you want to stage them all.
-
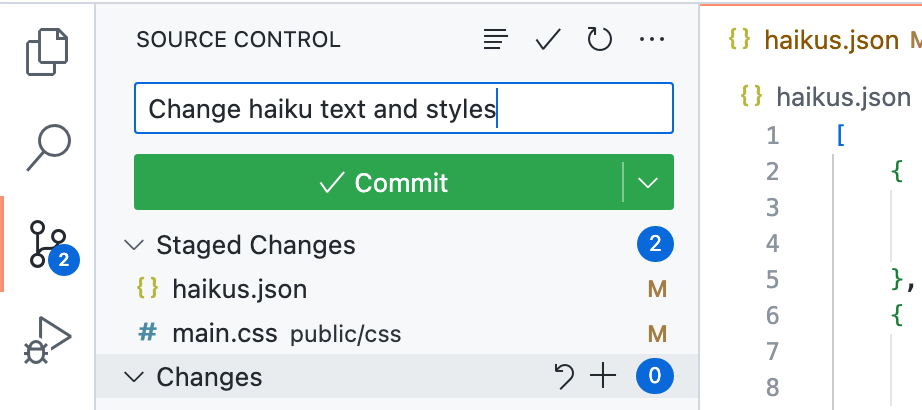
In the text box, type a commit message describing the change you've made.
-
Click the down arrow at the right side of the Commit button, and select Commit & Push from the dropdown menu.


Pulling changes from the remote repository
You can pull changes from the remote repository into your codespace at any time.
-
In the Activity Bar, click the Source Control view.
-
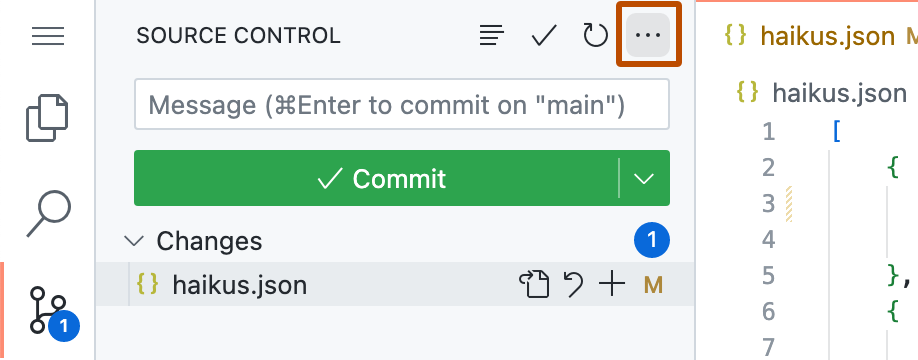
At the top of the side bar, click .
-
In the dropdown menu, click Pull.

If the dev container configuration has been changed since you created the codespace, you can apply the changes by rebuilding the container for the codespace. For more information, see "Introduction to dev containers."
Setting your codespace to automatically fetch new changes
You can set your codespace to automatically fetch details of any new commits that have been made to the remote repository. This allows you to see whether your local copy of the repository is out of date, in which case you may choose to pull in the new changes.
If the fetch operation detects new changes on the remote repository, you'll see the number of new commits in the status bar. You can then pull the changes into your local copy.
-
Click the Manage button at the bottom of the Activity Bar.

-
In the menu, click Settings.
-
On the Settings page, search for:
autofetch.
-
To fetch details of updates for all remotes registered for the current repository, set Git: Autofetch to
all.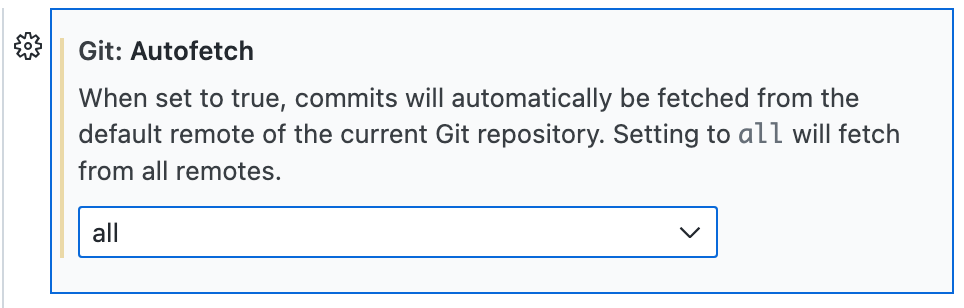
-
If you want to change the number of seconds between each automatic fetch, edit the value of Git: Autofetch Period.


Raising a pull request
-
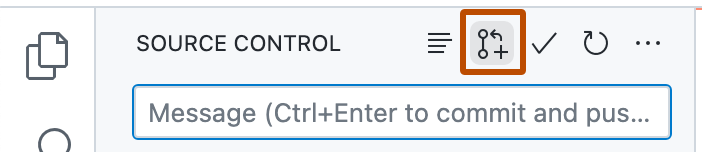
After you've committed changes to your local copy of the repository, click the pull request icon at the top of the "Source Control" side bar.
-
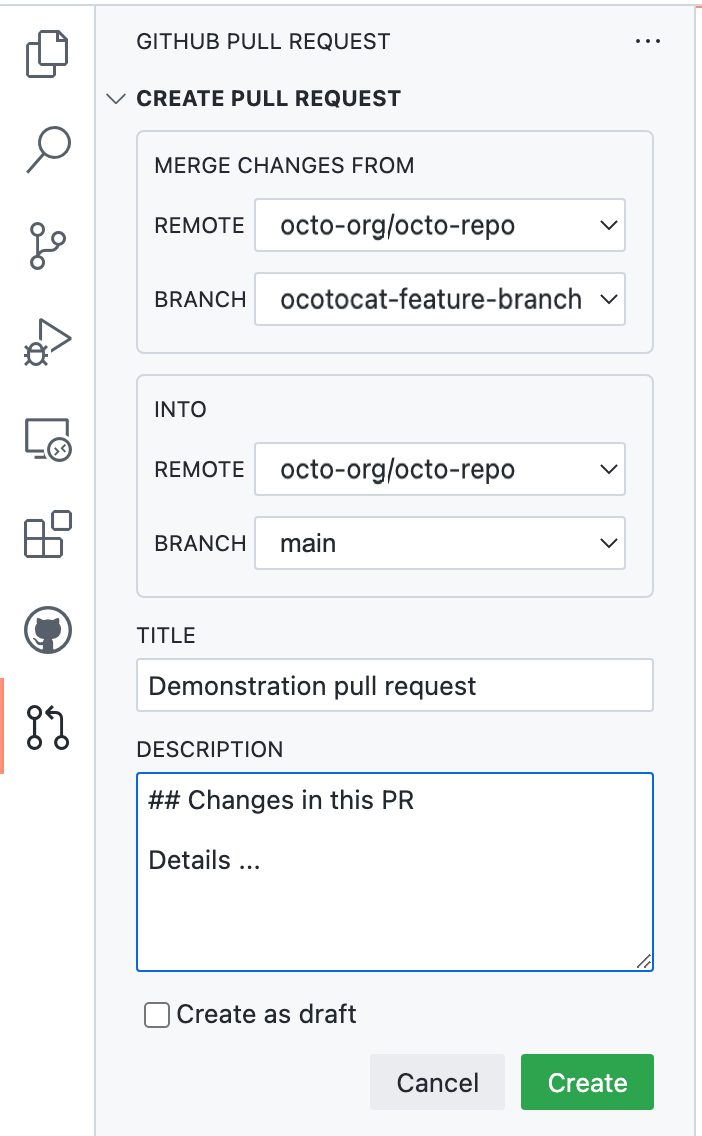
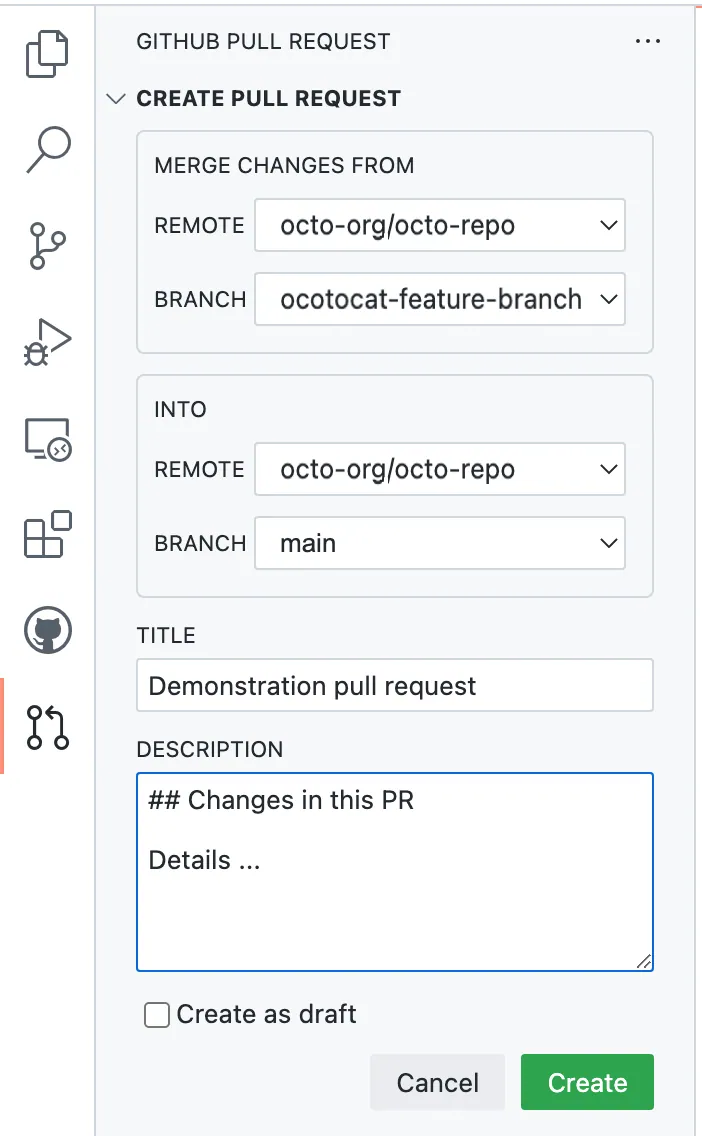
Check that the local branch and repository you're merging from, and the remote branch and repository you're merging into, are correct. Then give the pull request a title and a description.
-
Click Create.

Pushing changes to your remote repository
You can push changes you've saved and committed. This applies those changes to the upstream branch on the remote repository. You might want to do this if you're not yet ready to create a pull request, or if you prefer to create a pull request on GitHub.
-
At the top of the side bar, click .

-
In the dropdown menu, click Push.

Publishing a codespace created from a template
When you create a codespace from a template repository or a template on the "Your codespaces" page, the work you do won't be stored in a repository on GitHub until you publish your codespace. For more information, see "Creating a codespace from a template."
If you're working in a codespace, you can publish it from the VS Code web client or desktop application.
-
In the Activity Bar, click the Source Control view.
-
To stage your changes, click + next to the file you've added or changed, or next to Changes if you've changed multiple files and you want to stage them all.
Note: If you start from GitHub's blank template, you will not see a list of changes unless you have already initialized your directory as a Git repository. To publish codespaces created from the blank template, click Publish to GitHub in the "Source Control" view, then skip to step 5.
-
To commit your staged changes, type a commit message describing the change you've made, then click Commit.
-
Click Publish Branch.
-
In the "Repository Name" dropdown, type a name for your new repository, then select Publish to GitHub private repository or Publish to GitHub public repository.
The owner of the new repository will be the GitHub account with which you created the codespace.
-
Optionally, in the pop-up that appears in the lower right corner of the editor, click Open on GitHub to view the new repository on GitHub.com.
Creating or switching branches
-
If the current branch is not shown in the status bar, at the bottom of your codespace, right-click the status bar and select Source control.
-
Click the branch name in the status bar.
-
In the dropdown, either click the branch you want to switch to, or enter the name for a new branch and click Create new branch.
Tip: If someone has recently changed a file on the remote repository, in the branch you switched to, you may not see those changes until you pull the changes into your codespace.
Committing your changes
-
In the Activity Bar, click the Source Control view.
-
To stage your changes, click next to the file you've changed, or next to Changes if you've changed multiple files and you want to stage them all.
-
In the text box, type a commit message describing the change you've made.
-
Click the down arrow at the right side of the Commit button, and select Commit & Push from the dropdown menu.
Pulling changes from the remote repository
You can pull changes from the remote repository into your codespace at any time.
-
In the Activity Bar, click the Source Control view.
-
At the top of the side bar, click .
-
In the dropdown menu, click Pull.
If the dev container configuration has been changed since you created the codespace, you can apply the changes by rebuilding the container for the codespace. For more information, see "Introduction to dev containers."
Setting your codespace to automatically fetch new changes
You can set your codespace to automatically fetch details of any new commits that have been made to the remote repository. This allows you to see whether your local copy of the repository is out of date, in which case you may choose to pull in the new changes.
If the fetch operation detects new changes on the remote repository, you'll see the number of new commits in the status bar. You can then pull the changes into your local copy.
-
Click the Manage button at the bottom of the Activity Bar.
-
In the menu, click Settings.
-
On the Settings page, search for:
autofetch. -
To fetch details of updates for all remotes registered for the current repository, set Git: Autofetch to
all. -
If you want to change the number of seconds between each automatic fetch, edit the value of Git: Autofetch Period.
Raising a pull request
-
After you've committed changes to your local copy of the repository, click the pull request icon at the top of the "Source Control" side bar.
-
Check that the local branch and repository you're merging from, and the remote branch and repository you're merging into, are correct. Then give the pull request a title and a description.
-
Click Create.
Pushing changes to your remote repository
You can push changes you've saved and committed. This applies those changes to the upstream branch on the remote repository. You might want to do this if you're not yet ready to create a pull request, or if you prefer to create a pull request on GitHub.
-
At the top of the side bar, click .
-
In the dropdown menu, click Push.
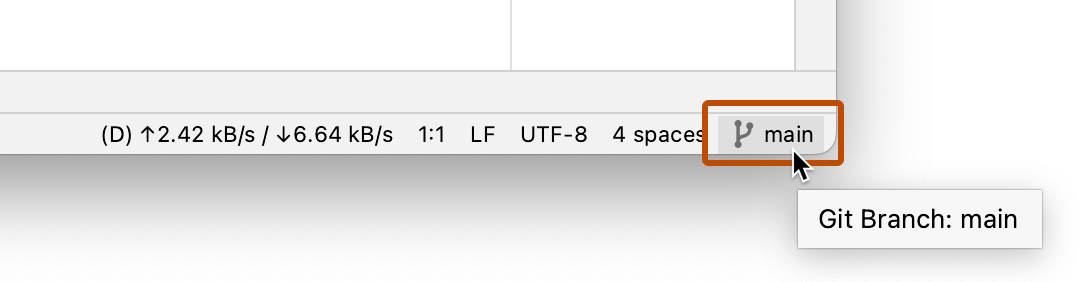
Creating or switching branches
-
Click the branch name at the right side of the status bar.
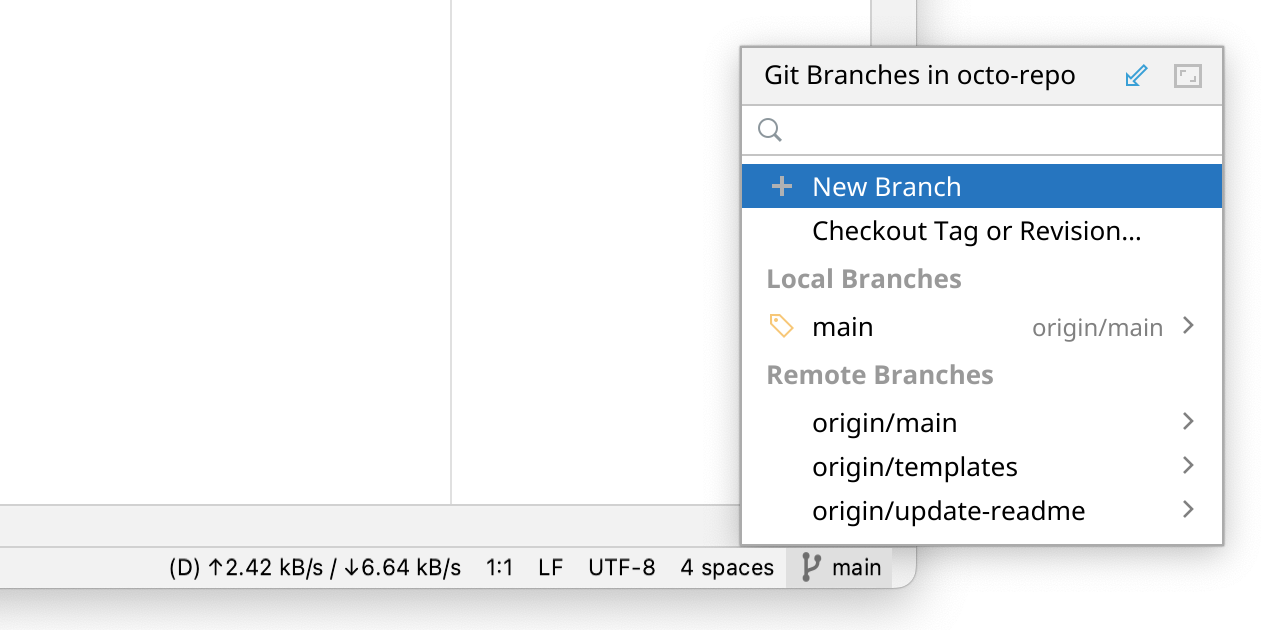
-
In the pop-up menu, do one of the following:
-
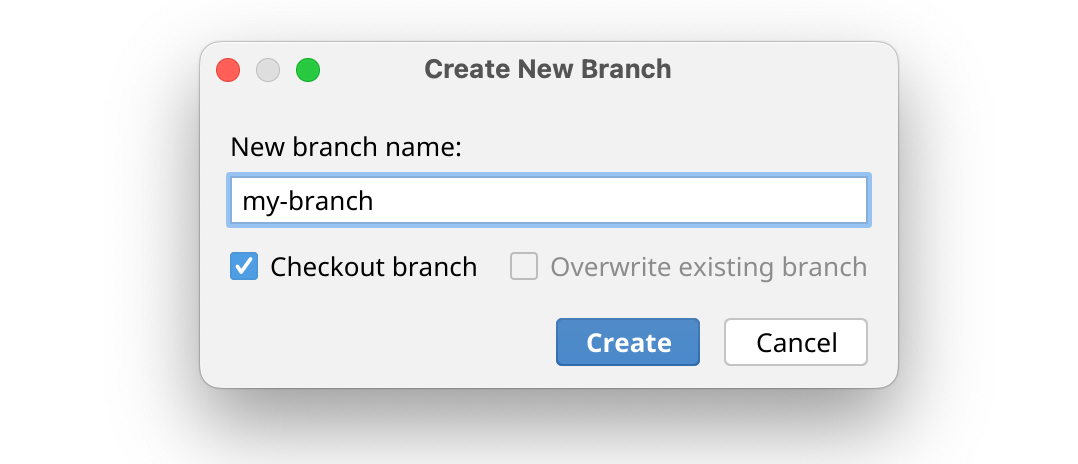
To create a new branch based on the current branch, click New Branch.
Enter a name for the new branch and click Create.
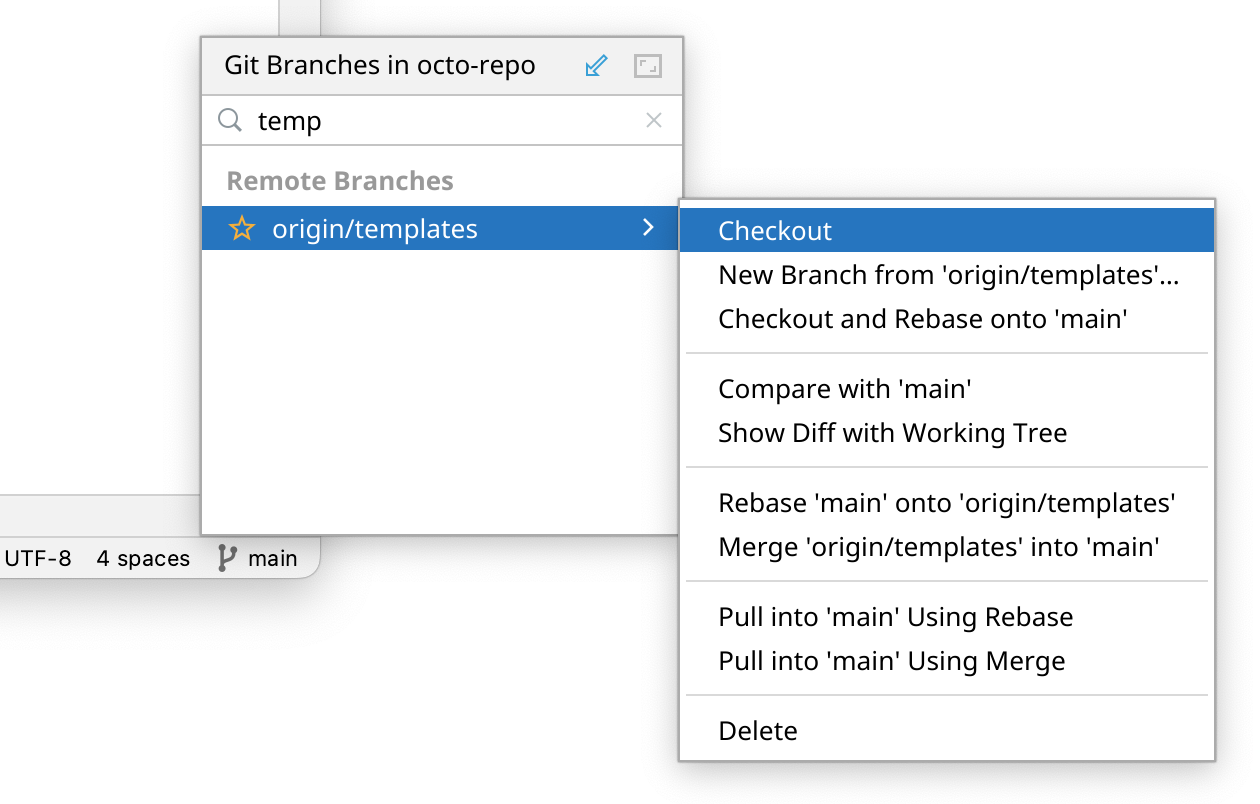
-
To check out an existing branch, start typing the name of the branch you want to check out. Click the branch from the list, then click Checkout.
Tip: If someone has recently changed a file on the remote repository, in the branch you switched to, you may not see those changes until you pull the changes into your codespace.
-


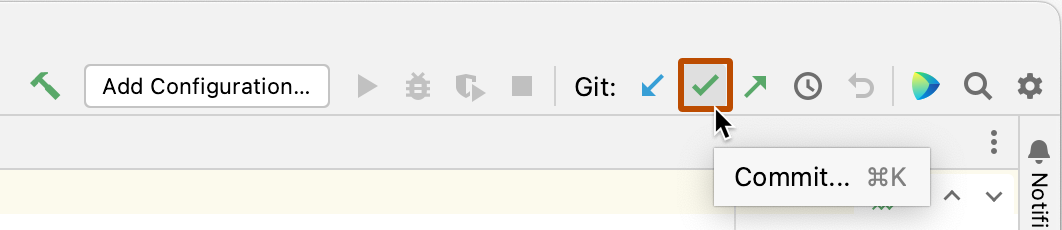
Committing your changes
-
At the right side of the navigation bar, click the check mark.
-
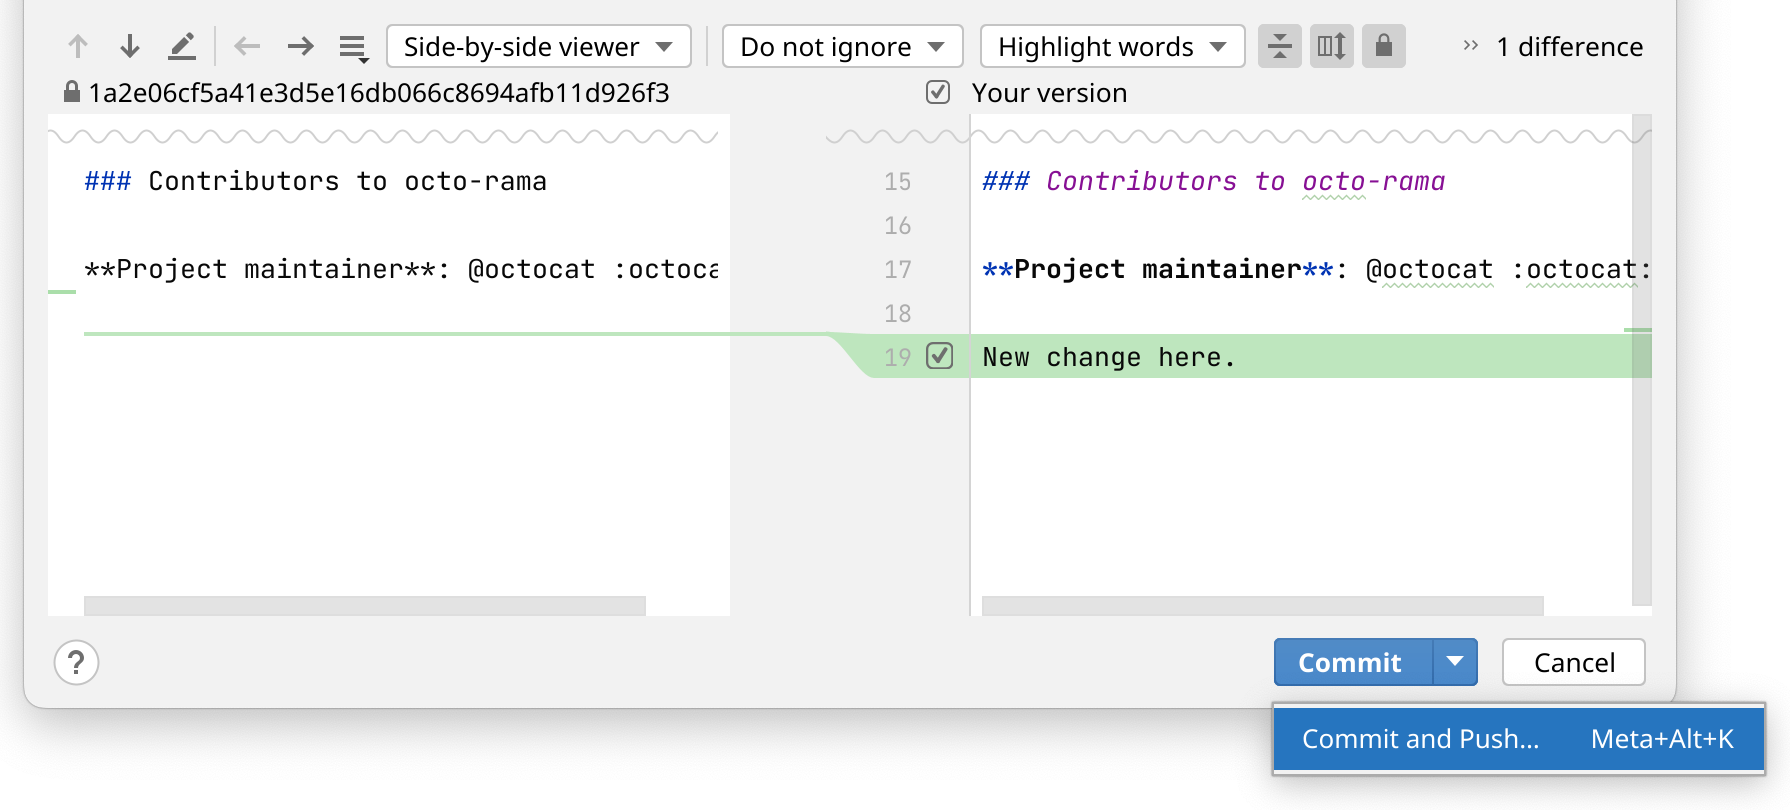
In the Commit Changes dialog, enter a commit message.
-
Click Commit.
Alternatively, click the down arrow beside Commit and click Commit and Push.


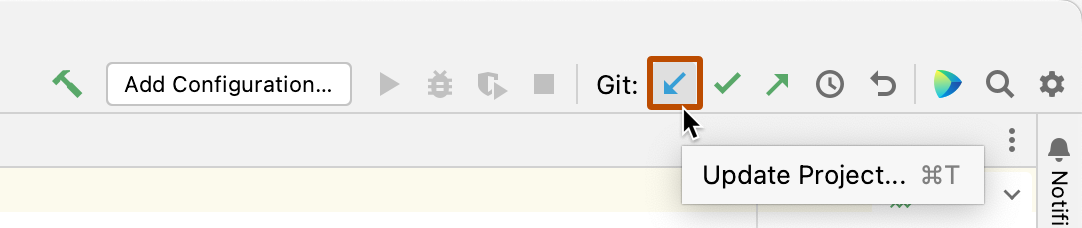
Pulling changes from the remote repository
You can pull changes from the same branch on the remote repository and apply those changes to the copy of the repository you are working on in your codespace.
-
At the right side of the navigation bar, click the downward pointing arrow.
-
In the Update Project dialog, choose whether you want to merge or rebase the incoming changes.
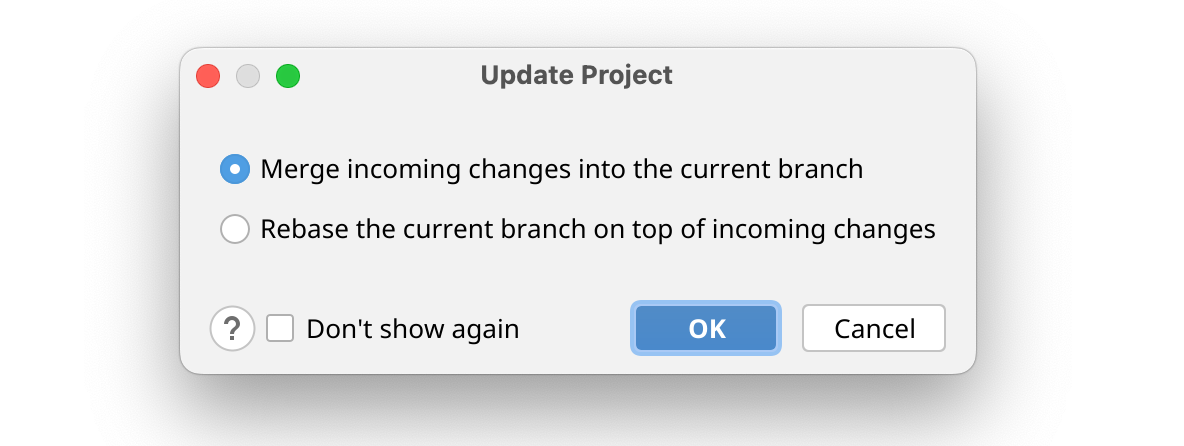
-
Click OK.


Pushing changes to your remote repository
You can push changes you've saved and committed. This applies those changes to the upstream branch on the remote repository. You might want to do this if you're not yet ready to create a pull request, or if you prefer to create a pull request on GitHub.
-
At the right side of the navigation bar, click the upward pointing arrow.
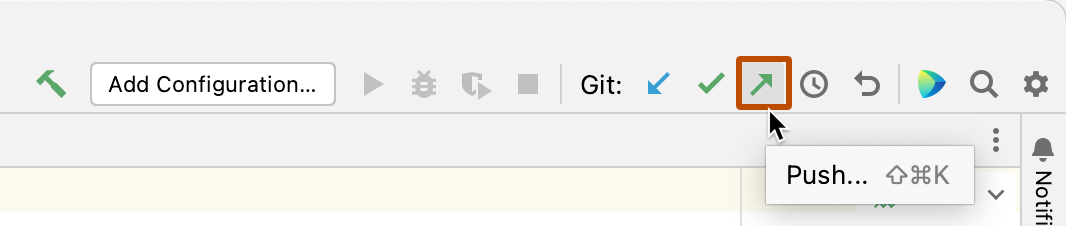
-
In the Push Commits dialog, click Push.
