About enabling security features
If you're a security manager, repository administrator, or organization owner, you can use security overview to enable or disable security features for multiple repositories at the same time. You can enable or disable security features for all repositories visible on the "Security coverage" view in security overview for an organization.
You can use checkboxes to select which repositories you want to include, or use the search bar to narrow down to a specific subset of repositories, and enable or disable security features for that group. This is useful if you want to introduce a feature to your organization gradually over time, or if your organization requires a complex security setup where different features are enabled in different repositories. For example, if you are enabling a feature across a group of repositories, you may find the following filtering options helpful.
- To exclude certain repositories from the selection, you can assign a topic such as
testto these repositories, then exclude them from the results with a search like-topic:test. For more information, see "Classifying your repository with topics." - If a team uses repositories that all require a certain feature, you can use the
team:filter to search for repositories where a team has write or admin access. - If you're enabling code scanning, you can see which repositories are eligible for default setup with the search
code-scanning-default-setup:eligible. For more information, see "Configuring default setup for code scanning at scale."
For more information on filters you can use in different parts of security overview, see "Filtering alerts in security overview."
For more information about the different ways of enabling security features in an organization, see "Quickstart for securing your organization."
Enabling security features for multiple repositories
-
On GitHub.com, navigate to the main page of the organization.
-
Under your organization name, click Security.

-
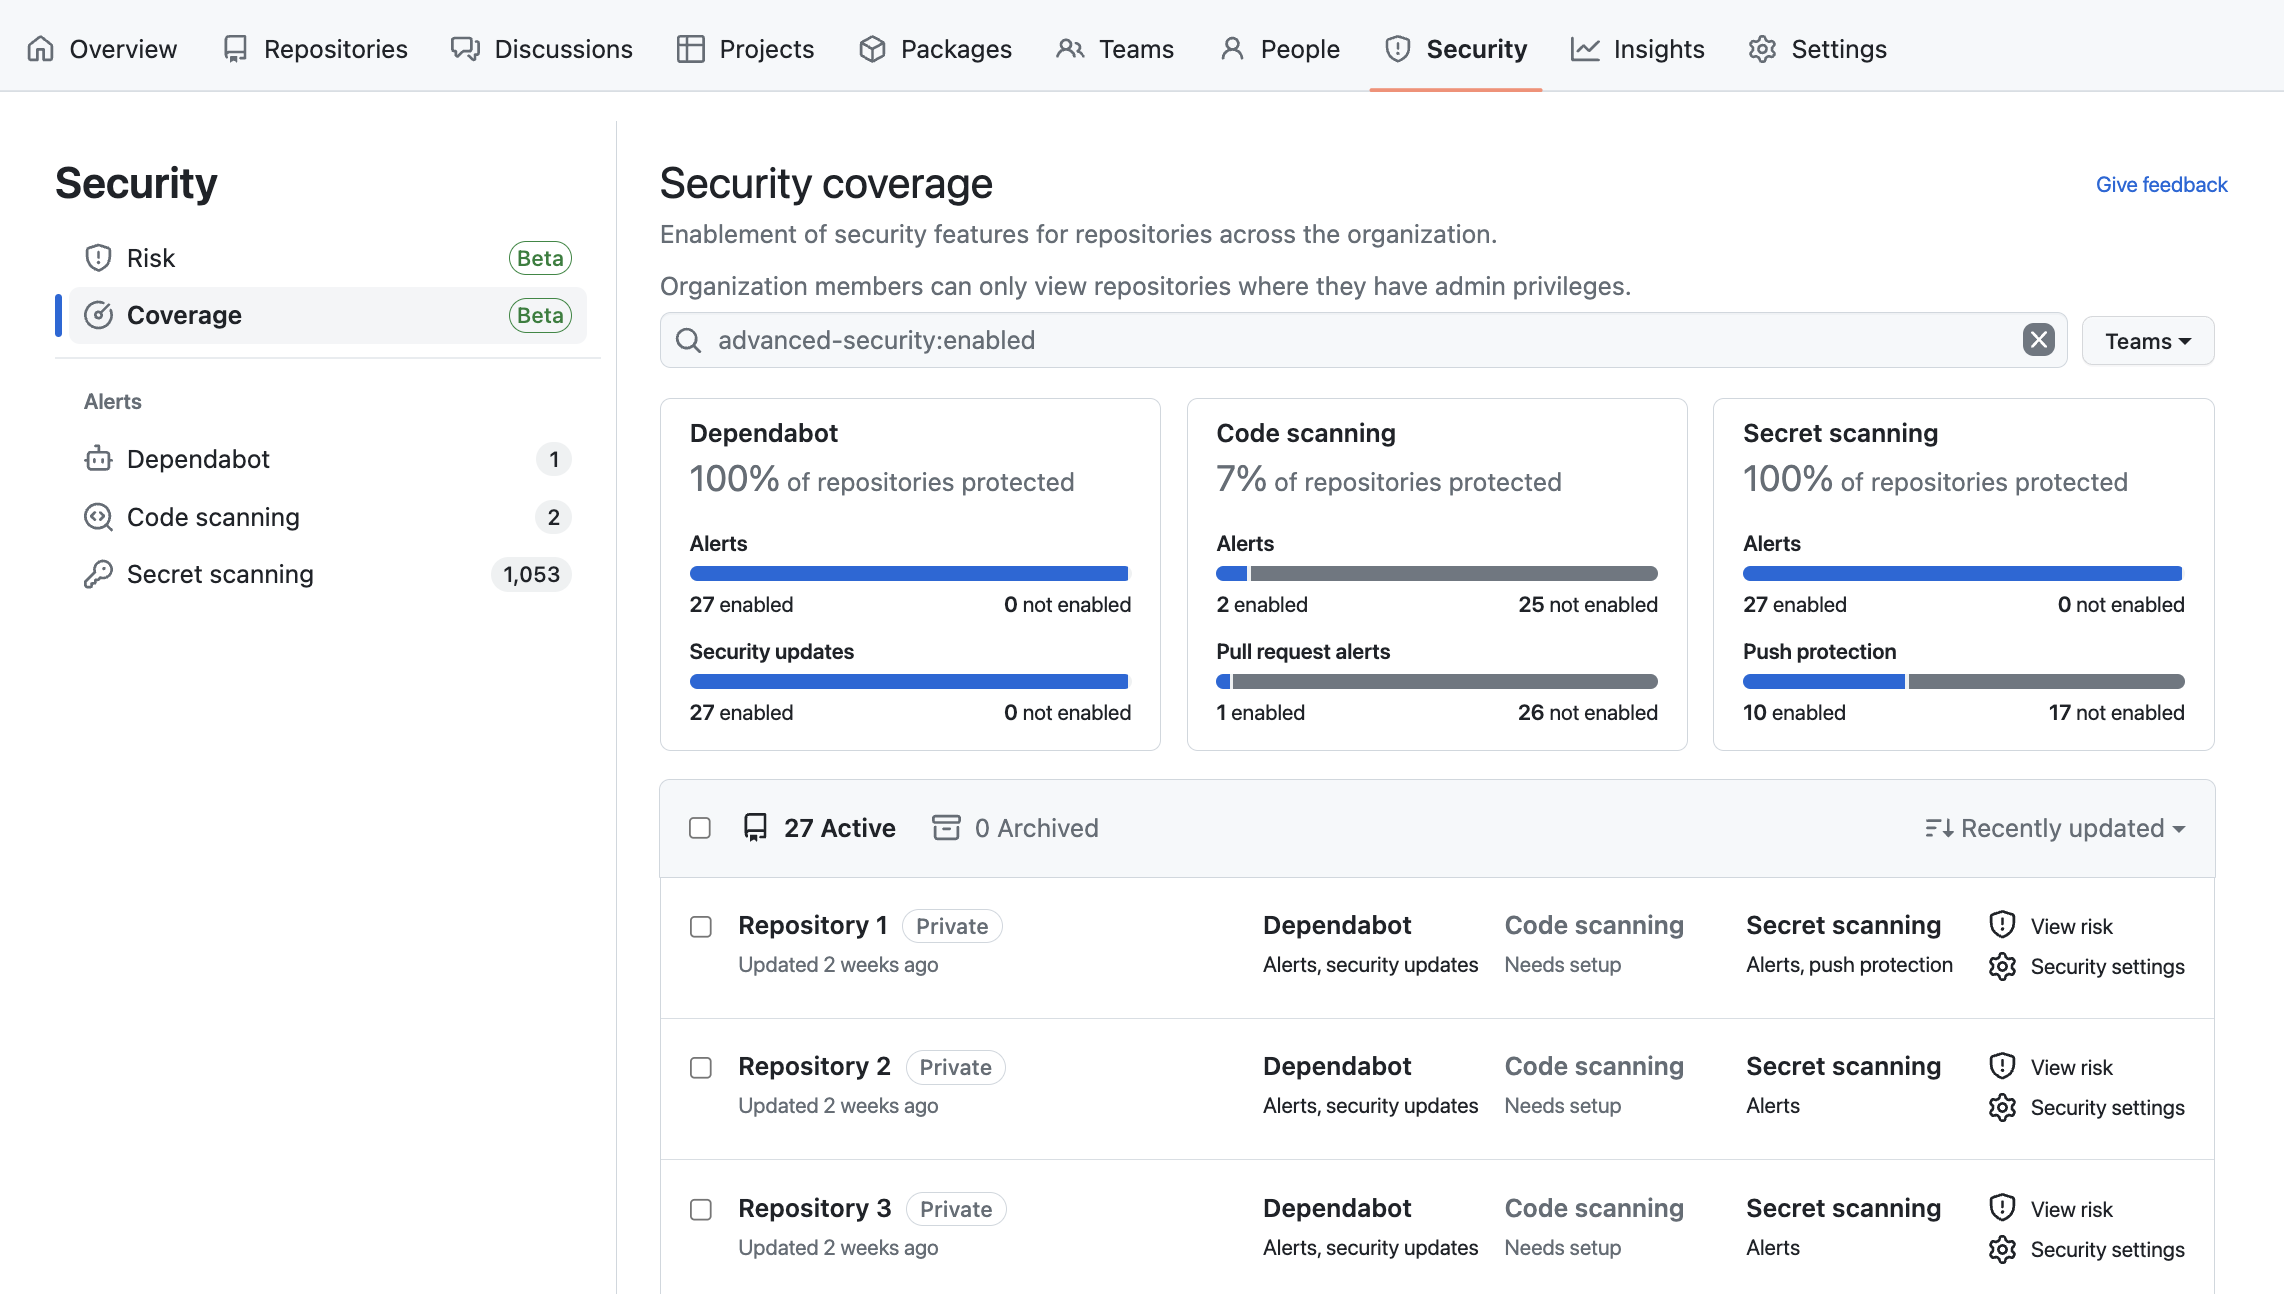
In the sidebar, click Coverage to display the "Security coverage" view.
-
You can use the search bar to narrow down visible repositories in the "Security coverage" view based on name, or on the enablement status of security features.
-
In the list of repositories, select each repository you want to modify the enablement of security features for. To select all repositories on the page, click the checkbox next to NUMBER Active. To select all repositories that match the current search, click the checkbox next to NUMBER Active and then click Select all NUMBER repos.
-
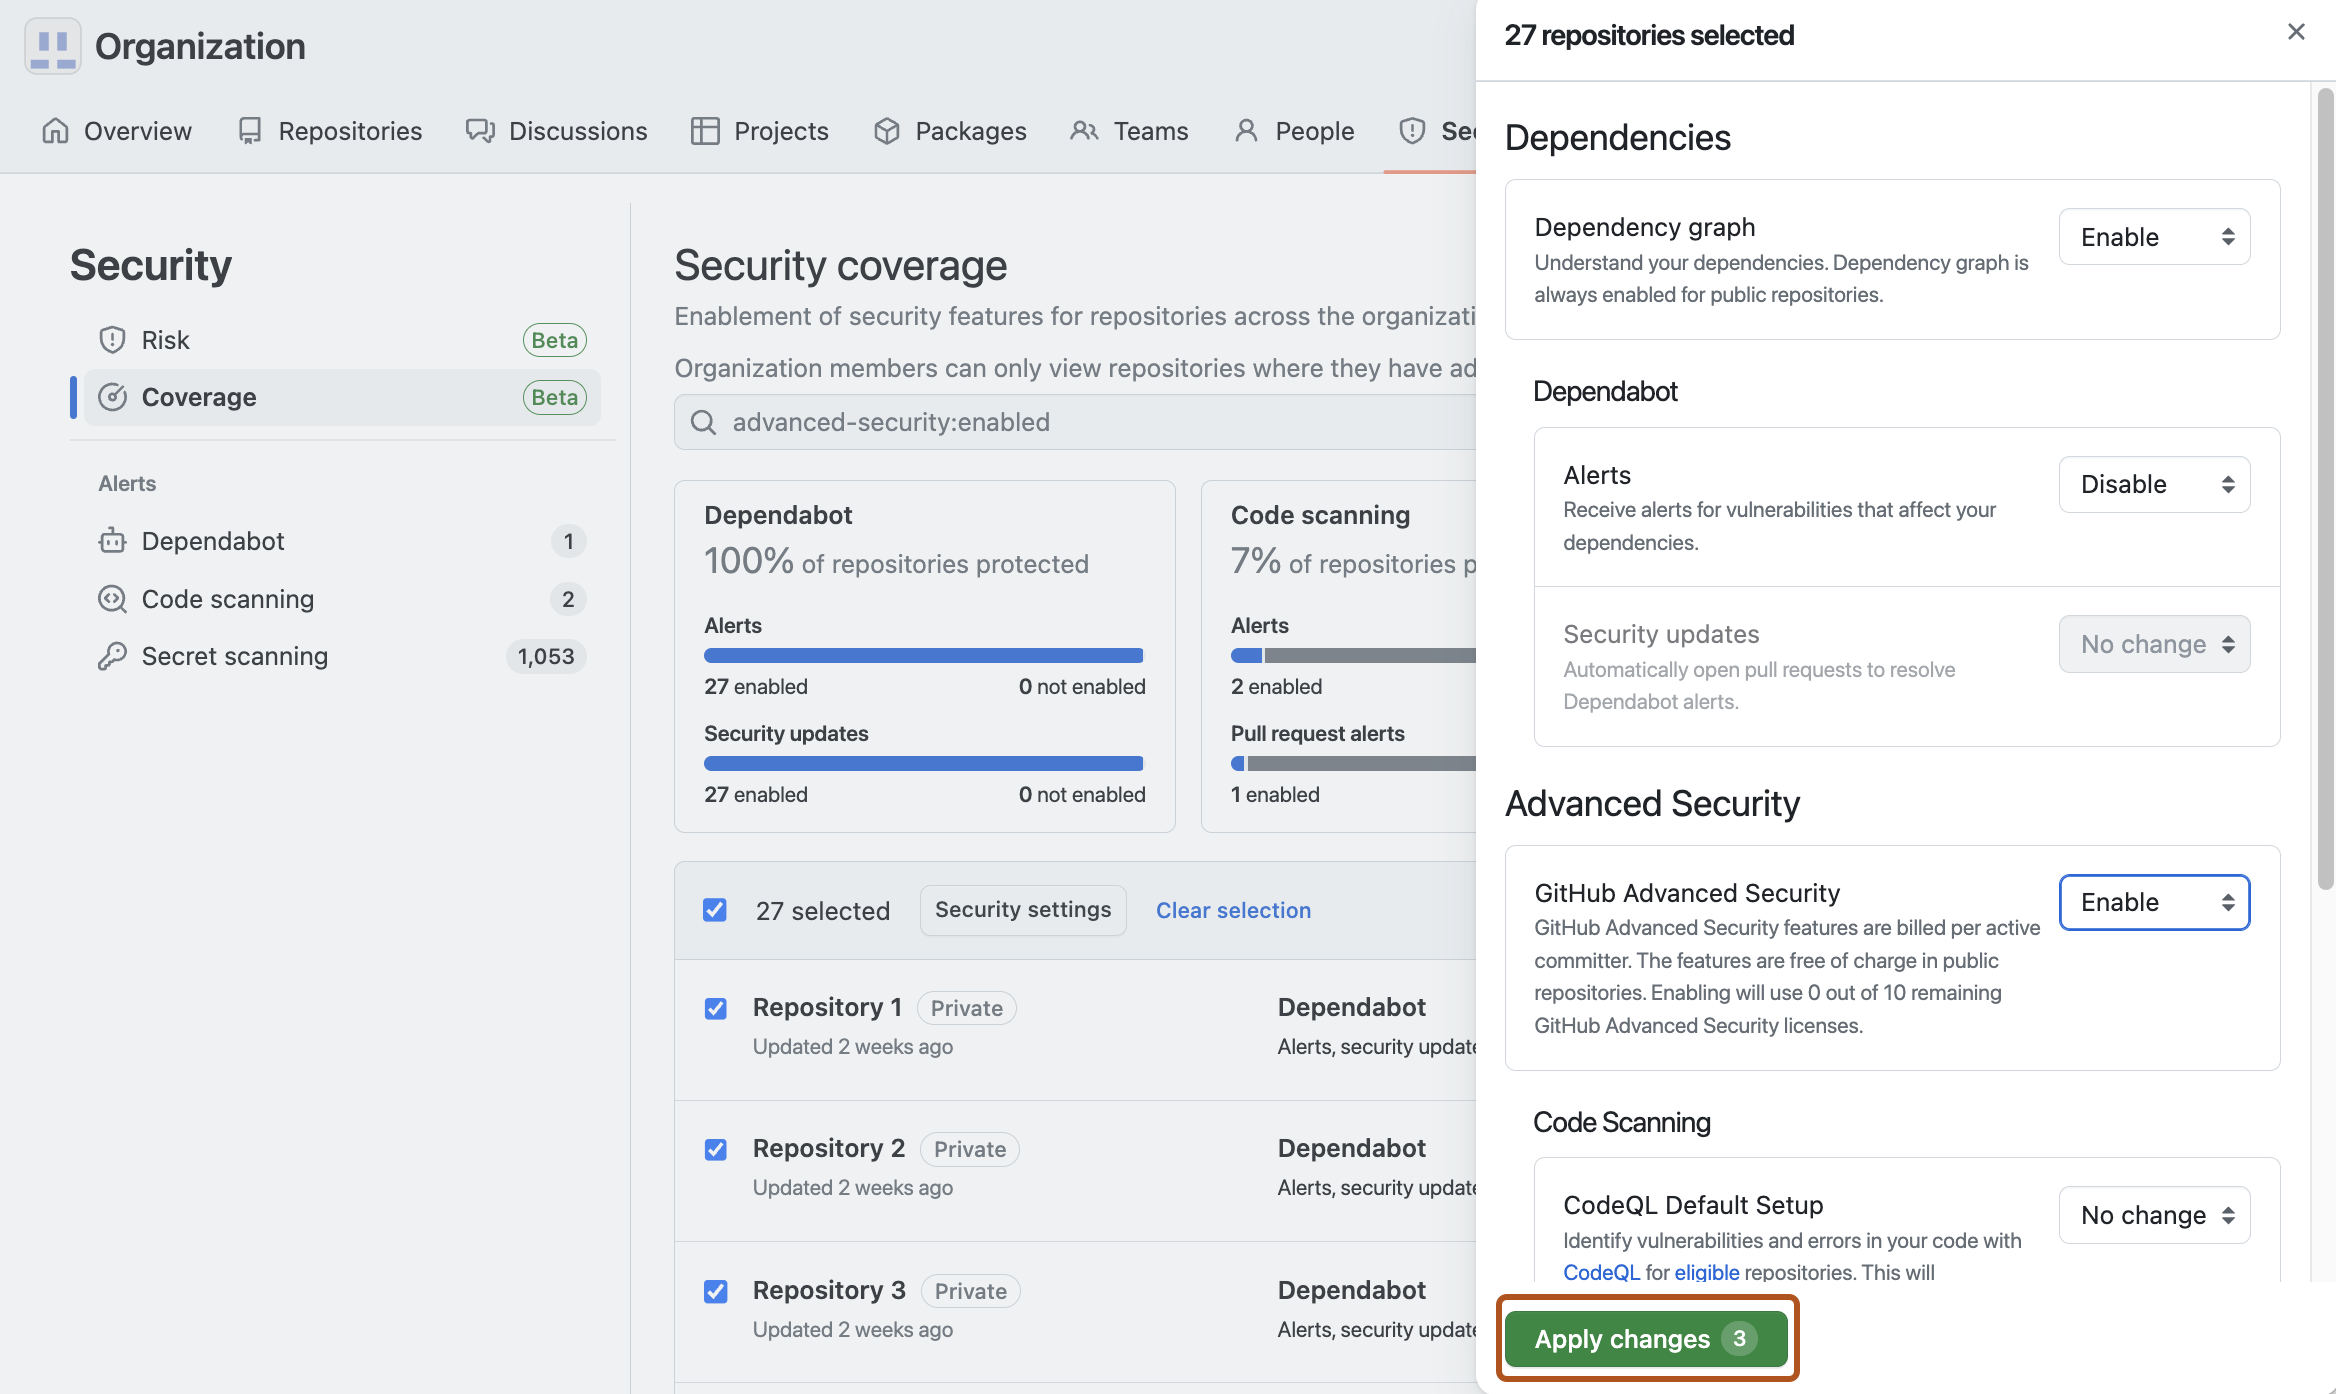
Click Security settings next to NUMBER selected.
-
In the side panel, next to all the security features you want to enable or disable, select Enable or Disable.
-
As you make changes, the Apply changes button reports the number of security features you have edited. To confirm the changes, click Apply changes NUMBER. Alternatively, click to close the panel without making changes.
Notes:
- Enabling code scanning default setup will not override any existing configurations of advanced setup for the selected repositories, but it will override any existing configurations of default setup.
- Enabling "Alerts" for secret scanning enables high-confidence alerts. If you want to enable non-provider alerts, you need to edit the repository, organization, or enterprise settings. For more information about alert types, see "Supported secrets."


The security features that you can enable and disable in this view are:
- Dependency graph
- Dependabot alerts
- Dependabot security updates
- GitHub Advanced Security
- Code scanning default setup
- Secret scanning alerts
- Secret scanning as a push protection
If you're blocked from enabling a security feature due to an enterprise policy, you will still be able to see the affected repository in the "Security Coverage" view and access the side panel from the Security settings button. However, you will see a message in the side panel indicating that the functionality is not available. For more information about enterprise policies, see "Enforcing policies for code security and analysis for your enterprise."
Organization owners and security managers can use security overview to enable or disable security features for all repositories belonging to their organization. There are no enterprise policies that restrict organization owners or security managers from enabling or disabling any security features. For more information about enterprise policies, see "About enterprise policies."