Requirements
Before you start, make sure you know:
- The GitHub username of the client who will become the owner of the organization you create
- The name your client would like to use for the organization
- The email address where you would like receipts to be sent
- The product your client would like to purchase
- The number of paid seats your client would like you to purchase for the organization
Step 1: Create your personal GitHub account
You will use your personal account to set up the organization. You'll also need to sign in to this account to renew or make changes to your client's subscription in the future.
If you already have a personal account on GitHub, skip to step 2.
- Go to the Join GitHub page.
- Complete the form, then click Create account.
- Select GitHub Free for your personal account.
- Click Finish sign up.
Step 2: Create the organization
-
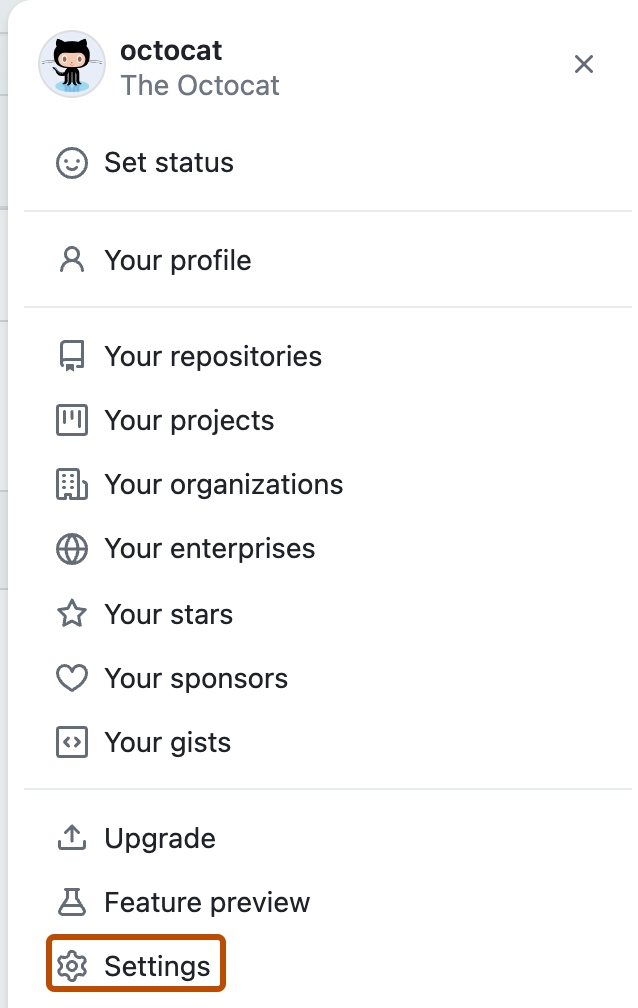
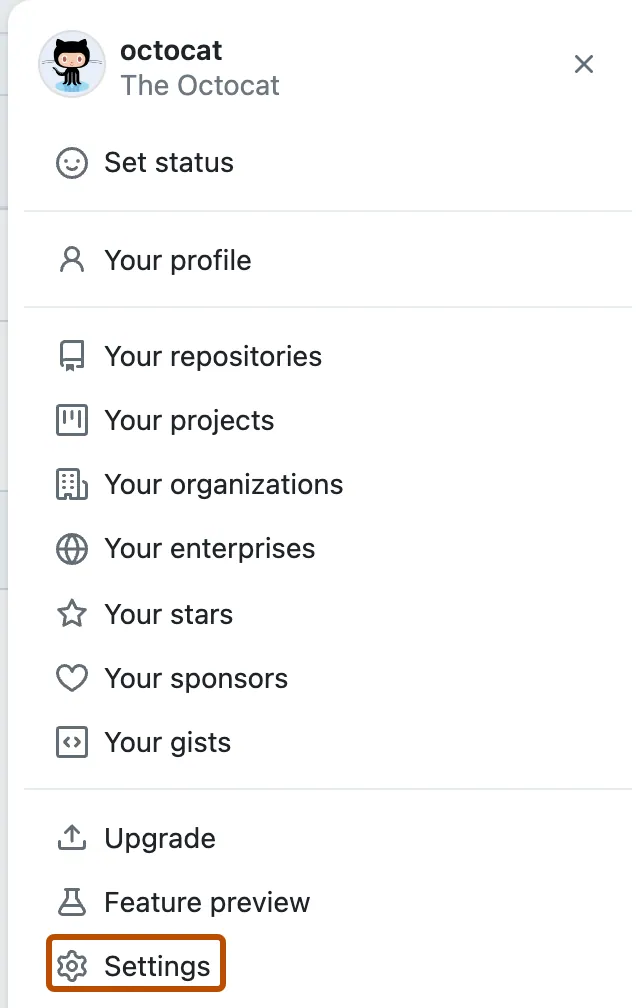
In the upper-right corner of any page, click your profile photo, then click Settings.
-
In the "Access" section of the sidebar, click Organizations.
-
Next to the "Organizations" header, click New organization.
-
Under "Choose a plan", click Choose GitHub Free. You will upgrade the organization in the next step.
-
Under "Organization name", type a name for your organization.
-
Under "Contact email", type a contact email address for your client.
-
Optionally, if your organization is owned by a business or institution, select This organization is owned by a business.
-
If your organization is owned by a business or institution, under "Name of business or institution this organization belongs to", type the name of the business or institution.
-
Click Next.
Step 3: Upgrade the organization to a yearly paid subscription
-
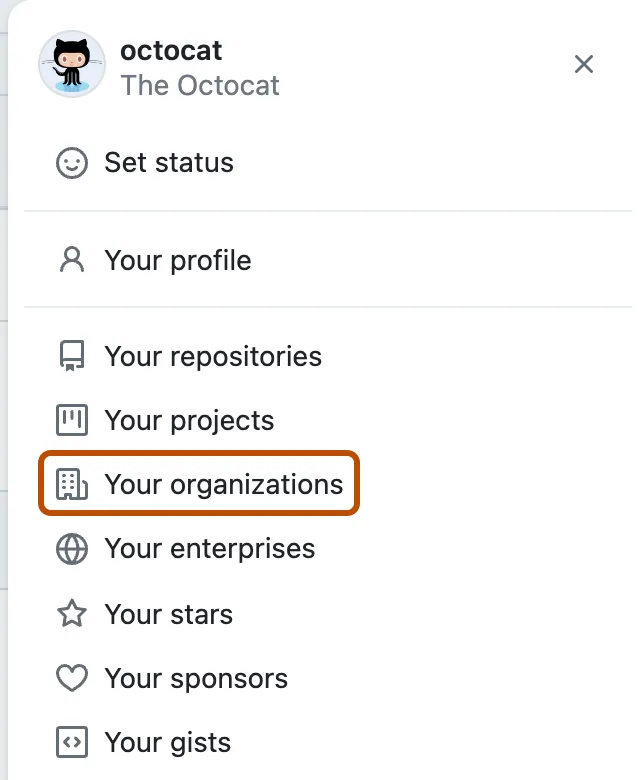
In the upper-right corner of GitHub.com, select your profile photo, then click Your organizations.

-
Next to the organization, click Settings.
-
In the "Access" section of the sidebar, click Billing and plans.
-
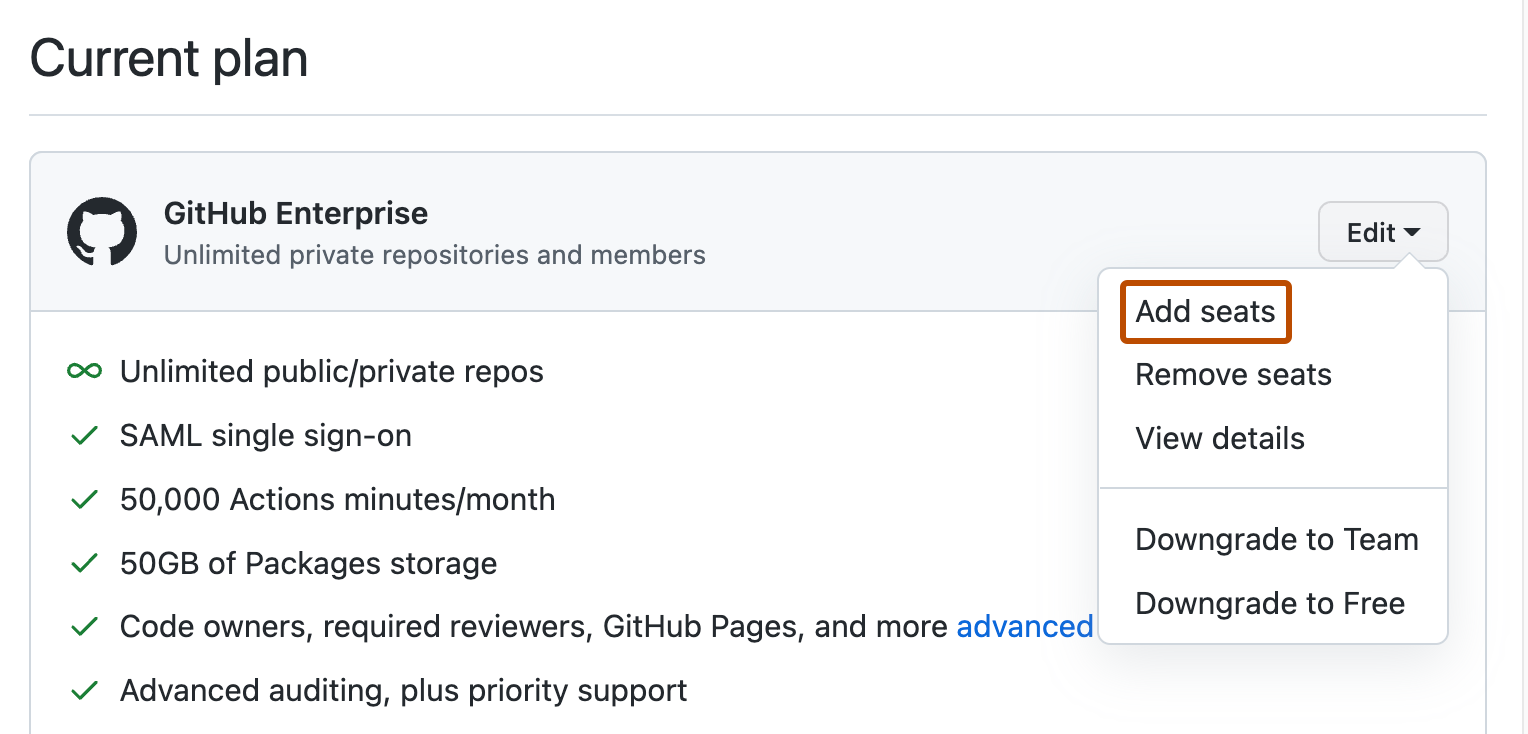
Click Upgrade next to "Current plan".
-
Review the features of each plan, then, click either Upgrade to Team or Upgrade to Enterprise. (You can add more seats to the organization in the next step.)
-
Under "Upgrade summary", select Pay yearly to pay for the organization yearly.
-
Under "Payment method", choose to pay with a credit card or PayPal.
-
Complete the payment information form, then click Submit.
-
Review the information about the charge and your billing date, then click Upgrade my account or Upgrade my organization's account.
Step 4: Upgrade the number of paid seats in the organization
-
In the upper-right corner of GitHub.com, select your profile photo, then click Your organizations.
-
Next to the organization, click Settings.
-
In the "Access" section of the sidebar, click Billing and plans.
-
Under "Current plan", next to the name of your plan, select Edit and click Add seats.
-
Under "Add seats", type the number of seats you'd like to add.
-
Click Add seats.

Step 5: Invite your client to join the organization
-
In the upper-right corner of GitHub.com, select your profile photo, then click Your organizations.
-
Click the name of your organization.
-
Under your organization name, click People.

-
Click Invite member.
-
In the search field, type your client's GitHub username and press Enter.
-
Select Owner, then click Send invitation.
-
Your client will receive an email inviting them to the organization. They will need to accept the invitation before you can move on to the next step.

Step 6: Transfer organization ownership to your client
-
In the upper-right corner of GitHub.com, select your profile photo, then click Your organizations.
-
Click the name of your organization.
-
Under your organization name, click People.
-
Confirm that your client is listed among the members of the organization and is assigned the owner role.
-
To the right of your username, select the dropdown menu, and click Manage.

-
In the left sidebar, click Remove from organization.
-
Confirm your choice and click Remove members.

Next steps
- Contact your client and ask them to add you to the organization as a billing manager. You'll need to be a billing manager for the organization so that you can renew or make changes to your client's subscription in the future.
- If you would like your organization's credit card to be removed from the organization so that it's not charged again, contact us through the GitHub Support portal.
- When it's time to renew your client's paid subscription, see "Renewing your client's paid organization."