Introduction
You can use Copilot to get answers to coding-related questions, such as how best to code something, how to fix a bug, or how someone else's code works. For full details of what Copilot can do, see What is GitHub Copilot?.
Instructions for using Copilot differ depending on where you are using it. This version of the quickstart is for GitHub. Click the tabs above for instructions on using Copilot in other environments.
Sign up for GitHub Copilot
To use Copilot, you’ll need a personal GitHub account with access to a Copilot plan. You can:
- Start with Copilot Free to explore limited features without subscribing to a plan.
- Upgrade to Copilot Pro or Copilot Pro+ to unlock more features, models, and request limits.
For more information about the different plans for GitHub Copilot, see Plans for GitHub Copilot.
Asking your first question
-
On GitHub, navigate to a repository and open a file.
-
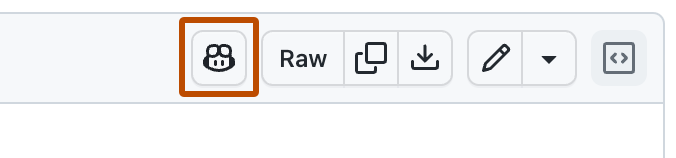
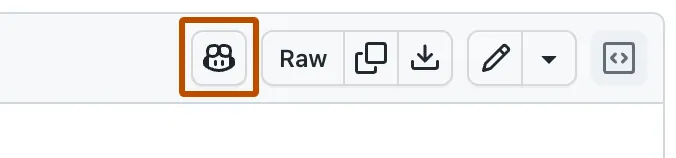
Click the Copilot icon () at the top right of the file view.
-
Type a question in the "Ask Copilot" box at the bottom of the chat panel and press Enter.
For example, you could enter:
- Explain this file.
- How could I improve this code?
- How can I test this code?
Copilot responds to your request in the panel.
-
You can continue the conversation by asking a follow-up question. For example, you could type "tell me more" to get Copilot to expand on its last comment.
Other questions you can ask
There are many more things you can do with GitHub Copilot Chat in GitHub. For example:
- Ask a general question about software development
- Ask exploratory questions about a repository
- Ask a question about a knowledge base
- Find out about the changes in a pull request
- Ask a question about a specific issue or commit
For more information, see Asking GitHub Copilot questions in GitHub.
Next steps
- Find out more about GitHub Copilot Chat - See Asking GitHub Copilot questions in your IDE.
- Get Copilot code completion suggestions in an IDE - See Getting code suggestions in your IDE with GitHub Copilot.
- Learn how to write effective prompts - See Prompt engineering for GitHub Copilot Chat.
- Use Copilot on your mobile device - See Asking GitHub Copilot questions in GitHub Mobile.
- Use Copilot on the command line - See Using GitHub Copilot in the command line.
GitHub Copilot provides coding suggestions as you type in your editor. You can also ask Copilot coding-related questions, such as how best to code something, how to fix a bug, or how someone else's code works. For full details of what Copilot can do, see What is GitHub Copilot?.
Instructions for using Copilot differ depending on where you are using it. This version of the quickstart is for Windows Terminal. Click the tabs above for instructions on using Copilot in other environments.
Sign up for GitHub Copilot
To use Copilot, you’ll need a personal GitHub account with access to a Copilot plan. You can:
- Start with Copilot Free to explore limited features without subscribing to a plan.
- Upgrade to Copilot Pro or Copilot Pro+ to unlock more features, models, and request limits.
For more information about the different plans for GitHub Copilot, see Plans for GitHub Copilot.
Prerequisites
- Windows Terminal Canary. Terminal Chat is only available in Windows Terminal Canary.
Use Copilot in Terminal Chat
After you've installed Windows Terminal Canary, you can use Copilot in Terminal Chat to ask command line-related questions.
-
Open Settings from the dropdown menu.

-
Go to the Terminal Chat (Experimental) setting.

-
Under Service Providers, select GitHub Copilot and Authenticate via GitHub to sign in.


Chat with GitHub Copilot
Note
If you have access to GitHub Copilot via your organization, you won't be able to use GitHub Copilot in Windows Terminal if your organization owner has disabled GitHub Copilot in the CLI. See Managing policies and features for GitHub Copilot in your organization.
-
Open Terminal Chat (Experimental) in the dropdown menu.
-
In the Terminal Chat chat window, type
how do i list all markdown files in my directorythen press Enter.Copilot's answer is displayed below your question.
-
Click on an answer to insert it to the command line.
Next steps
- Find out more about Copilot code completion - See Getting code suggestions in your IDE with GitHub Copilot.
- Find out more about GitHub Copilot Chat - See Asking GitHub Copilot questions in your IDE.
- Learn how to write effective prompts - See Prompt engineering for GitHub Copilot Chat.
- Use Copilot on your mobile device - See Asking GitHub Copilot questions in GitHub Mobile.
- Use Copilot on the command line - See Customizing GitHub Copilot in the CLI.
- Configure Copilot in your editor - You can enable or disable GitHub Copilot from within your editor, and create your own preferred keyboard shortcuts for Copilot. See Configuring GitHub Copilot in your environment.
GitHub Copilot provides coding suggestions as you type in your editor. You can also ask Copilot coding-related questions, such as how best to code something, how to fix a bug, or how someone else's code works. For full details of what Copilot can do, see What is GitHub Copilot?.
Instructions for using Copilot differ depending on where you are using it. This version of the quickstart is for Visual Studio Code. Click the tabs above for instructions on using Copilot in other environments.
Sign up for GitHub Copilot
To use Copilot, you’ll need a personal GitHub account with access to a Copilot plan. You can:
- Start with Copilot Free to explore limited features without subscribing to a plan.
- Upgrade to Copilot Pro or Copilot Pro+ to unlock more features, models, and request limits.
For more information about the different plans for GitHub Copilot, see Plans for GitHub Copilot.
Prerequisites
- Latest version of Visual Studio Code. See the Visual Studio Code download page.
- Sign in to GitHub in Visual Studio Code. If you experience authentication issues, see Troubleshooting common issues with GitHub Copilot.
Chat with GitHub Copilot
After you've installed the GitHub Copilot extension, you can ask Copilot coding-related questions.
Note
If you have access to GitHub Copilot via your organization, you won't be able to use GitHub Copilot Chat if your organization owner has disabled chat. See Managing policies and features for GitHub Copilot in your organization.
-
Open an existing code file.
-
Open the Chat view from the Activity Bar.

-
At the bottom of the chat view, in the chat input field, type:
explain this file. -
Press Enter.
Copilot replies in the chat view.
-
In the editor, select one or more lines of code that are not commented.
-
In the chat input field, type:
add comments to these lines. -
If you like the comments that Copilot suggests, hover over the suggested code in the chat view and click the "Insert at Cursor" icon to replace the selected lines with the suggested code.


Get your first code completion suggestion
The following example uses JavaScript, however other languages will work similarly. GitHub Copilot provides suggestions for numerous languages and a wide variety of frameworks, but works especially well for Python, JavaScript, TypeScript, Ruby, Go, C# and C++. GitHub Copilot can also assist in query generation for databases, generating suggestions for APIs and frameworks, and can help with infrastructure as code development.
-
Open Visual Studio Code.
-
In Visual Studio Code, create a new JavaScript (*.js) file.
-
In the JavaScript file, type the following function header.
JavaScript function calculateDaysBetweenDates(begin, end) {function calculateDaysBetweenDates(begin, end) {GitHub Copilot will automatically suggest an entire function body in grayed text. The exact suggestion may vary.
-
To accept the suggestion, press Tab.
Next steps
- Find out more about Copilot code completion - See Getting code suggestions in your IDE with GitHub Copilot.
- Find out more about GitHub Copilot Chat - See Asking GitHub Copilot questions in your IDE.
- Learn how to write effective prompts - See Prompt engineering for GitHub Copilot Chat.
- Use Copilot like a pro - Learn how to write effective prompts for GitHub Copilot. For more information, see Best practices for using GitHub Copilot in VS Code in the Visual Studio Code documentation.
- Get familiar with next edit suggestions - See About next edit suggestions.
- Use Copilot on your mobile device - See Asking GitHub Copilot questions in GitHub Mobile.
- Use Copilot on the command line - See Customizing GitHub Copilot in the CLI.
- Configure Copilot in your editor - You can enable or disable GitHub Copilot from within your editor, and create your own preferred keyboard shortcuts for Copilot. See Configuring GitHub Copilot in your environment.
GitHub Copilot provides coding suggestions as you type in your editor. You can also ask Copilot coding-related questions, such as how best to code something, how to fix a bug, or how someone else's code works. For full details of what Copilot can do, see What is GitHub Copilot?.
Instructions for using Copilot differ depending on where you are using it. This version of the quickstart is for Visual Studio. Click the tabs above for instructions on using Copilot in other environments.
Sign up for GitHub Copilot
To use Copilot, you’ll need a personal GitHub account with access to a Copilot plan. You can:
- Start with Copilot Free to explore limited features without subscribing to a plan.
- Upgrade to Copilot Pro or Copilot Pro+ to unlock more features, models, and request limits.
For more information about the different plans for GitHub Copilot, see Plans for GitHub Copilot.
Prerequisites
- Compatible version of Visual Studio. To use GitHub Copilot in Visual Studio, you must have version 2022 17.8 or later of Visual Studio for Windows installed. For more information, see Install Visual Studio in the Microsoft documentation.
- GitHub Copilot extension for Visual Studio. For instructions on how to install the Copilot extension, see Install GitHub Copilot in Visual Studio in the Microsoft documentation.
- Add your GitHub account to Visual Studio. See Add your GitHub accounts to your Visual Studio keychain in the Microsoft documentation.
Chat with GitHub Copilot
After you've installed the GitHub Copilot extension, you can ask Copilot coding-related questions.
Note
If you have access to GitHub Copilot via your organization, you won't be able to use GitHub Copilot Chat if your organization owner has disabled chat. See Managing policies and features for GitHub Copilot in your organization.
-
Open an existing code file.
-
In the Visual Studio menu bar, click View, then click GitHub Copilot Chat.
-
In the Copilot Chat window, type
what does this file dothen press Enter.Copilot's answer is displayed below your question.
-
Select a line of code in the editor.
-
In the Copilot Chat window, type
explain this linethen press Enter.
Get your first code completion suggestion
The following example uses JavaScript, however other languages will work similarly. GitHub Copilot provides suggestions for numerous languages and a wide variety of frameworks, but works especially well for Python, JavaScript, TypeScript, Ruby, Go, C# and C++. GitHub Copilot can also assist in query generation for databases, generating suggestions for APIs and frameworks, and can help with infrastructure as code development.
-
Open Visual Studio.
-
In Visual Studio, create a new JavaScript (*.js) file.
-
In the JavaScript file, type the following function header.
JavaScript function calculateDaysBetweenDates(begin, end) {function calculateDaysBetweenDates(begin, end) {GitHub Copilot will automatically suggest an entire function body in grayed text. The exact suggestion may vary.
-
To accept the suggestion, press Tab.
Next steps
- Find out more about Copilot code completion - See Getting code suggestions in your IDE with GitHub Copilot.
- Find out more about GitHub Copilot Chat - See Asking GitHub Copilot questions in your IDE.
- Learn how to write effective prompts - See Prompt engineering for GitHub Copilot Chat.
- Prompt like a pro - Watch Visual Studio Prompt Engineering with GitHub Copilot on YouTube.
- Use Copilot on your mobile device - See Asking GitHub Copilot questions in GitHub Mobile.
- Use Copilot on the command line - See Customizing GitHub Copilot in the CLI.
- Configure Copilot in your editor - You can enable or disable GitHub Copilot from within your editor, and create your own preferred keyboard shortcuts for Copilot. See Configuring GitHub Copilot in your environment.
GitHub Copilot provides coding suggestions as you type in your editor. You can also ask Copilot coding-related questions, such as how best to code something, how to fix a bug, or how someone else's code works. For full details of what Copilot can do, see What is GitHub Copilot?.
Instructions for using Copilot differ depending on where you are using it. This version of the quickstart is for JetBrains IDEs. Click the tabs above for instructions on using Copilot in other environments.
Sign up for GitHub Copilot
To use Copilot, you’ll need a personal GitHub account with access to a Copilot plan. You can:
- Start with Copilot Free to explore limited features without subscribing to a plan.
- Upgrade to Copilot Pro or Copilot Pro+ to unlock more features, models, and request limits.
For more information about the different plans for GitHub Copilot, see Plans for GitHub Copilot.
Prerequisites
- A compatible JetBrains IDE. Copilot is supported in a large number of JetBrains IDEs. For a full list, see Asking GitHub Copilot questions in your IDE.
- Latest version of the GitHub Copilot extension. See the GitHub Copilot plugin in the JetBrains Marketplace. For installation instructions, see Installing the GitHub Copilot extension in your environment.
- Sign in to GitHub in your JetBrains IDE. For authentication instructions, see Installing the GitHub Copilot extension in your environment.
Chat with GitHub Copilot
After you've installed the GitHub Copilot plugin, you can ask Copilot coding-related questions.
Note
If you have access to GitHub Copilot via your organization, you won't be able to use GitHub Copilot Chat if your organization owner has disabled chat. See Managing policies and features for GitHub Copilot in your organization.
-
Open an existing code file.
-
Open the Copilot Chat window by clicking the Copilot Chat icon at the right side of the JetBrains IDE window.

-
In the Copilot Chat window, type
what does this file dothen press Enter.Copilot's answer is displayed below your question.
-
Select a line of code in the editor.
-
In the Copilot Chat window, type
explain this linethen press Enter.
Get your first code completion suggestion
The following example uses JavaScript, however other languages will work similarly. GitHub Copilot provides suggestions for numerous languages and a wide variety of frameworks, but works especially well for Python, JavaScript, TypeScript, Ruby, Go, C# and C++. GitHub Copilot can also assist in query generation for databases, generating suggestions for APIs and frameworks, and can help with infrastructure as code development.
-
In your JetBrains editor, create a new JavaScript (*.js) file.
-
In the JavaScript file, type the following function header.
JavaScript function calculateDaysBetweenDates(begin, end) {function calculateDaysBetweenDates(begin, end) {GitHub Copilot will automatically suggest an entire function body in grayed text. The exact suggestion may vary.
-
To accept the suggestion, press Tab.
Next steps
- Find out more about Copilot code completion - See Getting code suggestions in your IDE with GitHub Copilot.
- Find out more about GitHub Copilot Chat - See Asking GitHub Copilot questions in your IDE.
- Learn how to write effective prompts - See Prompt engineering for GitHub Copilot Chat.
- Use Copilot on your mobile device - See Asking GitHub Copilot questions in GitHub Mobile.
- Use Copilot on the command line - See Customizing GitHub Copilot in the CLI.
- Configure Copilot in your editor - You can enable or disable GitHub Copilot from within your editor, and create your own preferred keyboard shortcuts for Copilot. See Configuring GitHub Copilot in your environment.