About templates for GitHub Codespaces
If you're starting a new project, you can get started with development work quickly by creating a codespace from a template. You'll be able to work on your project in a cloud-based development environment, save your files in the cloud, and publish your work to a new remote repository that you can share with others or clone to your local machine.
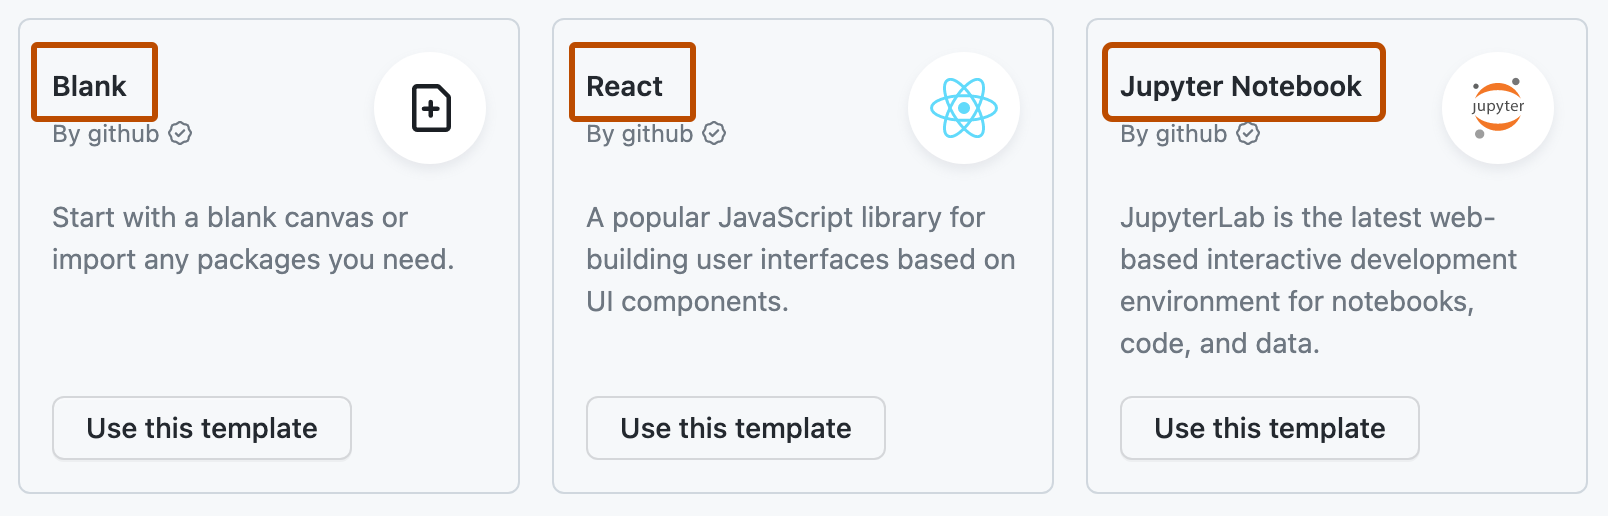
You can start from a blank template, choose from templates maintained by GitHub for popular technologies such as React or Jupyter Notebook, or launch a codespace from any template repository on GitHub.
With a blank template, you'll start with an empty directory, with access to cloud-based compute resources and the tools, languages, and runtime environments that come preinstalled with the default dev container image. With other templates, you'll get starter files for the technology you're working with, plus typically some extra files such as a README file, a .gitignore file, and dev container configuration files containing some custom environment configuration. For more information on dev containers and the default image, see "Introduction to dev containers."
As an example, if you create a codespace from GitHub's React template, you'll arrive in a workspace containing template files for a simple application, such as index.js, app.js, and package.json. Shortly after the codespace opens, a development server will start up automatically, and you will be able to view the running application in a simple browser tab within the VS Code web client.

The files and configuration included in templates are defined in template repositories. The template repository is cloned into your codespace when you create the codespace. After that, the link is severed, and your codespace won't be linked to a remote repository until you publish to one.
Tip: To help people get started with your framework, library, or other project, you can set up a template repository for use with GitHub Codespaces. For more information, see "Setting up a template repository for GitHub Codespaces."
Creating a codespace from a GitHub template
Templates maintained by GitHub, including the blank template, are available from the "Your codespaces" page.
-
In the top-left corner of GitHub.com, select , then click Codespaces to take you to the "Your codespaces" page at github.com/codespaces.
-
To view the full list of templates, in the "Explore quick start templates" section, click See all.

-
Optionally, to view the template repository containing the files for a template, click the name of the template.
-
Under the name of the template you want to launch, click Use this template.


When you create a new codespace from a template, it is always opened in the Visual Studio Code web client. You can reopen an existing codespace in any supported editor. For more information, see "Opening an existing codespace."
Creating a codespace from a template repository
You can create a codespace from any template repository, then publish your work to a new repository when you are ready. For more information on template repositories, see "Creating a repository from a template."
-
On GitHub.com, navigate to the main page of the repository.
-
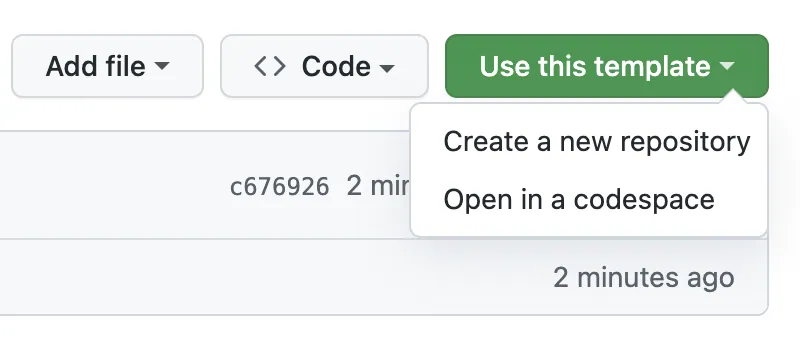
Click Use this template, then click Open in a codespace.
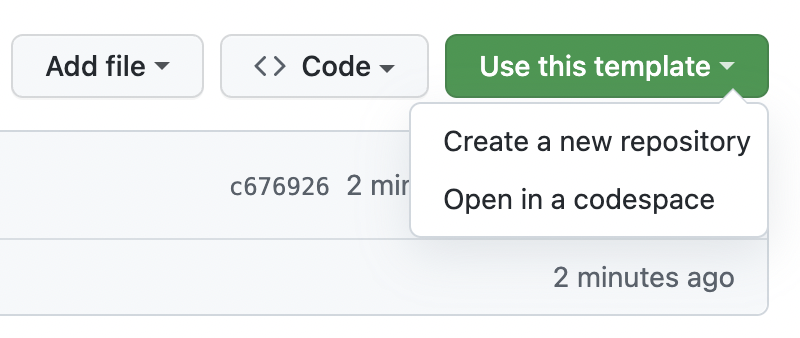
Note: If you're a maintainer of the template repository, and want to commit changes to the template repository itself, you should create a codespace from the Code dropdown. For more information, see "Creating a codespace for a repository."
When you create a new codespace from a template, it is always opened in the Visual Studio Code web client. You can reopen an existing codespace in any supported editor. For more information, see "Opening an existing codespace."
Publishing to a repository on GitHub
When you work in a codespace created from a template, your work is saved on a virtual machine in the cloud, but it is not stored in a repository on GitHub.
You can save your files, close and stop your codespace, and come back to your work later. Typically, Git will come preinstalled, and the working directory will be automatically initialized as a Git repository unless you started from GitHub's blank template. This means you can immediately use Git for local source control, such as adding and committing files.
However, if you delete an unpublished codespace, or if it's automatically deleted by being left unused for the duration of the retention period, then your work will be deleted too. To persist your work, and to allow others to work on your project, you will need to publish your codespace to a repository on GitHub.
Note: If an unpublished codespace is currently billed to an organization, publishing the codespace transfers ownership and billing of the codespace to your personal account. For more information, see "About billing for GitHub Codespaces."
Publishing from VS Code
If you're working in a codespace, you can publish it from the VS Code web client or desktop application.
-
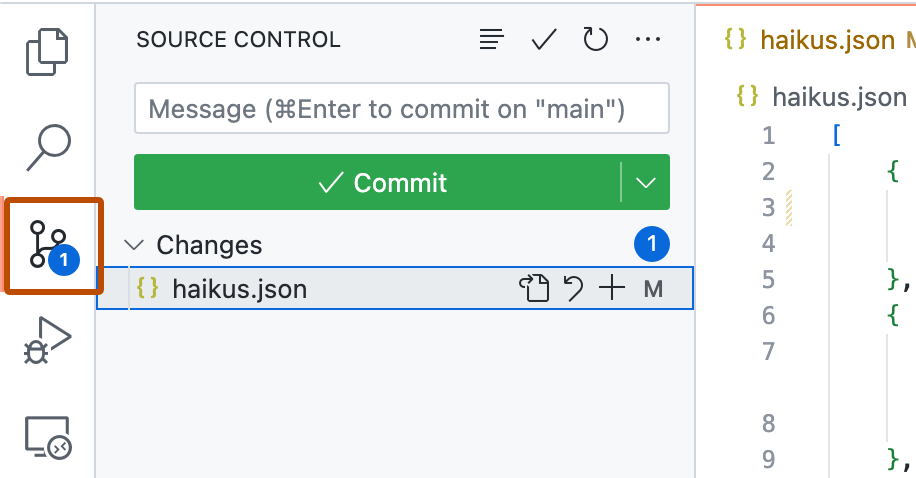
In the Activity Bar, click the Source Control view.
-
To stage your changes, click + next to the file you've added or changed, or next to Changes if you've changed multiple files and you want to stage them all.

Note: If you start from GitHub's blank template, you will not see a list of changes unless you have already initialized your directory as a Git repository. To publish codespaces created from the blank template, click Publish to GitHub in the "Source Control" view, then skip to step 5.
-
To commit your staged changes, type a commit message describing the change you've made, then click Commit.

-
Click Publish Branch.

-
In the "Repository Name" dropdown, type a name for your new repository, then select Publish to GitHub private repository or Publish to GitHub public repository.

The owner of the new repository will be the GitHub account with which you created the codespace.
-
Optionally, in the pop-up that appears in the lower right corner of the editor, click Open on GitHub to view the new repository on GitHub.com.


When a codespace is published, you have access to a greater range of options to customize your GitHub Codespaces experience. For example, you can:
- Change the machine type of your codespace to make sure you're using resources appropriate for the work you're doing (see "Changing the machine type for your codespace").
- Allow GitHub to automatically use GPG to sign commits you make in your codespace (see "Managing GPG verification for GitHub Codespaces").
- Share secrets with your codespace (see "Managing your account-specific secrets for GitHub Codespaces").
Publishing from GitHub.com
You can publish an unpublished codespace from the "Your codespaces" page on GitHub.com. This is useful if you want to publish a codespace that you don't currently have open in your browser. If you do this, your work will be preserved in a repository, but there won't be a link between your existing codespace and the new repository. However, you can navigate to the new repository and create a codespace from there, and this codespace will be connected to the repository.
-
In the top-left corner of GitHub.com, select , then click Codespaces to take you to the "Your codespaces" page at github.com/codespaces.
-
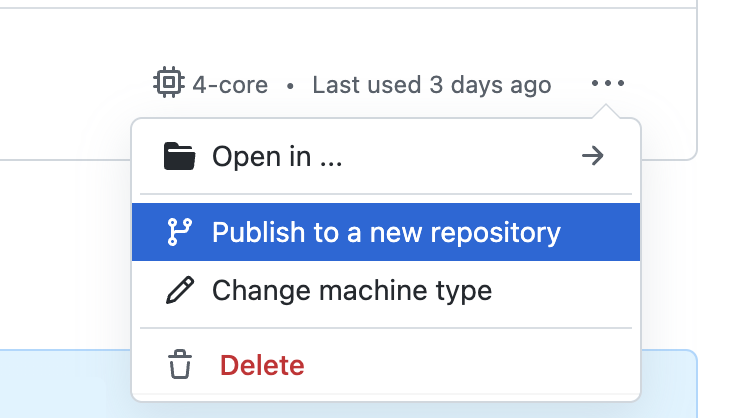
Next to the unpublished codespace, click the ellipsis (...), then select Publish to a new repository.
-
Choose a name for your new repository, set it as Public or Private, and click Create repository.

-
Optionally, to view the new repository, click See repository.

