# GitHub Actions快速入门
试用几分钟内的核心功能 GitHub Actions 。
> \[!NOTE]
> GitHub Enterprise Server 目前不支持 GitHub 托管的运行器。
## 简介
GitHub Actions 是一种持续集成和持续交付 (CI/CD) 平台,可用于自动执行生成、测试和部署管道。 可以创建在将更改推送到存储库或将合并拉取请求部署到生产环境时运行测试的工作流。
本快速入门指南介绍如何使用用户界面 GitHub 添加演示某些基本功能的 GitHub Actions工作流。
若要开始使用预配置的工作流,请浏览 [actions/starter-workflows](https://github.com/actions/starter-workflows) 存储库中的模板列表。 有关详细信息,请参阅“[使用工作流模板](/zh/enterprise-server@3.22/actions/how-tos/write-workflows/use-workflow-templates)”。
有关工作流的 GitHub Actions 概述,请参阅 [工作流](/zh/enterprise-server@3.22/actions/concepts/workflows-and-actions/workflows)。 若要了解构成 GitHub Actions的各种组件,请参阅 [了解GitHub Actions](/zh/enterprise-server@3.22/actions/get-started/understand-github-actions)。
## 使用工作流模板
GitHub 提供预配置的工作流模板,可以按原样使用或自定义它来创建自己的工作流。 GitHub 分析代码并显示可能对仓库有用的工作流模板。 例如,如果仓库包含 Node.js 代码,您就会看到 Node.js 项目的建议。
这些工作流模板旨在帮助你快速启动和运行,提供了一系列配置,例如:
* CI:[持续集成工作流](https://github.com/actions/starter-workflows/tree/main/ci)
* 部署:[部署工作流](https://github.com/actions/starter-workflows/tree/main/deployments)
* 自动化:[自动化工作流](https://github.com/actions/starter-workflows/tree/main/automation)
* 代码扫描:[代码扫描工作流](https://github.com/actions/starter-workflows/tree/main/code-scanning)
* 页面:[页面工作流](https://github.com/actions/starter-workflows/tree/main/pages)
使用这些工作流作为构建自定义工作流的起点或按原样使用它们。 可以在 [actions/starter-workflows](https://github.com/actions/starter-workflows) 存储库中浏览工作流模板的完整列表。
## 先决条件
本指南假定:
* 你至少对如何使用 GitHub有一个基本知识。 如果没有,你将发现先阅读存储库和拉取请求文档中的一些文章会非常有帮助。 有关示例,请参阅“[仓库快速入门](/zh/enterprise-server@3.22/repositories/creating-and-managing-repositories/quickstart-for-repositories)”、“[分支](/zh/enterprise-server@3.22/pull-requests/collaborating-with-pull-requests/proposing-changes-to-your-work-with-pull-requests/about-branches)”和“[拉取请求](/zh/enterprise-server@3.22/pull-requests/collaborating-with-pull-requests/proposing-changes-to-your-work-with-pull-requests/about-pull-requests)”。
* 你有一个存储库 GitHub ,可在其中添加文件。
* 您有权访问 GitHub Actions。
> \[!NOTE] 如果未在存储库GitHub名称下显示“操作”选项卡,则可能是因为为存储库禁用了“操作”。**** 有关详细信息,请参阅“[管理存储库的GitHub Actions设置](/zh/enterprise-server@3.22/repositories/managing-your-repositorys-settings-and-features/enabling-features-for-your-repository/managing-github-actions-settings-for-a-repository)”。
## 创建第一个工作流程
1. 在存储库 GitHub中,创建目录中调用 `github-actions-demo.yml` 的 `.github/workflows` 工作流文件。 要执行此操作:
* `.github/workflows`如果目录已存在,请导航到该目录GitHub,单击“**添加文件**”,然后单击“**创建新文件**”,并命名该文件`github-actions-demo.yml`。
* 如果存储库没有 `.github/workflows` 目录,请转到存储库 GitHub的主页,单击“ **添加文件**”,然后单击“ **创建新文件**”,并命名该文件 `.github/workflows/github-actions-demo.yml`。 这会在单个步骤中创建 `.github` 和 `workflows` 目录以及 `github-actions-demo.yml` 文件。
> \[!NOTE]
> 若要发现存储库中的任何工作流,必须将工作流文件保存在名为 <a0/> 的目录中。
>
> 你可以为工作流文件指定所需的任何名称,但必须使用 `.yml` 或 `.yaml` 作为文件扩展名。 YAML 通常是用于配置文件的标记语言。
2. 将以下 YAML 内容复制到 `github-actions-demo.yml` 文件中:
```yaml copy
name: GitHub Actions Demo
run-name: ${{ github.actor }} is testing out GitHub Actions 🚀
on: [push]
jobs:
Explore-GitHub-Actions:
runs-on: ubuntu-latest
steps:
- run: echo "🎉 The job was automatically triggered by a ${{ github.event_name }} event."
- run: echo "🐧 This job is now running on a ${{ runner.os }} server hosted by GitHub!"
- run: echo "🔎 The name of your branch is ${{ github.ref }} and your repository is ${{ github.repository }}."
- name: Check out repository code
uses: actions/checkout@v6
- run: echo "💡 The ${{ github.repository }} repository has been cloned to the runner."
- run: echo "🖥️ The workflow is now ready to test your code on the runner."
- name: List files in the repository
run: |
ls ${{ github.workspace }}
- run: echo "🍏 This job's status is ${{ job.status }}."
```
在此阶段,你无需了解此工作流的详细信息。 现在,你只需将内容复制并粘贴到文件中。 完成本快速入门指南后,可以了解 [工作流](/zh/enterprise-server@3.22/actions/concepts/workflows-and-actions/workflows) 中工作流文件的语法,以及有关上下文的说明GitHub Actions,请参阅 `${{ github.actor }}``${{ github.event_name }}`[上下文参考](/zh/enterprise-server@3.22/actions/reference/workflows-and-actions/contexts)。
3. 单击“提交更改”。
4. 在“建议更改”对话框中,选择提交到默认分支的选项或创建新分支并启动拉取请求的选项。 然后单击“提交更改”\*\*\*\* 或“建议更改”\*\*\*\*。

向存储库的分支提交工作流文件会触发 `push` 事件并运行工作流。
如果选择启动拉取请求,则可以继续并创建拉取请求,但对于本快速入门来说,这不是必要的,因为提交仍然是对分支进行的,并会触发新工作流。
## 查看工作流程结果
1. 在 GitHub 上,导航到存储库的主页面。
2. 在仓库名称下,单击“ Actions”\*\*\*\*。

3. 在左侧栏中,单击要显示的工作流,在本示例中为“GitHub Actions演示”。

4. 在工作流运行列表中,单击要查看的运行名称,在本示例中,“USERNAME 正在测试GitHub Actions”。
5. 在工作流运行页的左侧栏中,在 **Jobs** 下,单击 **Explore-GitHub-Actions** 作业。

6. 日志显示每个步骤的处理方式。 展开任何步骤之一以查看其详细信息。
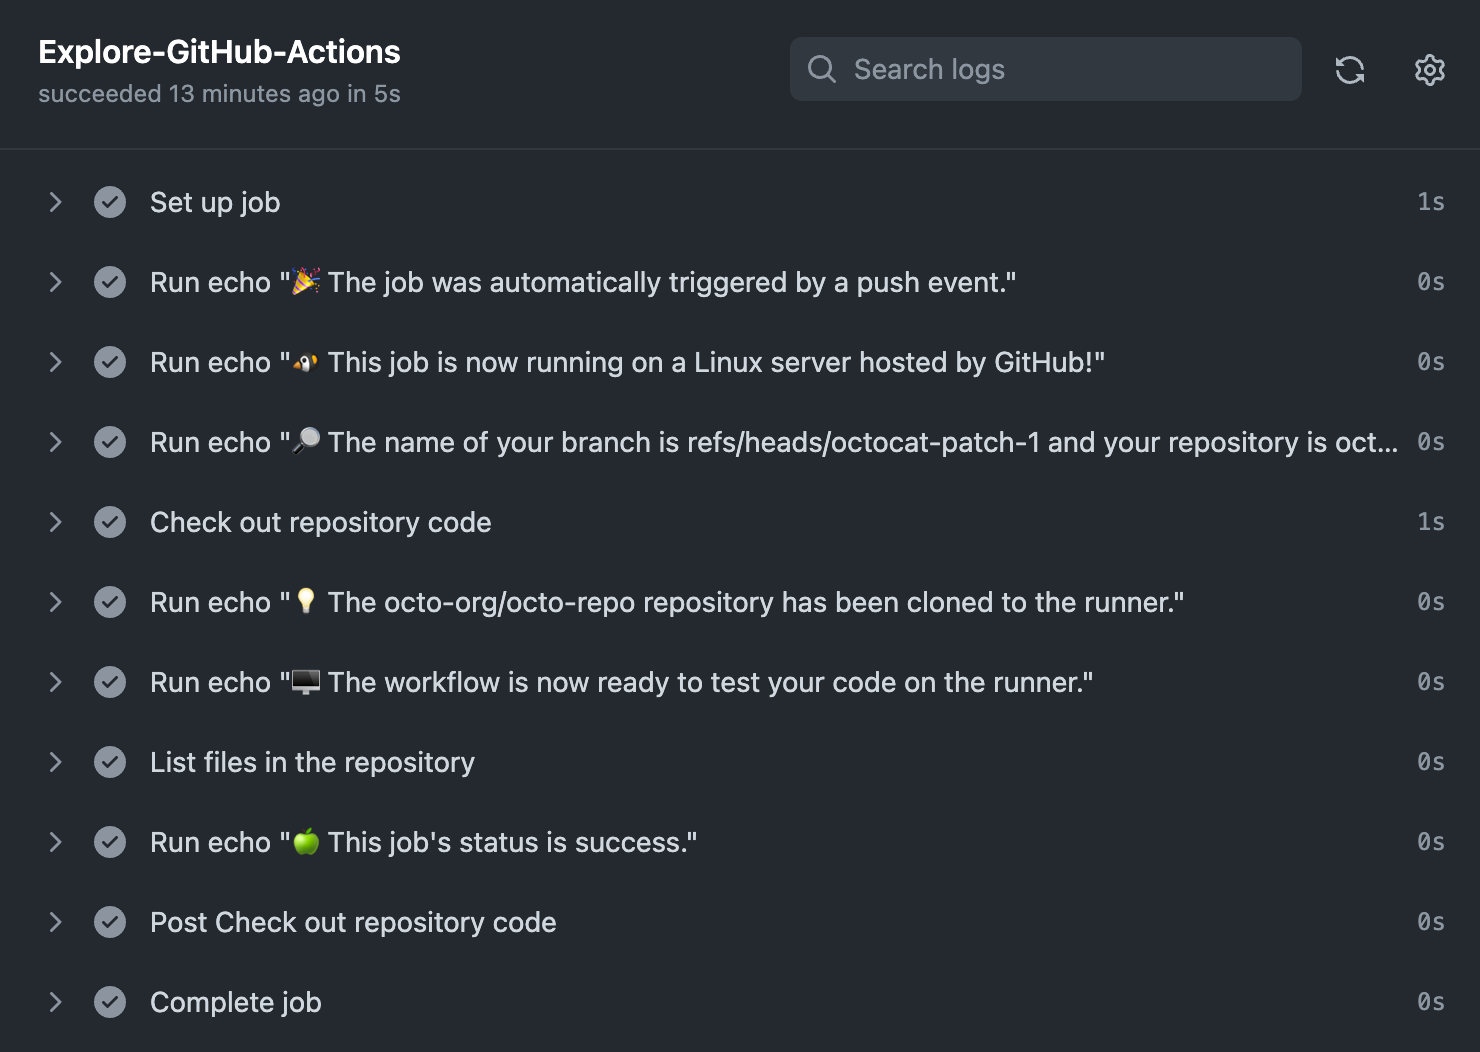
例如,你可以看到存储库中的文件列表:
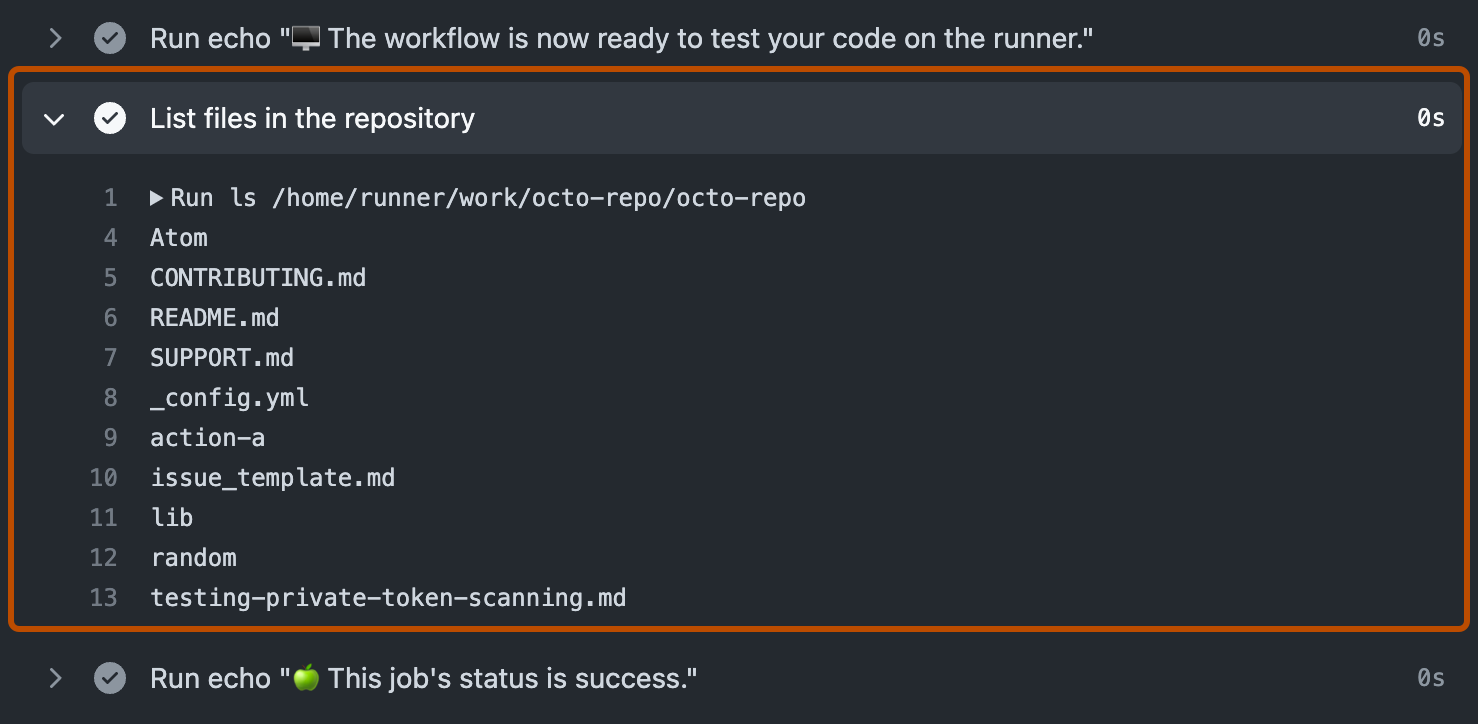
每次将代码推送到分支时,都会触发刚刚添加的示例工作流,并演示如何 GitHub Actions 处理存储库的内容。 有关深入教程,请参阅“[了解GitHub Actions](/zh/enterprise-server@3.22/actions/get-started/understand-github-actions)”。
## 后续步骤
GitHub Actions 可帮助你自动执行应用程序开发过程的几乎所有方面。 准备好开始了吗? 以下是一些有助于你借助 GitHub Actions 继续下一步的资源:
* 若要创建 GitHub Actions 工作流,请参阅 [使用工作流模板](/zh/enterprise-server@3.22/actions/how-tos/write-workflows/use-workflow-templates)。
* 有关持续集成 (CI) 工作流,请参阅 [构建和测试代码](/zh/enterprise-server@3.22/actions/tutorials/build-and-test-code)。
* 有关构建和发布包的信息,请参阅 [发布包](/zh/enterprise-server@3.22/actions/tutorials/publish-packages)。
* 有关部署项目,请参阅 [部署到第三方平台](/zh/enterprise-server@3.22/actions/how-tos/deploy/deploy-to-third-party-platforms)。
* 有关在 GitHub 上自动执行任务和流程的信息,请参阅 [使用 GitHub Actions 管理你的工作](/zh/enterprise-server@3.22/actions/tutorials/manage-your-work)。
* 有关演示 GitHub Actions 更复杂功能的示例,请参阅 [选择工作流执行的操作](/zh/enterprise-server@3.22/actions/how-tos/write-workflows/choose-what-workflows-do)。 这些详细示例说明如何在运行程序上测试代码、访问 GitHub CLI 并使用高级功能(如并发和测试矩阵)。