# Managing worktrees in GitHub Desktop
Worktrees let you work on multiple branches of the same repository at the same time, so you can switch contexts, review changes, or make hotfixes without stashing your work.
## About worktrees
Git worktrees let you check out multiple branches of the same repository at the same time, each in its own directory on your computer. This means you can work on a feature branch, quickly review a pull request on a different branch, or make a hotfix without stashing or committing incomplete work on your current branch.
GitHub Desktop provides built-in support for creating, switching between, renaming, and deleting worktrees. When your repository has worktrees, a **Worktree** dropdown appears in the toolbar between the **Repository** and **Branch** dropdowns.
> \[!NOTE]
> The **Worktree** dropdown is only visible when you have at least one linked worktree. To create your first worktree, use the **Repository** menu or right-click the **Repository** dropdown in the toolbar.
Each worktree is associated with a branch (or a detached HEAD commit). The main worktree is your original repository clone, and linked worktrees are additional checkouts you create.
## Creating a worktree
You can create a new worktree from the **Repository** menu, by right-clicking the **Repository** dropdown in the toolbar, or (once you already have worktrees) from the **Worktree** dropdown.
### Creating your first worktree
If your repository does not have any linked worktrees yet, the **Worktree** dropdown is not visible in the toolbar. To create your first worktree:
1. In the menu bar, click **Repository**, then click **New Worktree…**.
Alternatively, right-click the **Repository** dropdown in the toolbar and click **New Worktree…**.


2. In the "Add worktree" dialog, type a name for your worktree in the **Worktree name** field.
GitHub Desktop automatically determines the path where the worktree will be created, based on the name you enter. The full path is displayed at the bottom of the dialog.
3. Optionally, in the **Branch name** field, type or select a branch name.
* If you leave this field empty, a new branch with the same name as the worktree is created.
* If you type the name of an existing local branch, that branch is checked out in the new worktree.
* If you type the name of a remote branch, a new local branch is created from the remote reference.


4. Click **Create Worktree**.
After you create your first linked worktree, the **Worktree** dropdown appears in the toolbar.
### Creating additional worktrees
Once the **Worktree** dropdown is visible, you can also create worktrees from there:
1. In the repository bar, click the **Worktree** dropdown.


2. Click **New Worktree**.
3. Complete the fields in the "Add worktree" dialog as described in [Creating your first worktree](#creating-your-first-worktree), then click **Create Worktree**.
GitHub Desktop creates the worktree and automatically switches to it.
## Switching between worktrees
You can switch between worktrees at any time. When you switch worktrees, GitHub Desktop updates the working directory to the selected worktree's path.
1. In the repository bar, click the **Worktree** dropdown.
2. In the worktree list, click the worktree you want to switch to.

The worktree list is grouped into "Main worktree" and "Linked worktrees". Each item displays the worktree directory name and the associated branch name. You can use the filter field at the top of the list to search for a worktree by name.
## Renaming a worktree
You can rename linked worktrees. You cannot rename the main worktree.
1. In the repository bar, click the **Worktree** dropdown.
2. Right-click the worktree you want to rename, then click **Rename…**.


3. In the "Rename worktree" dialog, type a new name for the worktree.
4. Click **Rename**.
## Deleting a worktree
You can delete linked worktrees that you no longer need. You cannot delete the main worktree or worktrees that Git has locked to prevent deletion.
1. In the repository bar, click the **Worktree** dropdown.
2. Right-click the worktree you want to delete, then click **Delete…**.
3. In the confirmation dialog, click **Delete**.
Optionally, select **Do not show this message again** to skip this confirmation in the future. You can re-enable the confirmation in your preferences. See [Configuring a prompt for deleting worktrees](#configuring-a-prompt-for-deleting-worktrees).


If the deletion fails (for example, because the worktree contains uncommitted changes), GitHub Desktop displays an error dialog offering to forcefully delete the worktree. If you cancel, GitHub Desktop switches you back to the worktree you were originally working in.
## Configuring a prompt for deleting worktrees
You can choose whether GitHub Desktop asks for confirmation before deleting a worktree.
1. 在菜单栏中,选择“GitHub Desktop”,然后单击“设置”\*\*\*\*\*\*\*\*。

2. In the Settings window, click **Prompts**.
3. Select or deselect the **Removing worktrees** checkbox to enable or disable the confirmation prompt.
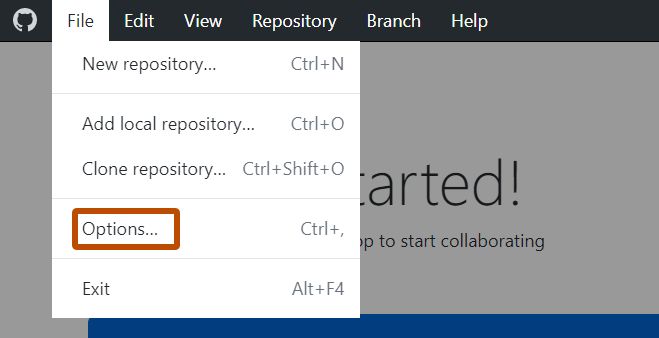
1. 使用文件”菜单,然后单击“选项” 。
2. In the Options window, click **Prompts**.
3. Select or deselect the **Removing worktrees** checkbox to enable or disable the confirmation prompt.
## Further reading
* [在 GitHub Desktop 中管理分支](/zh/desktop/making-changes-in-a-branch/managing-branches-in-github-desktop)
* [git-worktree](https://git-scm.com/docs/git-worktree) in the Git documentation